

Student Project Gallery for Learn Your CNC Academy
RR
Ronald Roth
Plate 2 sided in Aspire
Just did this as a Test Carve out of scrap Baltic Birch , it looked kinda cool , so i put finish on it
Plate 2 sided in Aspire
Just did this as a Test Carve out of scrap Baltic Birch , it looked kinda cool , so i put finish on it

Wayne Burton
I made this spoon rest for a guys business using his logo. A pirogue is a canoe like flat bottom boat the Cajuns use. I used cherry and finished with mineral oil.
I made this spoon rest for a guys business using his logo. A pirogue is a canoe like flat bottom boat the Cajuns use. I used cherry and finished with mineral oil.

Wayne Burton
Made this out of 5/4" cypress, used VistaSculpt for the model and Aspire for the frame. It measures 21" x 15 1/4". Getting it ready for my wife to paint.
Made this out of 5/4" cypress, used VistaSculpt for the model and Aspire for the frame. It measures 21" x 15 1/4". Getting it ready for my wife to paint.

Emmett Pyatt
Pyatt-ERP Workshoppe
I acquired some unique, but very rough & rustic barnwood. The lumber is twisted, bowed and warped, but the grain pattern is stunning - therefore I didn't want to plane it flat. Used the CNC to cut out the letters and graphic, painted and applied the parts to the barnwood panel.
I acquired some unique, but very rough & rustic barnwood. The lumber is twisted, bowed and warped, but the grain pattern is stunning - therefore I didn't want to plane it flat. Used the CNC to cut out the letters and graphic, painted and applied the parts to the barnwood panel.
JB
John Barker
My first multicolor painting of a 3d carve.
JB
John Barker
Another spoon rest idea. Used 1/4 ball nose, 60 deg v-bit, and finished in Watco Oil.
M
Mark B
I donated this floating plaque that I made to a local center that offers free services to cancer patients. It is held up by concealed magnets and at the bottom it is held in place by fishing line. To keep the weight down I made the main area of the plaque from 1/4" thick maple and the top and bottom parts are made from 3/4" square walnut. The U-shaped frame is made from 1" square Walnut.
The heart and hands are regular inlays 1/8" thick. The heart is African Rosewood and the hands are Wenge. The Kin logo and the Welcome To Kin in the base are V Carve inlays done with a 30 degree V bit. The text inside the logo is V Carved and filled in with walnut wood filler. The text in the heart and hands were filled in with white wood filler.
Because of the weight of the floating part, I used five sets of magnets. It really needed six sets as I would have liked it to have a larger gap at the top. The magnets were 1/2" in diameter and 1/4" thick. I concealed the magnets by using Walnut edge banding. To make sure that the floating plaque stays level inside the outside frame, I used two fishing lines at the bottom, and it was a lot of work to get them the same length. Needed an extra set of hands and I used some small electrical connector to crimp around the fishing line to hold the fishing lines in place. As I used screws to hold the U-shape frame to the base, I removed the U-shaped structure when I worked on getting the fishing line in position. I also used some CA glue to help hold the fishing line in position so that I could crimp the conector to the fishing line.
NOTE: If you make a floating project with multiple magnets, you have to make sure that all the magnets in either the floating part and the U-shaped frame are aligned the same as the magnets have a north and a south pole. I also used a dab of medium CA glue on the bottom of each magnet to keep it in place. I used a 1/2" diameter Forstner drill bit for the holes for the magnets. You can also do this on your cnc router.
I donated this floating plaque that I made to a local center that offers free services to cancer patients. It is held up by concealed magnets and at the bottom it is held in place by fishing line. To keep the weight down I made the main area of the plaque from 1/4" thick maple and the top and bottom parts are made from 3/4" square walnut. The U-shaped frame is made from 1" square Walnut.
The heart and hands are regular inlays 1/8" thick. The heart is African Rosewood and the hands are Wenge. The Kin logo and the Welcome To Kin in the base are V Carve inlays done with a 30 degree V bit. The text inside the logo is V Carved and filled in with walnut wood filler. The text in the heart and hands were filled in with white wood filler.
Because of the weight of the floating part, I used five sets of magnets. It really needed six sets as I would have liked it to have a larger gap at the top. The magnets were 1/2" in diameter and 1/4" thick. I concealed the magnets by using Walnut edge banding. To make sure that the floating plaque stays level inside the outside frame, I used two fishing lines at the bottom, and it was a lot of work to get them the same length. Needed an extra set of hands and I used some small electrical connector to crimp around the fishing line to hold the fishing lines in place. As I used screws to hold the U-shape frame to the base, I removed the U-shaped structure when I worked on getting the fishing line in position. I also used some CA glue to help hold the fishing line in position so that I could crimp the conector to the fishing line.
NOTE: If you make a floating project with multiple magnets, you have to make sure that all the magnets in either the floating part and the U-shaped frame are aligned the same as the magnets have a north and a south pole. I also used a dab of medium CA glue on the bottom of each magnet to keep it in place. I used a 1/2" diameter Forstner drill bit for the holes for the magnets. You can also do this on your cnc router.
PT
Paul Thorpe
My first Sign Commission, It came out well Had difficulty with getting the bottom smooth but the client was happy. This is western red cedar. all one piece and the Dragonflies are 3D carved.
My first Sign Commission, It came out well Had difficulty with getting the bottom smooth but the client was happy. This is western red cedar. all one piece and the Dragonflies are 3D carved.
TH
Tom Hartranft
Couple of maple wall hangings ... 9 inches tall x 3/4 inches deep. Finished with a light maple stain and tung oil.

Phil Samples
My first project importing a digital image and converting it to a tool path. I officiated this promotion and made this as a gift for the newly pinned Colonel. The wood is a black walnut and the finish is True Oil.
My first project importing a digital image and converting it to a tool path. I officiated this promotion and made this as a gift for the newly pinned Colonel. The wood is a black walnut and the finish is True Oil.

Marilyn Kuczynski
I wanted to thank everybody that helped me with the dados. I finally got my articulating arm done with everyone’s help. Here’s some pictures of it. It was a challenge for me, but now I know how to do dados 😀
I wanted to thank everybody that helped me with the dados. I finally got my articulating arm done with everyone’s help. Here’s some pictures of it. It was a challenge for me, but now I know how to do dados 😀
JB
John Barker
This is the stl for the pictured spoon rest if anyone wants to try it.
PC
Paul Collins
I just finished my first project
I learned how to run the toolpaths from vectric to my machine.
I just finished my first project
I learned how to run the toolpaths from vectric to my machine.
KL
Keith Leatherwood
First win with the Vortex rotary. Upload to Aspire and adjusted the tool paths for my Altmill and Vortex. Lots of kindling and sawdust create. file is from Sienci Labs.
First win with the Vortex rotary. Upload to Aspire and adjusted the tool paths for my Altmill and Vortex. Lots of kindling and sawdust create. file is from Sienci Labs.

Scott Silvia
Finished up this Donation finally. Took their logo ran it in Easy Carve. All good except the dogs were bad for EC to produce so I had to create my own, duplicate and mirror it. Worked it out.
Carving is 13 3/4 X 10 3/4
Base 13 3/4 x 2 1/2
And Dwight's glazing technique which I still haven't gotten the hang of yet.
I did the entire thing on the machine, stairs, v-carve, dado on the base, tab on the carving. Yes could have done it on the table saw and drill press but ... Whats the machine for.
Finished up this Donation finally. Took their logo ran it in Easy Carve. All good except the dogs were bad for EC to produce so I had to create my own, duplicate and mirror it. Worked it out.
Carving is 13 3/4 X 10 3/4
Base 13 3/4 x 2 1/2
And Dwight's glazing technique which I still haven't gotten the hang of yet.
I did the entire thing on the machine, stairs, v-carve, dado on the base, tab on the carving. Yes could have done it on the table saw and drill press but ... Whats the machine for.
ML
Mike Luter
Took of shot on Project Lesson 170 and it turned out great
going to try and use epoxy on the openings next
Took of shot on Project Lesson 170 and it turned out great
going to try and use epoxy on the openings next

Tim Karash
I decided to go off in a different direction with this carving.
It started life as a Facebook screenshot of a pinstriping competition entry. I passed it through ChatGPT, which gave me nice clear lines, however, many were a mess. Overlapping lines, components missing, artifacts added, and many "What the heck is that shape" resulted in four hours of node editing, which was great practice. At about 2 hours into the the editing, the "light bulb moment" happened with "I can use the mirror tool here". Time was also spent to recreate the over and under visuals that the original painter did with colors.
The carving is on mystery wood from a cabinet shop, possibly a void filler panel. I've asked 6 local woodworkers for species identification, and I got 6 different answers.
The wood was sealed with rattle can shellac prior to painting with Rustoleum spray paint.
My "Go-To" V Bit is the Cadence Mfg Groovey Jenny 60 degree, 3/8" downcut, which was used for the majority of the carve, gave me excellent cuts with no tearout and close to zero cleanup. A 1 inch 90 degree V bit was used for only the very center vertical Components. Overall size is 9.5" X 17.5"
I decided to go off in a different direction with this carving.
It started life as a Facebook screenshot of a pinstriping competition entry. I passed it through ChatGPT, which gave me nice clear lines, however, many were a mess. Overlapping lines, components missing, artifacts added, and many "What the heck is that shape" resulted in four hours of node editing, which was great practice. At about 2 hours into the the editing, the "light bulb moment" happened with "I can use the mirror tool here". Time was also spent to recreate the over and under visuals that the original painter did with colors.
The carving is on mystery wood from a cabinet shop, possibly a void filler panel. I've asked 6 local woodworkers for species identification, and I got 6 different answers.
The wood was sealed with rattle can shellac prior to painting with Rustoleum spray paint.
My "Go-To" V Bit is the Cadence Mfg Groovey Jenny 60 degree, 3/8" downcut, which was used for the majority of the carve, gave me excellent cuts with no tearout and close to zero cleanup. A 1 inch 90 degree V bit was used for only the very center vertical Components. Overall size is 9.5" X 17.5"
TH
Tom Hartranft
Happy baby in mother’s hands. 10 x 8 x 1.5-inch carving in Cherry. Tung oil finish. Front, angled, and back images.
RJ
Richard McKinley Jr
Here is the bed divider that everyone in the community helped out with and it turned out great. I really appreciate the help!
Here is the bed divider that everyone in the community helped out with and it turned out great. I really appreciate the help!
TH
Tom Hartranft
Each of these Maple wall-hanging carvings measure 9 x 5 x ¾. Male image digitally photographed from a carving magazine then uploaded to ChatGPT for manipulation. Also used ChatGPT to convert male image to a second, female image with identical hat, size, etc. to form a matching pair of caricature curmudgeons. Then uploaded in Vistasculpt to generate stl files. Finally, uploaded in Aspire and manipulated for final size, shape, and tool pathing. Total time was 1-1/4 hours for each using 80 ipm feed and 60 ipm plunge. After ¼ ball nose roughing, finished with 3/16 ball nose followed by 3/32 diameter tapered ball nose, and lastly, 3/16 end mill profile cut out. Applied sanding sealer coat of shellac both sides followed by light maple stain both sides. Then applied some acrylic burnt umber to hats, beard, and extremities. Backsides also shown with lasered maker’s mark at bottom along with hanger hardware.
Each of these Maple wall-hanging carvings measure 9 x 5 x ¾. Male image digitally photographed from a carving magazine then uploaded to ChatGPT for manipulation. Also used ChatGPT to convert male image to a second, female image with identical hat, size, etc. to form a matching pair of caricature curmudgeons. Then uploaded in Vistasculpt to generate stl files. Finally, uploaded in Aspire and manipulated for final size, shape, and tool pathing. Total time was 1-1/4 hours for each using 80 ipm feed and 60 ipm plunge. After ¼ ball nose roughing, finished with 3/16 ball nose followed by 3/32 diameter tapered ball nose, and lastly, 3/16 end mill profile cut out. Applied sanding sealer coat of shellac both sides followed by light maple stain both sides. Then applied some acrylic burnt umber to hats, beard, and extremities. Backsides also shown with lasered maker’s mark at bottom along with hanger hardware.
JH
Jack Hearns
Cutting Board That belonged to my father in law . Cleaned up the cut marks and put a walnut inlay using Vectric Aspire . Still learning, next time I’ll edit the nodes to be not so thin . I was using a 30degree v-carve and a 3/16 up cut bit from cic.
Cutting Board That belonged to my father in law . Cleaned up the cut marks and put a walnut inlay using Vectric Aspire . Still learning, next time I’ll edit the nodes to be not so thin . I was using a 30degree v-carve and a 3/16 up cut bit from cic.

Dwight Ferguson
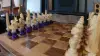
I just got back from the fairgrounds. I was very surprised when I got there and that my chess table got "Best in division". I was then surprised to see that my other three entries got first place in their categories, and my "Farmer in the Hallway" also got first place and Honorable Mention! I didn't know that meant so I looked it up, and it means: An awarded item that receives both a first place and an honorable mention means the entry won the top prize in its main category while also earning a separate special notice for its high quality.
It was well worthwhile in entering!
I just got back from the fairgrounds. I was very surprised when I got there and that my chess table got "Best in division". I was then surprised to see that my other three entries got first place in their categories, and my "Farmer in the Hallway" also got first place and Honorable Mention! I didn't know that meant so I looked it up, and it means: An awarded item that receives both a first place and an honorable mention means the entry won the top prize in its main category while also earning a separate special notice for its high quality.
It was well worthwhile in entering!
RR
Ron Roth
Didn't sand or finish yet , I don't smoke , so the inside chip carve will probably get burnt up . I learned a lot about setting the pointed round over bit . Fun lesson
Didn't sand or finish yet , I don't smoke , so the inside chip carve will probably get burnt up . I learned a lot about setting the pointed round over bit . Fun lesson
BJ
Bob Jotte
Wanted to share why I got into CNC in the first place. My wife saw this at an antique store and I decided to up my woodworking capabilities. This is a replica of an early 1800s Louis XV French armoire. Several Q&A's helped me work through this project. There are 42 different components I created on the CNC along with multiple 3D modelings in Aspire. I even made the brass handle decorations in the front on the CNC. I owe everything to Kyle and this group because I never could have come close to making a piece like this without everyone's input. Thanks!
Wanted to share why I got into CNC in the first place. My wife saw this at an antique store and I decided to up my woodworking capabilities. This is a replica of an early 1800s Louis XV French armoire. Several Q&A's helped me work through this project. There are 42 different components I created on the CNC along with multiple 3D modelings in Aspire. I even made the brass handle decorations in the front on the CNC. I owe everything to Kyle and this group because I never could have come close to making a piece like this without everyone's input. Thanks!
TH
Tom Hartranft
This carving was made from 8.5 x 8.5 x 0.93 Cherry. Mother & Children image was screen shot from online source then manipulated in ChatGPT. Then uploaded in Vistasculpt to generate stl file. Finally, uploaded in Aspire and manipulated into custom frame. After ¼ ball nose roughing, finished with 3/16 ball nose followed by 3/32 diameter tapered ball nose. 2 & 1/2 - hour CNC machine time using 80 ipm feed and 60 ipm plunge. Tung Oil finish applied. Backside also shown … with lasered embellishment in center and maker’s mark lower right corner.
This carving was made from 8.5 x 8.5 x 0.93 Cherry. Mother & Children image was screen shot from online source then manipulated in ChatGPT. Then uploaded in Vistasculpt to generate stl file. Finally, uploaded in Aspire and manipulated into custom frame. After ¼ ball nose roughing, finished with 3/16 ball nose followed by 3/32 diameter tapered ball nose. 2 & 1/2 - hour CNC machine time using 80 ipm feed and 60 ipm plunge. Tung Oil finish applied. Backside also shown … with lasered embellishment in center and maker’s mark lower right corner.

Scott Silvia
Kyle being in China brought back a lot of memories. Found a picture of my wife and I when we were doing a demonstration Lion Dance for a University of Miami function. Worked it up and made this one last night. Still working on the finish.
And yes were referred to as the “Old Lion”…. and I was always bringing up the rear.
Kyle being in China brought back a lot of memories. Found a picture of my wife and I when we were doing a demonstration Lion Dance for a University of Miami function. Worked it up and made this one last night. Still working on the finish.
And yes were referred to as the “Old Lion”…. and I was always bringing up the rear.

Wayne Burton
This custom clock was made out of 8/4 cherry for a towboat captain to his specs. It's 24" x 25". That is the logo for the company he works for and the name of the boat he runs at the bottom.
This custom clock was made out of 8/4 cherry for a towboat captain to his specs. It's 24" x 25". That is the logo for the company he works for and the name of the boat he runs at the bottom.
JW
Jon Whitmore
A friend who makes custom furniture gives me cut-offs for use on my CNC so when he gave me a 1 inch piece of Ash I thought I'd try a V-Carve Inlay with his company logo and give to him. It's my first attempt and I think it came out pretty well using walnut with the Ash. I used 1/4" and 1/8" Upcut endmills for clearing and a 3 flute 30 Degree VBit for the finishing. The challenge was keeping the sharp fine details from chipping off so I ran multiple shallow passes with the VBit. Only 2 or 3 areas had a little chip out so for a first inlay, I consider it a success. Total carve time was right around 2.5 hours.
A friend who makes custom furniture gives me cut-offs for use on my CNC so when he gave me a 1 inch piece of Ash I thought I'd try a V-Carve Inlay with his company logo and give to him. It's my first attempt and I think it came out pretty well using walnut with the Ash. I used 1/4" and 1/8" Upcut endmills for clearing and a 3 flute 30 Degree VBit for the finishing. The challenge was keeping the sharp fine details from chipping off so I ran multiple shallow passes with the VBit. Only 2 or 3 areas had a little chip out so for a first inlay, I consider it a success. Total carve time was right around 2.5 hours.

Dwight Ferguson
I designed and carved this cigar ashtray two years ago after watching one of the Q&A sessions. It is 8' x 8" x 1.5" from black walnut. Only takes an hour and 25 minutes to carve. It is all molding tool paths and a profile tool path, with a little bit of VBit thrown in! My VCarve technique has gotten a lot better since then thanks to LYCNC!
I designed and carved this cigar ashtray two years ago after watching one of the Q&A sessions. It is 8' x 8" x 1.5" from black walnut. Only takes an hour and 25 minutes to carve. It is all molding tool paths and a profile tool path, with a little bit of VBit thrown in! My VCarve technique has gotten a lot better since then thanks to LYCNC!

Wayne Burton
A guy ordered this one, it’s 24” x 36” and made out of 8/4 cypress.

Tony Duderewicz
8 x 10 Family portrait carved in maple with a light pine stain and clear finish. Done in VistaSculpt and Aspire

Tony Duderewicz
Did some carvings of crosses in walnut. Small one is 6" high the rest 10-11" high. Used a 1/32" tbn on small cross for details, the rest of them with a 1/8" tbn.
Did some carvings of crosses in walnut. Small one is 6" high the rest 10-11" high. Used a 1/32" tbn on small cross for details, the rest of them with a 1/8" tbn.

Dwight Ferguson
OK... I did a really stupid thing! This goes to the point of getting too cocky! I had previously had an issue with my 1/4" collet. Then I forgot about it. A couple days later I proceeded to carve a project that is very detailed using a 1/64 inch bit.
I got the 3D carving completed and proceeded with the swept profile tool path for the frame, which required a 1/4 inch ballnose. I put the bit in, tightened it, set Z, then proceeded with the tool path.
I was on my computer and I heard a weird noise and ran over to the CNC and the bit had slipped down and was carving through the bottom of the board. I stopped the carve but the bit was broken and the carving was destroyed (I thought).
So I went to bed and when I woke up in the morning I was thinking about it more and decided to turn the lemon into lemonade. I cut out the 3-D carving and took the frame (that it was almost finished) to the router table and put a round over on the inside, then took another board and glued it to the frame, then glued the 3D model to the center. Sort of how I had designed it. It came out pretty good.
This is the model I made from an old picture I had of my great grandparent's Homestead in 1880. I made this for my granddaughter for her 14th birthday. She may not appreciate it now but she may when she's older. This is her 3X great grandparents Homestead in North Dakota. I lasered the pictures of her ancestors on the back. It even shows the map of where the Homestead was.
LESSON LEARNED: change the collet when you notice a problem. Collets cost a lot less than bits do!
Gif is what it should have been!
OK... I did a really stupid thing! This goes to the point of getting too cocky! I had previously had an issue with my 1/4" collet. Then I forgot about it. A couple days later I proceeded to carve a project that is very detailed using a 1/64 inch bit.
I got the 3D carving completed and proceeded with the swept profile tool path for the frame, which required a 1/4 inch ballnose. I put the bit in, tightened it, set Z, then proceeded with the tool path.
I was on my computer and I heard a weird noise and ran over to the CNC and the bit had slipped down and was carving through the bottom of the board. I stopped the carve but the bit was broken and the carving was destroyed (I thought).
So I went to bed and when I woke up in the morning I was thinking about it more and decided to turn the lemon into lemonade. I cut out the 3-D carving and took the frame (that it was almost finished) to the router table and put a round over on the inside, then took another board and glued it to the frame, then glued the 3D model to the center. Sort of how I had designed it. It came out pretty good.
This is the model I made from an old picture I had of my great grandparent's Homestead in 1880. I made this for my granddaughter for her 14th birthday. She may not appreciate it now but she may when she's older. This is her 3X great grandparents Homestead in North Dakota. I lasered the pictures of her ancestors on the back. It even shows the map of where the Homestead was.
LESSON LEARNED: change the collet when you notice a problem. Collets cost a lot less than bits do!
Gif is what it should have been!
GV
Gary Voigt
I recently made this plaque for our pastor who just received his earned doctorate. It is made out of 1" Rubberwood butcher block trimmed in red oak. He deserved something special for all of the work he put into this degree. I have a Longmill MK2.5 with spindle. I used Easycreate for the cap and scroll and the books. Easycreate however would simply not do the Bible verse on the books, so I had to create curves that matched the pages and align the text to them. I cut out profiles of both the books and cap and scroll in Oramask, and then stuck that background to the face outlining them before staining them to make it easier to use different stain shades. I sealed the text with shellac, and then brush painted the text brown and diagonally wiped off the excess as I went. I covered it with 1/8" acrylic. He was very pleased 😄
I recently made this plaque for our pastor who just received his earned doctorate. It is made out of 1" Rubberwood butcher block trimmed in red oak. He deserved something special for all of the work he put into this degree. I have a Longmill MK2.5 with spindle. I used Easycreate for the cap and scroll and the books. Easycreate however would simply not do the Bible verse on the books, so I had to create curves that matched the pages and align the text to them. I cut out profiles of both the books and cap and scroll in Oramask, and then stuck that background to the face outlining them before staining them to make it easier to use different stain shades. I sealed the text with shellac, and then brush painted the text brown and diagonally wiped off the excess as I went. I covered it with 1/8" acrylic. He was very pleased 😄

Dwight Ferguson
This is for a customer along the same lines with the glazing process shown above. The one thing I didn't do was put a semi gloss finish, I used a flat mat poly. It is from a photo that I put into Vista sculpt. It is life edge spalted maple 25" x 16" x 2 3/8".
One thing I always do is put the rainbow bridge poem on the back of the carving for the customer.
This is for a customer along the same lines with the glazing process shown above. The one thing I didn't do was put a semi gloss finish, I used a flat mat poly. It is from a photo that I put into Vista sculpt. It is life edge spalted maple 25" x 16" x 2 3/8".
One thing I always do is put the rainbow bridge poem on the back of the carving for the customer.
RS
Robert Sandstrom
If I already posted this in here I apologize - I did previously post on my Social media Channels. I entered this Cribbage Board in the San Diego County (Del Mar) Fair and they awarded me a first place in the category of "Furniture and Accessories Designed and Created By Computer - Laser and/or CNC".
Key things about this entry related to the Learn Your CNC community. The image was created with the help of the VistaSculpt AI. I wanted an image that illustrated the theme of the Del Mar Fair which was "Once Upon a Fair" illustrating fairy tales and reading. If you look closely you can see various fairy tale images in the graphic such as trolls, dragons, ship (captain Hook) from Peer Pan etc. - what fairy tale images do you recognize?
We have covered the process of using AI to create carving models in multiple lessons in this program.
The other thing to notice is I used Dwight Ferguson glazing technique for finishing the lid and carving.
If I already posted this in here I apologize - I did previously post on my Social media Channels. I entered this Cribbage Board in the San Diego County (Del Mar) Fair and they awarded me a first place in the category of "Furniture and Accessories Designed and Created By Computer - Laser and/or CNC".
Key things about this entry related to the Learn Your CNC community. The image was created with the help of the VistaSculpt AI. I wanted an image that illustrated the theme of the Del Mar Fair which was "Once Upon a Fair" illustrating fairy tales and reading. If you look closely you can see various fairy tale images in the graphic such as trolls, dragons, ship (captain Hook) from Peer Pan etc. - what fairy tale images do you recognize?
We have covered the process of using AI to create carving models in multiple lessons in this program.
The other thing to notice is I used Dwight Ferguson glazing technique for finishing the lid and carving.
Len Greiner
@Dwight Ferguson I finally had a chance to try your glazing technique. My 5-year-old grandson asked me to carve a lion's head for him to put up in his room. I had a 5 1/2x 6" piece of poplar in the scrap pile (sounds like a challenge theme) that I used and created the lion using Easy Create. Wow were you right about how it makes the details come to life. The eyes almost look life like.
I can see myself using the glaze for many future projects. Thanks for the tip.
@Dwight Ferguson I finally had a chance to try your glazing technique. My 5-year-old grandson asked me to carve a lion's head for him to put up in his room. I had a 5 1/2x 6" piece of poplar in the scrap pile (sounds like a challenge theme) that I used and created the lion using Easy Create. Wow were you right about how it makes the details come to life. The eyes almost look life like.
I can see myself using the glaze for many future projects. Thanks for the tip.

Tony Duderewicz
Tree of life I carved, size is 13" on a Teak round.

Dewayne Thole
I made this for a friend's son & new daughter in-law. They had the cookies as the centerpiece at each table during the reception with the flowers, candles and other stuff on it.
I made this for a friend's son & new daughter in-law. They had the cookies as the centerpiece at each table during the reception with the flowers, candles and other stuff on it.

Matt Stouffer
I wanted to share this finished project with everyone. It came out great. Thanks to Dwight, Michael, Kyle, and all the lycnc community for helping. This is a Time capsule for the city of Surprise, AZ. They held a 250 celebration, on the 4th of July, with city hall employees and elected officials to fill this time capsule, lock it up, and have it on display, in city hall, to be opened in 2076. Pretty cool,I thought. Thanks again for all the help. I look forward to my next challenge.
I wanted to share this finished project with everyone. It came out great. Thanks to Dwight, Michael, Kyle, and all the lycnc community for helping. This is a Time capsule for the city of Surprise, AZ. They held a 250 celebration, on the 4th of July, with city hall employees and elected officials to fill this time capsule, lock it up, and have it on display, in city hall, to be opened in 2076. Pretty cool,I thought. Thanks again for all the help. I look forward to my next challenge.
Michael Rosenberg
Just finished my most ambitious inlay cutting board project to date. This design was commissioned from Bogdan Petrushko after I gave him some sketches of what I was looking for. He drew up a few designs and ultimately provided me with the svg drawings. I made a few changes to accommodate my Amana 46280 bit and this is what 6 hours of CNC time can do!
Just finished my most ambitious inlay cutting board project to date. This design was commissioned from Bogdan Petrushko after I gave him some sketches of what I was looking for. He drew up a few designs and ultimately provided me with the svg drawings. I made a few changes to accommodate my Amana 46280 bit and this is what 6 hours of CNC time can do!
DW
David Weller
This is my first post on here. I've been doing this for around 8 months using a Two trees 450 Pro.
This is the first ever full 3D carvery using Vectric V Carve desktop.
My grandson loves the Netflix series Stranger Things so I made him this keep sake box from Oak using traditional wood work and CNC V carved text then filling it with black epoxy resin.
He was thrilled to bits.
What do you think guys
This is my first post on here. I've been doing this for around 8 months using a Two trees 450 Pro.
This is the first ever full 3D carvery using Vectric V Carve desktop.
My grandson loves the Netflix series Stranger Things so I made him this keep sake box from Oak using traditional wood work and CNC V carved text then filling it with black epoxy resin.
He was thrilled to bits.
What do you think guys
GS
Garry Strout
My weeks projects, napkin holders, oak with finish, oak with stain, and purple heart with a clear finish, plus more that I've given away. Also, five trivets and 4 egg trays and I turned multiple ink pens on my large lathe as extra gifts to go with the above items.
My weeks projects, napkin holders, oak with finish, oak with stain, and purple heart with a clear finish, plus more that I've given away. Also, five trivets and 4 egg trays and I turned multiple ink pens on my large lathe as extra gifts to go with the above items.

Dwight Ferguson
Well I went back and pulled one of my early carvings And added a glaze to it using my glazing process. It is simply amazing the difference that it makes in a carving! Below shows after the glaze and the other one shows before the glaze. It really shows and highlights the 3D of the model!
Well I went back and pulled one of my early carvings And added a glaze to it using my glazing process. It is simply amazing the difference that it makes in a carving! Below shows after the glaze and the other one shows before the glaze. It really shows and highlights the 3D of the model!

Tony Duderewicz
I designed a welcome to our home plaque using a teak round from Lowes. Size is 14" and a natural clear finish using a 1/16" tapered ball nose bit only. I made the letters 1/16" high.
I designed a welcome to our home plaque using a teak round from Lowes. Size is 14" and a natural clear finish using a 1/16" tapered ball nose bit only. I made the letters 1/16" high.

Wayne Burton
Made this using Vectric clipart on 5/4”cypress. Has a simple flat background and my wife painted it.
DP
David Parkerson
Not my latest project but a project I’m not embarrassed to share 🤣😂🤣 just kidding.

Scott Silvia
Reposting pictures for someone that was looking for a Model 1911 pistol file during todays Q&A session.
This was crafted as accurately as I could to match the original design manufactured by the Springfield Armory.
Reposting pictures for someone that was looking for a Model 1911 pistol file during todays Q&A session.
This was crafted as accurately as I could to match the original design manufactured by the Springfield Armory.
JG
Jef Geagan
Double sided with different vcarve reveals and pocketed base. Embedded our 25th anniversary logo for wood group at The Villages, FL with AI (ChatGPT) and carved with Groovee Jenny 60°. This is a fun competition we have going on at the club to celebrate USA and Clubs 250 & 25 anniversary using a single piece of 8”x36” cherry. This is what I made and submitted.
Double sided with different vcarve reveals and pocketed base. Embedded our 25th anniversary logo for wood group at The Villages, FL with AI (ChatGPT) and carved with Groovee Jenny 60°. This is a fun competition we have going on at the club to celebrate USA and Clubs 250 & 25 anniversary using a single piece of 8”x36” cherry. This is what I made and submitted.
Doug Engle
I think cutting out the background brings out the detail better

Gary Laffoon
My first carve in hardwood. The carve bowed so I think I need a different hold down. This was held by tape and glue. Next time I'll cut a larger piece of wood and use composite nails around the outside edges.
My first carve in hardwood. The carve bowed so I think I need a different hold down. This was held by tape and glue. Next time I'll cut a larger piece of wood and use composite nails around the outside edges.
CC
Chris Cote
This would be my first cutting board. the last male insert carved was the African ebony where the tip of my 22V broke, but not enough to see withe naked eye. I moved on to begin carving the female inserts into the board beginning with the vines. I then discovered they did not fit snug. I then remembered hearing a slight click noise when carving the male ebony. I looked through a magnifying glass and could barely see the tip was broke. I was able to fill in a few spots and skate through this project.
This would be my first cutting board. the last male insert carved was the African ebony where the tip of my 22V broke, but not enough to see withe naked eye. I moved on to begin carving the female inserts into the board beginning with the vines. I then discovered they did not fit snug. I then remembered hearing a slight click noise when carving the male ebony. I looked through a magnifying glass and could barely see the tip was broke. I was able to fill in a few spots and skate through this project.
DI
Dennis Ingram
This was my first attempt at AI. Kyle’s course was awesome. I struggled with this for a while. I’m glad I stuck with it. Came out pretty good. This was a gift for my niece when she graduated from college.
This was my first attempt at AI. Kyle’s course was awesome. I struggled with this for a while. I’m glad I stuck with it. Came out pretty good. This was a gift for my niece when she graduated from college.

Tony Duderewicz
Carved a Buffalo Bills logo onto the helmet and glued it onto a cherry cabinet door I had.
Carved a Buffalo Bills logo onto the helmet and glued it onto a cherry cabinet door I had.

Matt Stouffer
Shout out to Dwight Ferguson for really stepping up to help me with this project. The carvings came out great. These went back to the cabinet shop, today, to get glazing and finishing done for final assembly on the time capsule box. I will share those completed pics as soon as have them.
Shout out to Dwight Ferguson for really stepping up to help me with this project. The carvings came out great. These went back to the cabinet shop, today, to get glazing and finishing done for final assembly on the time capsule box. I will share those completed pics as soon as have them.
Jim Brown
FYI woodworkers know that wood has a moister content & that affects things. Not so much carving but it does when lasering. sometimes the laser doesn’t burn or burns like this, because the wood is still wet. you’ll see it with the saw dust when you carve how dry if you don’t have a meter. but I kinda like the design it makes when it does burn.
FYI woodworkers know that wood has a moister content & that affects things. Not so much carving but it does when lasering. sometimes the laser doesn’t burn or burns like this, because the wood is still wet. you’ll see it with the saw dust when you carve how dry if you don’t have a meter. but I kinda like the design it makes when it does burn.

Tony Duderewicz
Did this retirement sign for someone who retired. Used a diamond drag bit on a piece of cast acrylic and made my own base for it with led lights. NO laser involved.
Did this retirement sign for someone who retired. Used a diamond drag bit on a piece of cast acrylic and made my own base for it with led lights. NO laser involved.

Pete Buehn
Created this Retirement Gift Clock with all wood inlays.
These are the Woods I used for the inlay work:
Base piece: Book matched quilted maple, harvested on the Olympic Peninsula
Road Signs: Yellow Heart and Wenge; note the offset arrow on the curved road sign is factually how they look
Grips: Wenge
The Riders Silhouette (created with AI from an actual photo of the client riding)
Silhouette: Wenge
Harley marker lights: Padauk
License plate numbers: Clients Plate Number Lasered
Harley Emblem:
Outline: Wenge
Orange Background: Maple with a flame (fiddleback) grain pattern
Harley Letters: Maple Burl
Wings: Wenge outlining Maple Burl
Sturgis (Lettering is from the city’s welcoming sign) Maple with flame grain, dyed orange
“Yellow Brick Road” from the client's house to Sturgis: Yellow Heart
Created this Retirement Gift Clock with all wood inlays.
These are the Woods I used for the inlay work:
Base piece: Book matched quilted maple, harvested on the Olympic Peninsula
Road Signs: Yellow Heart and Wenge; note the offset arrow on the curved road sign is factually how they look
Grips: Wenge
The Riders Silhouette (created with AI from an actual photo of the client riding)
Silhouette: Wenge
Harley marker lights: Padauk
License plate numbers: Clients Plate Number Lasered
Harley Emblem:
Outline: Wenge
Orange Background: Maple with a flame (fiddleback) grain pattern
Harley Letters: Maple Burl
Wings: Wenge outlining Maple Burl
Sturgis (Lettering is from the city’s welcoming sign) Maple with flame grain, dyed orange
“Yellow Brick Road” from the client's house to Sturgis: Yellow Heart
Jim Brown
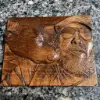
I learned I have to paint before lasering otherwise you laser twice it gets dark. could always shave a layer off & do it again but what fun is that when you experiment to see what happens. The laser adds to the color thou. Too dark for a golden retriever. what do you think?
I learned I have to paint before lasering otherwise you laser twice it gets dark. could always shave a layer off & do it again but what fun is that when you experiment to see what happens. The laser adds to the color thou. Too dark for a golden retriever. what do you think?
Michael Rosenberg
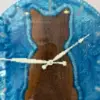
Just wanted to share an inlay cutting board, 12 x 18 inches, made from paduak, yellow heart, and maple, that I made for my daughter, Caitlin. We were both very pleased with the outcome. This is an end-grain board that should last a lifetime!
Just wanted to share an inlay cutting board, 12 x 18 inches, made from paduak, yellow heart, and maple, that I made for my daughter, Caitlin. We were both very pleased with the outcome. This is an end-grain board that should last a lifetime!

Dwight Ferguson
This is another pipe holder for his larger pipes! This time I 3-D model using a sculpting brush be raised parts. This one is out of Walnut. 6" x 3.5" x 2.5"
Customer picture is the last one with the actual pipes.
This is another pipe holder for his larger pipes! This time I 3-D model using a sculpting brush be raised parts. This one is out of Walnut. 6" x 3.5" x 2.5"
Customer picture is the last one with the actual pipes.

Dwight Ferguson
I have been busy over the last couple weeks. Got several projects including a simple 5 foot live edge bench and another pipe holder going for customers. This is one I did for customer in Arizona. This shows the process from design, carve, oil, glazing, and painting. It is 18" x 24" x 2 1/2" inches from spalted maple. It is finished with my exterior epoxy–flat varnish. This was started with Chat-GPT, and Easycarve
I have been busy over the last couple weeks. Got several projects including a simple 5 foot live edge bench and another pipe holder going for customers. This is one I did for customer in Arizona. This shows the process from design, carve, oil, glazing, and painting. It is 18" x 24" x 2 1/2" inches from spalted maple. It is finished with my exterior epoxy–flat varnish. This was started with Chat-GPT, and Easycarve
JB
Jim Brown
I like the idea that the machine does all the work allowing me to be creative. I also use a laser to makem pop. Sometimes stain, sometimes paint. These are both walnut.
I like the idea that the machine does all the work allowing me to be creative. I also use a laser to makem pop. Sometimes stain, sometimes paint. These are both walnut.
Len Greiner
Here's a couple of projects that I have carved in the last few weeks. Work has kept me busy and out of the shed lately and I miss my time creating.
The first was created with Easy Create, a first for me, with the frame made using the molding toolpath. I think it turned out well. I'm always amazed at how much fine detail will show up in a carving. The picture doesn't do it any justice due to the highlighting of the figure in the poplar.
The serving trays were downloaded from 3DWave. I've had very good luck with their files and have made a handful of models without issue.
The highland cow is for my son and daughters-in-law's first anniversary. She seems to love them.
The shark is for my daughter, and for whatever reason, she seems to love those wretched things.
These were both cut from one 24x24x 1.25 maple slab purchased from CIC, and of course I forgot to use the link in the discount page.
Here's a couple of projects that I have carved in the last few weeks. Work has kept me busy and out of the shed lately and I miss my time creating.
The first was created with Easy Create, a first for me, with the frame made using the molding toolpath. I think it turned out well. I'm always amazed at how much fine detail will show up in a carving. The picture doesn't do it any justice due to the highlighting of the figure in the poplar.
The serving trays were downloaded from 3DWave. I've had very good luck with their files and have made a handful of models without issue.
The highland cow is for my son and daughters-in-law's first anniversary. She seems to love them.
The shark is for my daughter, and for whatever reason, she seems to love those wretched things.
These were both cut from one 24x24x 1.25 maple slab purchased from CIC, and of course I forgot to use the link in the discount page.

Dwight Ferguson
OK here is one from the other day's Q&A. Customer wanted a pipe holder, but wanted it to look beat up sort of like burl on the ends and a little on the top. So here's another technique for you! I took the Dremel and just drilled into a 3 1/2" x 7"piece of Brazilian cherry in a lot of places! Then I glazed the indented areas. It really turned out nice!
OK here is one from the other day's Q&A. Customer wanted a pipe holder, but wanted it to look beat up sort of like burl on the ends and a little on the top. So here's another technique for you! I took the Dremel and just drilled into a 3 1/2" x 7"piece of Brazilian cherry in a lot of places! Then I glazed the indented areas. It really turned out nice!

Dwight Ferguson
I wanted to do a 3-D flag with an eagle and use lesson #253 as a guide. I wanted it to look like it was on leather, so I did not seal the plaque before applying the Java glaze. It came out with a really cool leather look texture. Another thing I did different is I used a make up sponge with the acrylic paint to paint the highlighted stars feathers and seal.
I wanted to do a 3-D flag with an eagle and use lesson #253 as a guide. I wanted it to look like it was on leather, so I did not seal the plaque before applying the Java glaze. It came out with a really cool leather look texture. Another thing I did different is I used a make up sponge with the acrylic paint to paint the highlighted stars feathers and seal.

Tim Karash
My version of the Edge Trim using the molding tool path
Grandpa Spath
Kyle ....this is for you....... A Learn Your CNC Academy vinyl record.
I use a LP album record, use double adhesive tape to hold it down on the bed.
I use a 1/32 inch tapered ball nose bit and center the bit in the hole of the record.
I usually start out the feed rate speed of 30, then I work up to 60 depending on the thickness of the record. The spindle speed is around 1800.
If you have any questions feel free to ask.
Grandpa Joe
Kyle ....this is for you....... A Learn Your CNC Academy vinyl record.
I use a LP album record, use double adhesive tape to hold it down on the bed.
I use a 1/32 inch tapered ball nose bit and center the bit in the hole of the record.
I usually start out the feed rate speed of 30, then I work up to 60 depending on the thickness of the record. The spindle speed is around 1800.
If you have any questions feel free to ask.
Grandpa Joe
SS
Scott Silvia
Had to make something for the other two grand boys who are a little older; plaques for their rooms.
The 6 year old is a jock and the 7 year old is brainiac.
Assorted suggestion/ideas from AI for each one. Picked the two I thought I could make. Then I made all the shapes in Aspire and added some vectors.
Had to make something for the other two grand boys who are a little older; plaques for their rooms.
The 6 year old is a jock and the 7 year old is brainiac.
Assorted suggestion/ideas from AI for each one. Picked the two I thought I could make. Then I made all the shapes in Aspire and added some vectors.

Dwight Ferguson
Here is a project similar to one I submitted last year. This one is an idea of a man wearing sunglasses and the reflection in sunglasses of him being surprised by Fredo standing on the path in front of his hobbit house. It's 11 by 13 inches in spalted maple.
Here is a project similar to one I submitted last year. This one is an idea of a man wearing sunglasses and the reflection in sunglasses of him being surprised by Fredo standing on the path in front of his hobbit house. It's 11 by 13 inches in spalted maple.

Tony Duderewicz
Here is a small dog I have done using cut3D by Vectric, which is an old program and it does 4 sided models. I tried to submit my project for the big and small challenge but it kicked me out and I couldn't submit it. The model is made of white oak using a 1/4" end mill for roughing and a 1/8" ball nose bit for finish. Size is 3-1/4" long x 3/4" wide x 1-3/4" high.
Here is a small dog I have done using cut3D by Vectric, which is an old program and it does 4 sided models. I tried to submit my project for the big and small challenge but it kicked me out and I couldn't submit it. The model is made of white oak using a 1/4" end mill for roughing and a 1/8" ball nose bit for finish. Size is 3-1/4" long x 3/4" wide x 1-3/4" high.
LR
Lester Rawls
Here one of Kyle project lesson a few weeks ago. Made out of .75 white pine.

Mark Haskins
I did this last week after out meeting to see how it would look and it came out great .
Lester Sak
I built this copy of the BRIO Labyrinth for a 7 year old nephew using hard maple and mahogany, here's a link to some build pics - https://photos.google.com/share/AF1QipOHLsUCM1o5G2MXO-rNJUOkqC6uZzGlNy_rdIoSqi7i06t7AZk8F4Hjy8Yy0VDZig?key=ZEpjSFpOZkJhak9nLTl2cGZDZDRoay1ONTBFR3VR
The labyrinth walls were cut out, painted and epoxied to the board in very shallow pockets. I had no idea how the tilting mechanism worked until I found someone who posted a 3d printed version on the Instructables website. Another challenging aspect was making the ball roll to the front right corner regardless of where it falls through.
I created 2 models for the floor, carved from 1/2" maple. The first was a 2-rail sweep that slopes down from all edges to a low point in front of the exit hole. Then I used a fluting toolpath to create a ramp using 20 parallel vectors spaced .045" apart giving me about a 10% stepover so the ramp would be very smooth. This started at the low point of the 2-rail sweep to the exit. I had a hard time setting the start point for the bit. I needed it to start the cut at the low point of the 2-rail sweep and cut down to the exit but it wanted to start at the exit instead which is the deepest part of the cut. I found if I used the final depth as the start depth and the start depth was used for flute depth, it worked! I think I like waiting for the ball to return more than playing, it sounds similar to the game Pachinko.
I built this copy of the BRIO Labyrinth for a 7 year old nephew using hard maple and mahogany, here's a link to some build pics - https://photos.google.com/share/AF1QipOHLsUCM1o5G2MXO-rNJUOkqC6uZzGlNy_rdIoSqi7i06t7AZk8F4Hjy8Yy0VDZig?key=ZEpjSFpOZkJhak9nLTl2cGZDZDRoay1ONTBFR3VR
The labyrinth walls were cut out, painted and epoxied to the board in very shallow pockets. I had no idea how the tilting mechanism worked until I found someone who posted a 3d printed version on the Instructables website. Another challenging aspect was making the ball roll to the front right corner regardless of where it falls through.
I created 2 models for the floor, carved from 1/2" maple. The first was a 2-rail sweep that slopes down from all edges to a low point in front of the exit hole. Then I used a fluting toolpath to create a ramp using 20 parallel vectors spaced .045" apart giving me about a 10% stepover so the ramp would be very smooth. This started at the low point of the 2-rail sweep to the exit. I had a hard time setting the start point for the bit. I needed it to start the cut at the low point of the 2-rail sweep and cut down to the exit but it wanted to start at the exit instead which is the deepest part of the cut. I found if I used the final depth as the start depth and the start depth was used for flute depth, it worked! I think I like waiting for the ball to return more than playing, it sounds similar to the game Pachinko.

Ray Smee
I have rally enjoyed doing the 3d carvings. This was my 4th carving.

Raymond Smee
This was my first try at 3d in Pine. Little rough but came out well
RS
Raymond Smee
my third project. This was on a saw door that my step dad made and then passed away

Rick Latour
As I was learning the AI for CNC course Kyle displayed an image of a welcome sign he created. It was a vertical Welcome Sign with 2 bears. I absolutely loved it. I used CHATGBT to create almost the same sign but horizontal with a backing. I had a few other projects to do before I could start this one. I just started the roughing path, can’t wait to see the finished path and see it complete. I’ll send you a pic of the completed project. When i first did the tool paths the project was going to take 28 hours to complete. AI suggested options I didn’t think of, set them up for be item for item and cut the project time down to less than 12 hours. Can’t wait to see the finished project. Can’t thank you enough for introducing me to AI and the benefits of knowing how to use AI. I have a binder with notes that I’ll use for many years to come. THANK YOU!!
As I was learning the AI for CNC course Kyle displayed an image of a welcome sign he created. It was a vertical Welcome Sign with 2 bears. I absolutely loved it. I used CHATGBT to create almost the same sign but horizontal with a backing. I had a few other projects to do before I could start this one. I just started the roughing path, can’t wait to see the finished path and see it complete. I’ll send you a pic of the completed project. When i first did the tool paths the project was going to take 28 hours to complete. AI suggested options I didn’t think of, set them up for be item for item and cut the project time down to less than 12 hours. Can’t wait to see the finished project. Can’t thank you enough for introducing me to AI and the benefits of knowing how to use AI. I have a binder with notes that I’ll use for many years to come. THANK YOU!!
RL
Rick Latour
Still needs sanding but came out beautiful

Dwight Ferguson
This is a customer project 11 x 14. Live edge Hickory. Shows the process from oil glazing and painting.

Scott Silvia
Ref: The recent project lesson. I made these for the 3 youngest of 5 grandsons.
Still learning to use the Air Weights vacuum table.
Ref: The recent project lesson. I made these for the 3 youngest of 5 grandsons.
Still learning to use the Air Weights vacuum table.
GS
Garry Strout
Latest picture and frame. Oak for the picture and walnut frame. done on a Sienci Labs 30 x 48. Sign done for a church in oak. Bare letters, 5.5 feet long and 22 inches tall 3/4 inches thick.
Latest picture and frame. Oak for the picture and walnut frame. done on a Sienci Labs 30 x 48. Sign done for a church in oak. Bare letters, 5.5 feet long and 22 inches tall 3/4 inches thick.

Bob Ingram
Made this one for my son, at his request, whom obviously is a golfer. Always enjoy doing request work
GD
Greg Dunkelberger
made this for my great niece. modeled after kyle's lesson on puzzle. had to find child safe paints. found a company called eco's paints where you can buy small sample jars of paint which worked perfect for the little bit i will use them. can't wait to see her expression when she sees it, since she loves elmo and bluey.
made this for my great niece. modeled after kyle's lesson on puzzle. had to find child safe paints. found a company called eco's paints where you can buy small sample jars of paint which worked perfect for the little bit i will use them. can't wait to see her expression when she sees it, since she loves elmo and bluey.

Dwight Ferguson
3D Glazing and Finishing Process
Some of you have asked how I paint my models.
Most of my items that I do, I use a Java brown glaze as it is really easy to fill in the crevices of the model and even words without having to hand paint them. It's very simple, I seal the project (I use an oil finish, but you can use a lacquer or something else of your liking) wait for it to dry then just dab the glaze into the crevices and wipe off the excess after a few minutes. Then I paint with acrylic, then put a finish coat on.
• Step 1:
When finished carving, sand to a finished product.
• Step 2 is Important:
Seal it with a lacquer or something that dries quickly, or even as I have said in the past, Bush Oil that I use. Then wait for it to dry completely.
• Optional -Step 3: (If you want a clear/clean color, skip this step.)
If you want an antique style finish, paint the items that you want to have painted in a color using acrylic artist paint. This will dull down the colors when you add the glaze after painting.
Step 4:
Glaze- glaze it, let it dry completely! (I use a Java Brown color. There are many types and colors out there to choose from, but java brown works with all wood colors well.)
• Step 5:
Using 220 grit or higher, very lightly sand off all of the areas that you want to be a lighter color or even
the whole model so just the background is dark. I focus on the high areas of the carving.
• Step 6:
If you do not want the antique style, then paint with acrylic after glazing. Tip: To make the acrylic paint transparent, water down the acrylic, testing on a board the same as your carving until you get the look that you are after. You could even do a little of both transparent and solid.
Step 7- Finish:
Then when you're finished, seal with your choice of finish. I usually seal the whole carving with a semi-gloss, water-based clearcoat.
As you see in the pictures below, how it really transforms a 3-D model and makes it pop!
(Note: This one I first saturated with a transparent deck sealer then only used the glaze and topcoat finish.)
3D Glazing and Finishing Process
Some of you have asked how I paint my models.
Most of my items that I do, I use a Java brown glaze as it is really easy to fill in the crevices of the model and even words without having to hand paint them. It's very simple, I seal the project (I use an oil finish, but you can use a lacquer or something else of your liking) wait for it to dry then just dab the glaze into the crevices and wipe off the excess after a few minutes. Then I paint with acrylic, then put a finish coat on.
• Step 1:
When finished carving, sand to a finished product.
• Step 2 is Important:
Seal it with a lacquer or something that dries quickly, or even as I have said in the past, Bush Oil that I use. Then wait for it to dry completely.
• Optional -Step 3: (If you want a clear/clean color, skip this step.)
If you want an antique style finish, paint the items that you want to have painted in a color using acrylic artist paint. This will dull down the colors when you add the glaze after painting.
Step 4:
Glaze- glaze it, let it dry completely! (I use a Java Brown color. There are many types and colors out there to choose from, but java brown works with all wood colors well.)
• Step 5:
Using 220 grit or higher, very lightly sand off all of the areas that you want to be a lighter color or even
the whole model so just the background is dark. I focus on the high areas of the carving.
• Step 6:
If you do not want the antique style, then paint with acrylic after glazing. Tip: To make the acrylic paint transparent, water down the acrylic, testing on a board the same as your carving until you get the look that you are after. You could even do a little of both transparent and solid.
Step 7- Finish:
Then when you're finished, seal with your choice of finish. I usually seal the whole carving with a semi-gloss, water-based clearcoat.
As you see in the pictures below, how it really transforms a 3-D model and makes it pop!
(Note: This one I first saturated with a transparent deck sealer then only used the glaze and topcoat finish.)
DS
Don Scott
Created in Easy Create, carved on cedar and painted with acrylic paints. 11" x 22"

Dwight Ferguson
"Farmer-After a Hard Days Work"
I just finished this a few days ago.
The idea is sort of an optical illusion with the farmer standing in his hallway looking out the back door at his farm. You are viewing it through the front door window.
The Spalted Maple had a yellow streak that went horizontal from inside the door to the left picture frame. I added a sunset, then transparent yellow acrylic to highlight that along the wall like the sun was coming through the door frame on the wall.
The frame I finished with a milk white paint then a smoky glaze over the top of that to give it a rough finished look.
It is carved out of spotted maple 24" x 31" x 2". I finished it with oil, my glazing process, acrylic paints and a flat poly finish.
Steps showing finishing process is in the PDF.
"Farmer-After a Hard Days Work"
I just finished this a few days ago.
The idea is sort of an optical illusion with the farmer standing in his hallway looking out the back door at his farm. You are viewing it through the front door window.
The Spalted Maple had a yellow streak that went horizontal from inside the door to the left picture frame. I added a sunset, then transparent yellow acrylic to highlight that along the wall like the sun was coming through the door frame on the wall.
The frame I finished with a milk white paint then a smoky glaze over the top of that to give it a rough finished look.
It is carved out of spotted maple 24" x 31" x 2". I finished it with oil, my glazing process, acrylic paints and a flat poly finish.
Steps showing finishing process is in the PDF.

Dwight Ferguson
This 3-D carved plaque is designed in aspire. I designed hummingbirds in Vista sculpt and brought them into aspire. I modeled the center plaque and brought in STL flowers that I had. I textured the background to make the design stand out and give it a natural frame. I used Redwood transparent deck stain, my glazing process, and acrylic paints. Finished with satin lacquer. 13" x 6" x1.5"
This 3-D carved plaque is designed in aspire. I designed hummingbirds in Vista sculpt and brought them into aspire. I modeled the center plaque and brought in STL flowers that I had. I textured the background to make the design stand out and give it a natural frame. I used Redwood transparent deck stain, my glazing process, and acrylic paints. Finished with satin lacquer. 13" x 6" x1.5"
Julie Coffey
Working on it.
I do a lot of work with churches and ministries, so faith based items are primarily what I do. The crosses were the first thing I cut on my TTC 6050 using Vectric, one was destined for fractal burning (I've done it for years and I'm addicted) the other features a inset piece of resin work. 6 yrs ago I imported 10kg of sand from Israel for this very purpose. The plaque is 'similar yet 'not' it also features a laser round that has a mustard seed I imported from Israel back when I brought in the sand- do you have any idea how MANY mustard seeds are in a KG? LOL I designed it in Vectric and chickened out and laser cut the window- but I profile cut it and cut it out- I made some things! I'm proud of myself. LOL
I do a lot of work with churches and ministries, so faith based items are primarily what I do. The crosses were the first thing I cut on my TTC 6050 using Vectric, one was destined for fractal burning (I've done it for years and I'm addicted) the other features a inset piece of resin work. 6 yrs ago I imported 10kg of sand from Israel for this very purpose. The plaque is 'similar yet 'not' it also features a laser round that has a mustard seed I imported from Israel back when I brought in the sand- do you have any idea how MANY mustard seeds are in a KG? LOL I designed it in Vectric and chickened out and laser cut the window- but I profile cut it and cut it out- I made some things! I'm proud of myself. LOL
DS
Don Scott
A portion of the Michelango masterpiece, "God Creating Adam." Hands painted with acrylic paint, the rest was left natural. The border was created in Aspire.
A portion of the Michelango masterpiece, "God Creating Adam." Hands painted with acrylic paint, the rest was left natural. The border was created in Aspire.
DS
Don Scott
Created with EasyCreate. Generated for the Challenge. border created in Aspire. Finished with thinned down acrylic to preserve the wood grain effect.
Created with EasyCreate. Generated for the Challenge. border created in Aspire. Finished with thinned down acrylic to preserve the wood grain effect.
DS
Don Scott
Created with EasyCreate. A wall hanging for my son who loves Orcas. Carved in Cedar and finished with acrylic paints. The border was created in Aspire.
Created with EasyCreate. A wall hanging for my son who loves Orcas. Carved in Cedar and finished with acrylic paints. The border was created in Aspire.
DS
Don Scott
Garden markers created with EasyCreate. Carved in Cedar (for outdoor protection. Painted with acrylic paints and finished with Clear acrylic finish for better weather protection.
Garden markers created with EasyCreate. Carved in Cedar (for outdoor protection. Painted with acrylic paints and finished with Clear acrylic finish for better weather protection.
Rick Reimer
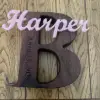
We had talked in one of the past Q & A about combining technologies, this is the first prototype of a project for my niece. The harper is 3d printed and inlayed into the "B" which is cutout on the cnc - the next one will have the date put on with the laser to combine the CNC, 3D Printer and Laser
We had talked in one of the past Q & A about combining technologies, this is the first prototype of a project for my niece. The harper is 3d printed and inlayed into the "B" which is cutout on the cnc - the next one will have the date put on with the laser to combine the CNC, 3D Printer and Laser

Wayne Burton
One of my wife’s new paint projects. I created it with Easy create and Aspire. The beast for roughing and a 1/16” tbn for finishing. Made out of poplar.
One of my wife’s new paint projects. I created it with Easy create and Aspire. The beast for roughing and a 1/16” tbn for finishing. Made out of poplar.

Tom Imel
Created a bottle opener idea from Kyles training class.
Michael Rosenberg
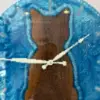
Hello Everyone! I have been using my Onefinity Elite Foreman for almost a year creating many different types of projects. I have taken advantage of Vectric software and Kyle's courses to learn all of my CNC skills! Also having a 48x48 table has allowed me to perform multiple projects on a larger scale. I also have a passion for clocks and use v-bits and endmills to carve numbers that I fill with epoxy!
Hello Everyone! I have been using my Onefinity Elite Foreman for almost a year creating many different types of projects. I have taken advantage of Vectric software and Kyle's courses to learn all of my CNC skills! Also having a 48x48 table has allowed me to perform multiple projects on a larger scale. I also have a passion for clocks and use v-bits and endmills to carve numbers that I fill with epoxy!
ML
Michael Levine
I did this carving in a piece of walnut. Got the prompt idea from the course. Used sculptok for the drawing. Thanks cnc academy!
I did this carving in a piece of walnut. Got the prompt idea from the course. Used sculptok for the drawing. Thanks cnc academy!
Michael Levine
My elderly friends were telling me a story about a plane ride in a cessna and as they were talking, I was picturing the fun they had and told AI what I wanted for a pic and this is what came out of the conversation.
My elderly friends were telling me a story about a plane ride in a cessna and as they were talking, I was picturing the fun they had and told AI what I wanted for a pic and this is what came out of the conversation.
 Made by Testimonial