

Student Project Gallery for Learn Your CNC Academy

Max Garcia
Hey y'all. This is my very first Carve ever!! I copied it from vetric clipart and originally carved it on a piece of 3/4" plywood as a trail run. Glad I did, because I had a problem. I was getting a horizontal line in the middle of the carve. I reached out to Kyle and he helped me with his suggestions. It wasn't the CNC machine. I redownloaded the file on my USB Drive and it worked. Must have had a loose USB as I downloaded it. Anyways here it is. All I need now is paint and finish. All suggestions are welcome.
Hey y'all. This is my very first Carve ever!! I copied it from vetric clipart and originally carved it on a piece of 3/4" plywood as a trail run. Glad I did, because I had a problem. I was getting a horizontal line in the middle of the carve. I reached out to Kyle and he helped me with his suggestions. It wasn't the CNC machine. I redownloaded the file on my USB Drive and it worked. Must have had a loose USB as I downloaded it. Anyways here it is. All I need now is paint and finish. All suggestions are welcome.
LL
Larry Lambeth
Hi Everyone - I've been away from my shop after moving to a new house and having heart surgery. Finally getting my shop back up and running and getting some long overdue projects done. Have not been online for a long time so I thought I'd share this. My client wanted tiles with words of affirmation on them that could be switched out and displayed on the top of a box. This is what I came up with - had never done a box or even a double sided project before. Tiles are double sided and carved with a laser on my CNC. I'm pretty happy with how it turned out.
Hi Everyone - I've been away from my shop after moving to a new house and having heart surgery. Finally getting my shop back up and running and getting some long overdue projects done. Have not been online for a long time so I thought I'd share this. My client wanted tiles with words of affirmation on them that could be switched out and displayed on the top of a box. This is what I came up with - had never done a box or even a double sided project before. Tiles are double sided and carved with a laser on my CNC. I'm pretty happy with how it turned out.
EC
Earnie Callender
A Chip-Carved Optical Illusion was featured in a carving magazine a few years back. The instructions included dividing a circle into 32 even parts then drawing 32 additional concentric circles through the center point of the circle. The below project was designed in VCarve, is double sided and suspended in the frame where it can rotate. Yes, you can chip carve on a CNC. Enjoy.
A Chip-Carved Optical Illusion was featured in a carving magazine a few years back. The instructions included dividing a circle into 32 even parts then drawing 32 additional concentric circles through the center point of the circle. The below project was designed in VCarve, is double sided and suspended in the frame where it can rotate. Yes, you can chip carve on a CNC. Enjoy.

Marcus Pedroza
Final product, he was very happy with it!
MP
Merle Pfeifer
I would like to thank all of you that contributed to the success of my chair seat project. You asked for photo's of the finished product so here it is.
I would like to thank all of you that contributed to the success of my chair seat project. You asked for photo's of the finished product so here it is.
davidrid Ridenhour
This turned out better than i expected. Thanks Kyle, couldn't done it without your classes.

Jude Shellito
Just finished my first epoxy charcuterie board. Cut the cherry on my CNC and used a mold from crafted elements to cast the epoxy. Finished with some wood butter. I think I sanded forever but It looks good.
Just finished my first epoxy charcuterie board. Cut the cherry on my CNC and used a mold from crafted elements to cast the epoxy. Finished with some wood butter. I think I sanded forever but It looks good.
davidrid Ridenhour
Roll tide
Ernesto Monroy
Thanks Kyle for helping me to extend the waves in this version of the Croc. Charcuterie Charlie one and two.
JH
Jim Hamann
Started making these trays after talking to a neighbor who thought it would be cool to have. Within 15mins I had a simple project file and threw a 2x10 on the Longmill 30x30 for a prototype. This one is edge grain walnut with a resin inlay. Took the logo and dropped it on a cutting board stand for a matching cutout. Was able to make quick work of these because I took the Aspire course. Thanks Kyle!
Started making these trays after talking to a neighbor who thought it would be cool to have. Within 15mins I had a simple project file and threw a 2x10 on the Longmill 30x30 for a prototype. This one is edge grain walnut with a resin inlay. Took the logo and dropped it on a cutting board stand for a matching cutout. Was able to make quick work of these because I took the Aspire course. Thanks Kyle!

Tony Duderewicz
Made a couple Santa's. The one on the left is made from white ash, the one on the right is made from cherry. Tall one is 16" high and the smaller one is 11" high.
Made a couple Santa's. The one on the left is made from white ash, the one on the right is made from cherry. Tall one is 16" high and the smaller one is 11" high.

Alfred Floyd
This was completed earlier this year based on the Michael Tyler project. Could not find a Santa Claus that would fit so it is becoming a place for a flower arrangement depending on the season.
This was completed earlier this year based on the Michael Tyler project. Could not find a Santa Claus that would fit so it is becoming a place for a flower arrangement depending on the season.

Tony Duderewicz
Hey Kyle great minds think alike. I did this Christmas globe 2 weeks before you did your live video # 171. This was a great piece to do because I met my wife on the internet and this pic was from a wedding we went to in November so I put the text, your the best thing I found on the internet on it using a 30° v bit and I used a 1/8" tapered ball nose for finish. The complete model is 5" wide x 6" high, and I cut the photo 4" round and glued it inside. We've been married 23 years.
Hey Kyle great minds think alike. I did this Christmas globe 2 weeks before you did your live video # 171. This was a great piece to do because I met my wife on the internet and this pic was from a wedding we went to in November so I put the text, your the best thing I found on the internet on it using a 30° v bit and I used a 1/8" tapered ball nose for finish. The complete model is 5" wide x 6" high, and I cut the photo 4" round and glued it inside. We've been married 23 years.

jonas Ögren
New laptop mount for the workshop

Alfred Floyd
We needed an address sign. The background is corian that was discarded from a kitchen remodel. The numbers are inlaid using colored corian I found at Habitat. The numbers are inlaid about 1/4" for stability and they stand proud of the background. This was my first attempt at using the Vectric inlay tools.
We needed an address sign. The background is corian that was discarded from a kitchen remodel. The numbers are inlaid using colored corian I found at Habitat. The numbers are inlaid about 1/4" for stability and they stand proud of the background. This was my first attempt at using the Vectric inlay tools.

Clark Inniger
The necks and fretboards are custom modeled in aspire. This project took seven months working on and off. The guitars are made from recycled shipping lumber except the body that is made from a recycled mahogany counter top.
The necks and fretboards are custom modeled in aspire. This project took seven months working on and off. The guitars are made from recycled shipping lumber except the body that is made from a recycled mahogany counter top.
Jamal Alabbood
Just finished this 3d carving on cherry wood

Alfred Floyd
I bought a NextWave HD520 a couple of years ago. It needed a home that would handle the weight as well as providing a place for all the bits and pieces that are needed in a CNC setup. The basic frame of the cart is 2-by lumber doubled up to be like 4x4. The top is three layers of 3/4" baltic birch.
I bought a NextWave HD520 a couple of years ago. It needed a home that would handle the weight as well as providing a place for all the bits and pieces that are needed in a CNC setup. The basic frame of the cart is 2-by lumber doubled up to be like 4x4. The top is three layers of 3/4" baltic birch.
Shannon Peth
Vcarve live edge. 90 degree vbit on this piece I believe

Tony Duderewicz
Here is my Grinch I carved and painted. I used 1/2" Baltic birch plywood and I carved the outlines with a 60 deg v bit. First I put a coat of shellac over the ply I waited till it dries and than I used oramask 813 over it. Carved the lines, sprayed black paint in the grooves, peeled off the masking and proceeded to paint the rest of it. Had a few orders to make.
Here is my Grinch I carved and painted. I used 1/2" Baltic birch plywood and I carved the outlines with a 60 deg v bit. First I put a coat of shellac over the ply I waited till it dries and than I used oramask 813 over it. Carved the lines, sprayed black paint in the grooves, peeled off the masking and proceeded to paint the rest of it. Had a few orders to make.
Grant Wilkinson
This is cut from opaque white acrylic. It measures 12" tall and wide. Acrylic is 1/4" thick. I cut this very conservatively. Feed rate is 40ipm, pass depth is .03". speed is number 2 on the Makita router. The bit is a 1/8" o-flute. So, it is very slow going. However, it results in no sanding and very clean edges.
CAD/CAM is VCarvePro. Code sender is gSender 1.1.7. Sienci Long Mill Mk1 30 x 30.
The “holder” is a length of 3/4" copper pipe, painted white.
This is cut from opaque white acrylic. It measures 12" tall and wide. Acrylic is 1/4" thick. I cut this very conservatively. Feed rate is 40ipm, pass depth is .03". speed is number 2 on the Makita router. The bit is a 1/8" o-flute. So, it is very slow going. However, it results in no sanding and very clean edges.
CAD/CAM is VCarvePro. Code sender is gSender 1.1.7. Sienci Long Mill Mk1 30 x 30.
The “holder” is a length of 3/4" copper pipe, painted white.

Chris Pelletier
This is a Christmas gift for my sisters family. There last name Is “Jones”. There is my Sister and her two boys. It’s made with Red cedar.
This is a Christmas gift for my sisters family. There last name Is “Jones”. There is my Sister and her two boys. It’s made with Red cedar.
JL
Jack Lucernoni
My wife went out of town for a few days. Wanted to surprise her with a new decoration.
Bitmap traced an image I liked & V-carved it into 3/8" ply. Made it like "paint-by -numbers"
Which is more my artistic speed. Added mounting blocks to back and zip tied it to the porch.
Finished with outdoor poly & have a red flood on it at night. She loves it! That's most important.
Sorry for the lousy pictures. Wasn't thinking I would do anything with them.
My wife went out of town for a few days. Wanted to surprise her with a new decoration.
Bitmap traced an image I liked & V-carved it into 3/8" ply. Made it like "paint-by -numbers"
Which is more my artistic speed. Added mounting blocks to back and zip tied it to the porch.
Finished with outdoor poly & have a red flood on it at night. She loves it! That's most important.
Sorry for the lousy pictures. Wasn't thinking I would do anything with them.

Thomas Dunaway
15" Sphere Illusion Charcuterie Board. 1" Cherry with epoxy fill. I run Vectric Aspire on my Axiom AR8 Pro V5.
Sort of looks like a Christmas ornament. Yes it is flat board.
15" Sphere Illusion Charcuterie Board. 1" Cherry with epoxy fill. I run Vectric Aspire on my Axiom AR8 Pro V5.
Sort of looks like a Christmas ornament. Yes it is flat board.
BP
Bob Prichard
I have had my Legacy CNC for nearly 7 years and usually make projects for the Salvation Army toy program that the wood club that I belong to does every year. Been making doll beds and toy cars, etc for each of the last few years. We have now moved back to Texas and don't do much right now with any groups yet. I decided that this Christmas it was time to make something for Christmas. I cutout the wreath and bow shown in the picture and the bow actually attaches to the wreath with magnets making it easy to store once Christmas items are put away. The bow took about 45 minutes to cut and the wreath was over 4.5 hours. Painting took probably 2 hours over a two day period waiting for acrylic paint to dry and then the sealer. I hope everyone enjoys this one as it came out better than I thought. It is hanging on my front door currently. Made out of select pine .75" thick and 20" diameter.
I have had my Legacy CNC for nearly 7 years and usually make projects for the Salvation Army toy program that the wood club that I belong to does every year. Been making doll beds and toy cars, etc for each of the last few years. We have now moved back to Texas and don't do much right now with any groups yet. I decided that this Christmas it was time to make something for Christmas. I cutout the wreath and bow shown in the picture and the bow actually attaches to the wreath with magnets making it easy to store once Christmas items are put away. The bow took about 45 minutes to cut and the wreath was over 4.5 hours. Painting took probably 2 hours over a two day period waiting for acrylic paint to dry and then the sealer. I hope everyone enjoys this one as it came out better than I thought. It is hanging on my front door currently. Made out of select pine .75" thick and 20" diameter.
JB
john barker
Challenge completed ✅
SB
Steve Barnett
I made this Santa Claus for my wife, I used 1/2" MDF since it's indoor. I first painted it all white and then added Oramask, painted the black first and then the red and face color, it was a simple project.
I made this Santa Claus for my wife, I used 1/2" MDF since it's indoor. I first painted it all white and then added Oramask, painted the black first and then the red and face color, it was a simple project.
EC
Earnie Callender
Each year I try to make a Santa for the two girls in my life. The below Santa was carved on a 3D CNC using the sliced model technique that Kyle taught us (thank you Kyle). He is approximately 16” tall and 10 inches wide, made from 6 slabs of Beech. The base is walnut cut from two pieces, using the two sided carve method, again one of Kyle’s lessons. Merry Christmas to all the carvers out there in CNC land! May Santa put 10 board feet of your favorite wood under your Christmas Tree.
Each year I try to make a Santa for the two girls in my life. The below Santa was carved on a 3D CNC using the sliced model technique that Kyle taught us (thank you Kyle). He is approximately 16” tall and 10 inches wide, made from 6 slabs of Beech. The base is walnut cut from two pieces, using the two sided carve method, again one of Kyle’s lessons. Merry Christmas to all the carvers out there in CNC land! May Santa put 10 board feet of your favorite wood under your Christmas Tree.
LD
Lee Dodd
Using the Design and Make pumpkin pie file. I used scrap plywood glue on end grain and carved. V carved couple on bench under bench. Tray is carved out with a v carve sign. Tray is plywood cut in a herringbone pattern. All has multiple layers of clear countertop epoxy.
Xmas gift to wife.
Using the Design and Make pumpkin pie file. I used scrap plywood glue on end grain and carved. V carved couple on bench under bench. Tray is carved out with a v carve sign. Tray is plywood cut in a herringbone pattern. All has multiple layers of clear countertop epoxy.
Xmas gift to wife.

Joseph Unthank
I made this nativity set on my CNC after modifying a set of plans for scroll saws. All pieces were cut with my Shark Pro CNC. The figurines representing Mary and Joseph involved cutting and gluing together pieces for the head/hair, face, body and arms. The angels and wisemen have recessed pockets to receive oval cutouts for faces. Baby Jesus was made from walnut and maple and fits in the arms of Mary and Joseph. The wisemen carry treasures which can be removed from their arms and placed near Jesus. This was my first project requiring pockets, allowances, inserts and 1/8 and 1/16" bits. Six species of wood were used.
I made this nativity set on my CNC after modifying a set of plans for scroll saws. All pieces were cut with my Shark Pro CNC. The figurines representing Mary and Joseph involved cutting and gluing together pieces for the head/hair, face, body and arms. The angels and wisemen have recessed pockets to receive oval cutouts for faces. Baby Jesus was made from walnut and maple and fits in the arms of Mary and Joseph. The wisemen carry treasures which can be removed from their arms and placed near Jesus. This was my first project requiring pockets, allowances, inserts and 1/8 and 1/16" bits. Six species of wood were used.

Gary Thompson
We always borrowed my dad's red pickup to cut down our Christmas tree. This brings back many memories.

Timothy Wojnowiak
lesson on VCarved Patterns with Randy from Vetric UMG 2023 confrères. I created this pattern from just using a few shapes, it was fun but not to sure what to do with it. Check out url: https://ugm.vectric.com/session/vcarved-patterns-randy-johnson
lesson on VCarved Patterns with Randy from Vetric UMG 2023 confrères. I created this pattern from just using a few shapes, it was fun but not to sure what to do with it. Check out url: https://ugm.vectric.com/session/vcarved-patterns-randy-johnson
JB
john barker
Trivets
CF
Caleb Foulks
Maple with a clear finish. Chip Carve

Dick Baynes
Created design in Vectric Aspire
JL
Jack Lucernoni
Was playing around with geometric patter "tiles" and decided to make it a Valentines Day theme. Made this picture frame for my wife. 90 Deg Vcarve with 60 deg. chamfers. Double sided to create the rabbit in the back along with a message. Made from Cherry.
Was playing around with geometric patter "tiles" and decided to make it a Valentines Day theme. Made this picture frame for my wife. 90 Deg Vcarve with 60 deg. chamfers. Double sided to create the rabbit in the back along with a message. Made from Cherry.
RR
Rick Reimer
A distressed flag i Made as a Christmas present (I marked over the name to keep the secret) this was cut into Baltic Birch plywood and then color was added. If I do this again I will play with a epoxy fill.
A distressed flag i Made as a Christmas present (I marked over the name to keep the secret) this was cut into Baltic Birch plywood and then color was added. If I do this again I will play with a epoxy fill.
Donald Michaud
Challenge completed ✅

Scott Whyte
Challenge Coins just seemed appropriate for a Veteran's November LYCNC Challenge Project. I'm new to CNC and this coin display is my second project since having purchased and jumped into the learning curve for my Shark SD120. There are a few 'Oops' lessons depicted...but I am learning so much from this well of knowledge. Thankyou Kyle. Post Traumatic Stress Disorder (PTSD) is a mental illness. I'm a Veteran and I've been doing battle with it for 23 years now. I think too many Veterans, First Responders and Caregivers are taken out by PTSD, both through career loss and suicides. My idea with this project piece is to pitch it 'Crisis Intervention Teams, International'. They hold an annual conference drawing a few thousand members from across the United States and a few countries abroad. There is a robust Challenge Coin exchange at these conferences, which is where my coins came from. There are always awards presented to recognize outstanding members of this community. I'd like to see recovery celebrated with the annual nomination of achievement for a Veteran, a First Responder and a Care Giver, each of whom has been recovering and giving back. I'll be ironing out the Oops's before my pitch though.
Challenge Coins just seemed appropriate for a Veteran's November LYCNC Challenge Project. I'm new to CNC and this coin display is my second project since having purchased and jumped into the learning curve for my Shark SD120. There are a few 'Oops' lessons depicted...but I am learning so much from this well of knowledge. Thankyou Kyle. Post Traumatic Stress Disorder (PTSD) is a mental illness. I'm a Veteran and I've been doing battle with it for 23 years now. I think too many Veterans, First Responders and Caregivers are taken out by PTSD, both through career loss and suicides. My idea with this project piece is to pitch it 'Crisis Intervention Teams, International'. They hold an annual conference drawing a few thousand members from across the United States and a few countries abroad. There is a robust Challenge Coin exchange at these conferences, which is where my coins came from. There are always awards presented to recognize outstanding members of this community. I'd like to see recovery celebrated with the annual nomination of achievement for a Veteran, a First Responder and a Care Giver, each of whom has been recovering and giving back. I'll be ironing out the Oops's before my pitch though.

Tony Duderewicz
I did a Pledge of Allegiance flag. I used Baltic Birch Plywood and painted the wood red and blue. Carved the pockets and painted them white. Measured the area where the stars are going and painted that blue. I put a clear coat over the paint, let it dry, than I used oramask 813 over the entire piece and carved the letters and stars using a 90 v bit and sprayed black for the letters and white for the stars. This was delivered to a American Legion post.
I did a Pledge of Allegiance flag. I used Baltic Birch Plywood and painted the wood red and blue. Carved the pockets and painted them white. Measured the area where the stars are going and painted that blue. I put a clear coat over the paint, let it dry, than I used oramask 813 over the entire piece and carved the letters and stars using a 90 v bit and sprayed black for the letters and white for the stars. This was delivered to a American Legion post.

Jerry Gebhardt
I have been working on a series a historical Characters. Lincoln and Washington was done in Aspire and a 2 sided projects. I have done Robert E Lee and working on Grant. I plan on doing a series of cowboy (John Wayne, Cintm Eastwood, etc)I try and keep the heights at about 18". Also I do a epitaph of each set on a base as shown.
I have been working on a series a historical Characters. Lincoln and Washington was done in Aspire and a 2 sided projects. I have done Robert E Lee and working on Grant. I plan on doing a series of cowboy (John Wayne, Cintm Eastwood, etc)I try and keep the heights at about 18". Also I do a epitaph of each set on a base as shown.
EC
Earnie Callender
Each year I make a Veterans Day Eagle Art pPoject to honor our veterans. Some years the project is from a photograph I took, t his year it was the below carving. The frame if Peruvian Walnut, the eagle is Curly Maple. The Eagle is lifted 1/8" off the back of the frame. Enjou and hpppy Veterans Day.
Each year I make a Veterans Day Eagle Art pPoject to honor our veterans. Some years the project is from a photograph I took, t his year it was the below carving. The frame if Peruvian Walnut, the eagle is Curly Maple. The Eagle is lifted 1/8" off the back of the frame. Enjou and hpppy Veterans Day.

Timothy Wojnowiak
I did it!

Pete Buehn
https://www.etsy.com/shop/naturesliveedge
I am working on this Memorial piece honoring the aircrew members of the 728th Bomb Squadron who gave their lives in service to our great USA flying the B-17 and B-26. I am a retired aviator from what became the 728th Airlift Squadron. It will probably be several weeks before I have all of the name plates (54 total) completed. I did the vector drawings for the B-17 and B-26 with help from what I learned here. Do you notice the protective Eagle in the book matched top board? The name plates are laser engraved on Curly Maple. The machining is being done on my AVID CNC Pro with their OPT laser upgrade. It has been an emotional journey reading about the fates of all the fearless aviators.
I am working on this Memorial piece honoring the aircrew members of the 728th Bomb Squadron who gave their lives in service to our great USA flying the B-17 and B-26. I am a retired aviator from what became the 728th Airlift Squadron. It will probably be several weeks before I have all of the name plates (54 total) completed. I did the vector drawings for the B-17 and B-26 with help from what I learned here. Do you notice the protective Eagle in the book matched top board? The name plates are laser engraved on Curly Maple. The machining is being done on my AVID CNC Pro with their OPT laser upgrade. It has been an emotional journey reading about the fates of all the fearless aviators.

Mark Rose
This is a Memorial Flag Box that was built in memory of the father of a very good friend. Edward Joseph Krahe was a veteran of the Marine Corps and earned a Purple Heart. This Flag Box is built out of solid cherry and is 36" wide by 24" tall. My friend is a beginning woodworker and we collaborated to allow him to learn the fundamentals of woodworking and I sharpened my skills on creating 3D models and integrating them into a larger construction project. The Marines emblem and the Purple Heart Emblem are raised above the face of the box foundation, while the text is sunk into the face of the box. The flag is inserted into the box through a hinged door on the back of the case, secured by a magnetic catch. Semper Fi.
This is a Memorial Flag Box that was built in memory of the father of a very good friend. Edward Joseph Krahe was a veteran of the Marine Corps and earned a Purple Heart. This Flag Box is built out of solid cherry and is 36" wide by 24" tall. My friend is a beginning woodworker and we collaborated to allow him to learn the fundamentals of woodworking and I sharpened my skills on creating 3D models and integrating them into a larger construction project. The Marines emblem and the Purple Heart Emblem are raised above the face of the box foundation, while the text is sunk into the face of the box. The flag is inserted into the box through a hinged door on the back of the case, secured by a magnetic catch. Semper Fi.

Marcus Pedroza
Made this for my sister, she lives in Mexico City
LD
Lee Dodd
I completed this challenge!
Jamal Alabbood
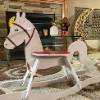
Thrilled to share my latest project – a meticulously carved eagle brought to life with the precision of a CNC machine and the artistic touch of VCarve Pro 3D. The intricate details, from feathered wings to piercing gaze, were meticulously crafted using advanced technology.
After the CNC magic, I opted for a bold choice – a sleek black stain to enhance the majestic presence of the eagle. The contrast creates a stunning visual impact, showcasing the depth of the carving.
Thrilled to share my latest project – a meticulously carved eagle brought to life with the precision of a CNC machine and the artistic touch of VCarve Pro 3D. The intricate details, from feathered wings to piercing gaze, were meticulously crafted using advanced technology.
After the CNC magic, I opted for a bold choice – a sleek black stain to enhance the majestic presence of the eagle. The contrast creates a stunning visual impact, showcasing the depth of the carving.
Jamal Alabbood
Just finished this bowl found it in lesson 84
I try to adjust the file to fit the thickness of the material I used , I make mistakes and try to fix it and now I have this bowl.
Just finished this bowl found it in lesson 84
I try to adjust the file to fit the thickness of the material I used , I make mistakes and try to fix it and now I have this bowl.
SB
Steve Barnett
My daughters asked me to make them some anchor sign with names to put on their door when they go cruises. So, I wanted something like color core and after looking at the price I decided to look at Home Depot to see what they had in the PVC or acrylic type material. I found a .118 thick 24 x 36" project board and it worked great. I painted blue with latex the night before and carved it the next morning, I used a 1/16 O-Flute bit at .05 depth, and this is how it turn out. It looked so good I made all the family one.
My daughters asked me to make them some anchor sign with names to put on their door when they go cruises. So, I wanted something like color core and after looking at the price I decided to look at Home Depot to see what they had in the PVC or acrylic type material. I found a .118 thick 24 x 36" project board and it worked great. I painted blue with latex the night before and carved it the next morning, I used a 1/16 O-Flute bit at .05 depth, and this is how it turn out. It looked so good I made all the family one.

Kurt Bruegl
My wife is Native American, and this symbol shown, Many Trails was designed by one of her distant cousins. I'm making a 'book' for one of her Christmas presents. This is the design I did for it.
My wife is Native American, and this symbol shown, Many Trails was designed by one of her distant cousins. I'm making a 'book' for one of her Christmas presents. This is the design I did for it.

Marcus Pedroza
For those that attended the Q and A the other day here is my initial result. I think I’ll make a frame to go around it.
YT
Yves Tremblay
velo fatbike yves quebec salut kile je suis pas tes cours en direct car je ne parle pas anglais

Dick Baynes
Been working on some boxes - these pictures are of one in some scrap wood and then the start of the same box in Leopard Wood. They measure approximately 8.25"x10.25".
Been working on some boxes - these pictures are of one in some scrap wood and then the start of the same box in Leopard Wood. They measure approximately 8.25"x10.25".

Tony Duderewicz
Made a couple Christmas projects, the cardinal plaque is 9" wide and the cardinal on a lamp post is 8" high.

Alfred Floyd
Rattlesnake Walkway

Marcus Pedroza
This was a project I threw together for my sister in law for Christmas. I've had my Longmill MK2 for little over a year. I use Vcarve Pro. I live in a fairly rural area, one of my biggest hurdles is getting good lumber, and resources... like bits, finishes, etc. The biggest issue I had with this project is not realizing how hard it would be to see the white paint with the chosen wood, aspen. I resealed it and painted it grey and liked it much better!
This was a project I threw together for my sister in law for Christmas. I've had my Longmill MK2 for little over a year. I use Vcarve Pro. I live in a fairly rural area, one of my biggest hurdles is getting good lumber, and resources... like bits, finishes, etc. The biggest issue I had with this project is not realizing how hard it would be to see the white paint with the chosen wood, aspen. I resealed it and painted it grey and liked it much better!
RC
Rodney Carpenter
This candy bowl was segmented in Aspire and made from maple.

Lars Coleman
I created this 3d carved sign out HDU for Halloween. I was very happy with how it carved and how well it came out!
Shannon Peth
I completed this challenge!
RS
Robert Sandstrom
Witches Hat Candy Dish with multiple colored epoxy rim. Made for daughter as gift. Made with maple and multiple table top epoxy pours. Black first, then yellow, and last silver. After epoxy dried, cut out the bowl using bowl bits and then the profile of the hat.
Witches Hat Candy Dish with multiple colored epoxy rim. Made for daughter as gift. Made with maple and multiple table top epoxy pours. Black first, then yellow, and last silver. After epoxy dried, cut out the bowl using bowl bits and then the profile of the hat.

Clark Inniger
I followed the 162 live training and made this Ghost to put in front of my yard light to cast a shadow on my house. Used some leftover 3/4 plastic.
I followed the 162 live training and made this Ghost to put in front of my yard light to cast a shadow on my house. Used some leftover 3/4 plastic.

Tony Duderewicz
Made this Halloween display carving a few 3D models out of cherry and maple. I used a 1/4" endmill for roughing and used a 1/16 tapered ball nose bit on most of the carvings except the hands which I used a 1/32 tapered ball nose bit. Took me over the course of 2 days to finish it, I hope you enjoy this and watch the video also.
Made this Halloween display carving a few 3D models out of cherry and maple. I used a 1/4" endmill for roughing and used a 1/16 tapered ball nose bit on most of the carvings except the hands which I used a 1/32 tapered ball nose bit. Took me over the course of 2 days to finish it, I hope you enjoy this and watch the video also.

Cliff Neal
Made these Gave Stones for a big local party. 2" pink foam board 4'x8' from Big Box Store. Bits & Bits extra long foam cutter. note I had challenges in some text with vbits so just used upcut EM. used a soldering iron and heat gun to do cracks and aging. Used sanded paint from Big box and some other colors I had laying around. You might find some of the head stone wording a bit fun. :)
Made these Gave Stones for a big local party. 2" pink foam board 4'x8' from Big Box Store. Bits & Bits extra long foam cutter. note I had challenges in some text with vbits so just used upcut EM. used a soldering iron and heat gun to do cracks and aging. Used sanded paint from Big box and some other colors I had laying around. You might find some of the head stone wording a bit fun. :)

Lester Sak
A door hanger made from 1/4" MDF.

Chris Pelletier
Made this for my brother to display in his wine store

Tim Adams
Here is my submission for the challenge. Several firsts checked off the list for me on this one, so bear with me.
1). October will mark 2 months free from an alcohol ‘problem’ I have struggled with for years and has held me back in so many ways in life.
2). I’ve been wanting to learn how to use AI to generate images I could vectorize, spend a few minutes node editing, and use on a workpiece, so this one is the AI design I went with for this project.
3). First challenge I’ve entered! Hopefully more to come.
4). First 2 colored epoxy pour for me. Albeit, they’re just black and white with a little Eye Candy added, with a clear tabletop flood coat, but it let me prove to myself that I could actually do it and get decent results with my limited knowledge.
The overall piece is ~6.5” x 9.5” on a scrap piece of MDF I had laying around. It was a fun project to work on. Mistakes were made. Lessons were learned. All part of the process of getting better, in so many different ways in life.
Here is my submission for the challenge. Several firsts checked off the list for me on this one, so bear with me.
1). October will mark 2 months free from an alcohol ‘problem’ I have struggled with for years and has held me back in so many ways in life.
2). I’ve been wanting to learn how to use AI to generate images I could vectorize, spend a few minutes node editing, and use on a workpiece, so this one is the AI design I went with for this project.
3). First challenge I’ve entered! Hopefully more to come.
4). First 2 colored epoxy pour for me. Albeit, they’re just black and white with a little Eye Candy added, with a clear tabletop flood coat, but it let me prove to myself that I could actually do it and get decent results with my limited knowledge.
The overall piece is ~6.5” x 9.5” on a scrap piece of MDF I had laying around. It was a fun project to work on. Mistakes were made. Lessons were learned. All part of the process of getting better, in so many different ways in life.
LB
Lyle Biehn
327, Hamilton Fire Dept., Capt. John Slade

Cliff Neal
My newest Speaker design, tried my first sunburst dye job on the ash. they are very heavy! Used molding profile to cut the walnut speaker grills with an exponential curve to reduce odd reflections. Re: Guitar in center I will post work after Frets and such are done.
My newest Speaker design, tried my first sunburst dye job on the ash. they are very heavy! Used molding profile to cut the walnut speaker grills with an exponential curve to reduce odd reflections. Re: Guitar in center I will post work after Frets and such are done.

Tony Duderewicz
Did a western scene display.
RC
Rodney Carpenter
A pitcher and some spoons I made from cherry.

Tony Duderewicz
Did a few Halloween carvings.

Tim Keller
Here are some of the trivets I’ve made over the years. Some of the people hang them on there wall instead of use them as trivets.
Here are some of the trivets I’ve made over the years. Some of the people hang them on there wall instead of use them as trivets.

cornerstone Knop
I made this in September 2023

Tony Duderewicz
Did a couple edge lit acrylics using a diamond drag bit, the settings I use are in the picture. I used 3/8" cast acrylic and I make my own bases. You can achieve the same results with a cnc as you would with a laser. It might take longer but if you don't have a laser a cnc is just as good. Practice with the settings.
Did a couple edge lit acrylics using a diamond drag bit, the settings I use are in the picture. I used 3/8" cast acrylic and I make my own bases. You can achieve the same results with a cnc as you would with a laser. It might take longer but if you don't have a laser a cnc is just as good. Practice with the settings.

Tim Adams
Bought my CNC about 10 months ago. Due to health issues, I never had a real chance to use it much, so I took advantage of the downtime, invested in myself and watched almost every video Kyle has made and spent some time learning the software without making any cuts. 3 days ago, I was asked if I could make something for a baby shower with a Bigfoot theme. Challenge accepted. Found a logo, created a quick border and some text, V Carved the crap out of it and attempted my first ever epoxy pour. Pretty simple in the end, but it was nice to finally put some of Kyle’s training into practice. And, they loved it!!
Bought my CNC about 10 months ago. Due to health issues, I never had a real chance to use it much, so I took advantage of the downtime, invested in myself and watched almost every video Kyle has made and spent some time learning the software without making any cuts. 3 days ago, I was asked if I could make something for a baby shower with a Bigfoot theme. Challenge accepted. Found a logo, created a quick border and some text, V Carved the crap out of it and attempted my first ever epoxy pour. Pretty simple in the end, but it was nice to finally put some of Kyle’s training into practice. And, they loved it!!

cornerstone Knop
Made in September 2023 200mm long x 100mm wide

cornerstone Knop
A snack tray with ceramic bowls made in Chestnut and resin inlay made in October 2023
DB
Donna Botelho
Bocce Scoreboard. I created and rendered a sample in Corel Draw then brought it to life.
Jamal Alabbood
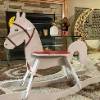
I just finished this trivets for kitchen in lesson 164 hopefully you can do it
SB
Steve Barnett
These are some different shape devil egg tray I have made for friends and family.

Tony Duderewicz
I made these napkin holders for the wife since it's Halloween and Football season, she putting them on the kitchen table.
I made these napkin holders for the wife since it's Halloween and Football season, she putting them on the kitchen table.

jonas Ögren
Made a magnetic knifeblock . Split the oak in to 2 halves . Pocketed holes for the magnets . Glued it together with the neodym magnets sitting 3mm from the front on each side total of 18magnets 9 on each side. Cut out the piece and sanded with upp to 800grit paper. Cut out the foot pieces and meade pochets on underside for small filt pads so tut can not get any scrarces on the countertop. Lasered my logo.
Made a magnetic knifeblock . Split the oak in to 2 halves . Pocketed holes for the magnets . Glued it together with the neodym magnets sitting 3mm from the front on each side total of 18magnets 9 on each side. Cut out the piece and sanded with upp to 800grit paper. Cut out the foot pieces and meade pochets on underside for small filt pads so tut can not get any scrarces on the countertop. Lasered my logo.
RR
Rick Reimer
End Grain Cutting Board Beach with Walnut Inlay.

Jude Shellito
Made some cheese boards. Making the graphic was so much easier thanks to Kyles lessons ! Machined on my Avid and laser etched on my home developed CNC.
Made some cheese boards. Making the graphic was so much easier thanks to Kyles lessons ! Machined on my Avid and laser etched on my home developed CNC.

Lars Coleman
I had this idea to create a spoon rest out of wood. I wanted something unique to use for my teaspoon. I created this spoon rest using a few techniques in Vectric Aspire software while incorporating a few different 3d models and vector clipping to get the final product I was looking for. I wanted to spice it up with a laser engraved customization.
I had this idea to create a spoon rest out of wood. I wanted something unique to use for my teaspoon. I created this spoon rest using a few techniques in Vectric Aspire software while incorporating a few different 3d models and vector clipping to get the final product I was looking for. I wanted to spice it up with a laser engraved customization.
RS
Robert Sandstrom
This is a river charcuterie board I did in July with wine corks embedded. The wine corks are from a friend's winery. Really like the clarity of the epoxy and the ability to read the cork labels.
This is a river charcuterie board I did in July with wine corks embedded. The wine corks are from a friend's winery. Really like the clarity of the epoxy and the ability to read the cork labels.

Clark Inniger
I saw my daughter in law looking at this style cutting board so I gathered my scraps and made her one.

Lester Sak
I worked with a realtor who wanted something special to give as a gift to clients who were purchasing big ticket homes from her. After seeing some of my other projects, she decided on having me design a personalized cutting board with a charcuterie board on the opposite side.
The boards were made from cherry, with final dimensions of 24"L. x 18"W x 1.25" T. She also wanted hers and my logos engraved. This one was made for the family who owns Redner's Markets.
I worked with a realtor who wanted something special to give as a gift to clients who were purchasing big ticket homes from her. After seeing some of my other projects, she decided on having me design a personalized cutting board with a charcuterie board on the opposite side.
The boards were made from cherry, with final dimensions of 24"L. x 18"W x 1.25" T. She also wanted hers and my logos engraved. This one was made for the family who owns Redner's Markets.

John Thaler
I made these trays using VCarve Pro after seeing how you took a round dome/dish and modified it into an oval shape. I have a friend who always brings deviled eggs when ever there is a pot-luck and thought this would be a good learning project. I made three all from old boards I had in the shop.
I made these trays using VCarve Pro after seeing how you took a round dome/dish and modified it into an oval shape. I have a friend who always brings deviled eggs when ever there is a pot-luck and thought this would be a good learning project. I made three all from old boards I had in the shop.
RC
Rodney Carpenter
Kitchen spoon I made for my wife.

Dick Baynes
My wife was in the room while today's class was going on and she heard Kyle mention the monthly challenge. She insisted I put my dishwasher clean/dirty sign in the challenge. Been doing a lot of other stuff for a craft show coming up in October...other than this sign, nothing really kitchen related.
My wife was in the room while today's class was going on and she heard Kyle mention the monthly challenge. She insisted I put my dishwasher clean/dirty sign in the challenge. Been doing a lot of other stuff for a craft show coming up in October...other than this sign, nothing really kitchen related.
LW
Lucky Warwick
I was experimenting with an inlay within an inlay.
PH
Pat Hiller
Deviled egg tray, 3/4 inch walnut with mineral oil finish
RS
Robert Sandstrom
3/4" Western Maple on the rectangle tray. Mixtures of Western Maple, Mahogany, and Sapele on the Standup and Sitting Chicken. These started out at 3/4" but ended up between 5/8 and 11/16" after glue-up and milling efforts.
3/4" Western Maple on the rectangle tray. Mixtures of Western Maple, Mahogany, and Sapele on the Standup and Sitting Chicken. These started out at 3/4" but ended up between 5/8 and 11/16" after glue-up and milling efforts.

jonas Ögren
Finaly done with 200 circular snuff boxes for a tiktok influencer. 100 small and 100 big. Lasering all the small ones tomorrow then putting on the finniching oil.
Finaly done with 200 circular snuff boxes for a tiktok influencer. 100 small and 100 big. Lasering all the small ones tomorrow then putting on the finniching oil.

Lester Sak
My son moved to Tucson Arizona last year for a job, and my wife and I are finally able to go out to visit. Tom hikes and camps quite a bit on Mt. Lemmon so I thought it would be cool to make a topographic map of the area and bring it to him when we go.
This was done in Cherry, 10.5" w. x 7.75" h. x 1.125" t. The carve took almost 9 hours using a .25" roughing endmill, and a 1/4" BN and 1mm TBN for the finish.
I planned on just spraying it with lacquer, but it was a humid day and the lacquer blushed, turning it milky white. I was aware this could happen, but I've sprayed on other humid days with no problems. Never again, lol. Since there was no way to sand the mountains and respray another day, I decided to try painting it. I've never used an airbrush, but I borrowed one from a friend. I learned a lot about airbrushes and now I want one :)
My son moved to Tucson Arizona last year for a job, and my wife and I are finally able to go out to visit. Tom hikes and camps quite a bit on Mt. Lemmon so I thought it would be cool to make a topographic map of the area and bring it to him when we go.
This was done in Cherry, 10.5" w. x 7.75" h. x 1.125" t. The carve took almost 9 hours using a .25" roughing endmill, and a 1/4" BN and 1mm TBN for the finish.
I planned on just spraying it with lacquer, but it was a humid day and the lacquer blushed, turning it milky white. I was aware this could happen, but I've sprayed on other humid days with no problems. Never again, lol. Since there was no way to sand the mountains and respray another day, I decided to try painting it. I've never used an airbrush, but I borrowed one from a friend. I learned a lot about airbrushes and now I want one :)

jonas Ögren
Upcomming project old style 1900s kitchen sofa . Thoughti would use the cnc to cut ot the sides and also make slot in the seats for the leaning back. Software i use to draw models i Shapr3d. Check link to se the model in 3d or in ARin full size. https://collaborate.shapr3d.com/v/LWvUwHAhoH4Sj2185BuFu
Upcomming project old style 1900s kitchen sofa . Thoughti would use the cnc to cut ot the sides and also make slot in the seats for the leaning back. Software i use to draw models i Shapr3d. Check link to se the model in 3d or in ARin full size. https://collaborate.shapr3d.com/v/LWvUwHAhoH4Sj2185BuFu
CF
Caleb Foulks
Cookie stamps
CF
Caleb Foulks
Puzzle tray from the lesson. Wood sampler. Cherry red oak ash and walnut
 Made by Testimonial