

Student Project Gallery for Learn Your CNC Academy
Lester Sak
These are cherry bifold louver doors that I finished last month for laundry area and furnace. Because the dryer & furnace burn gas, I wanted to make sure there would be enough combustion air, so I angled the louvers at 30 degrees to provide more air flow.
The louvers took some time, there are 90 louvers per door (360 total). Each louver was rough cut on the table saw, then went to the planer, drum sander 120 grit (both sides), then random orbital sanded at 220 grit (both sides) in a make-shift jig that holds 22 louvers at a time. And finally, the router table to round over the edges (4 passes each for a total of 1440 passes). I used System Three T-88 Epoxy for glue-up due to the time it takes to line up all of the louvers (not fun!)
These are cherry bifold louver doors that I finished last month for laundry area and furnace. Because the dryer & furnace burn gas, I wanted to make sure there would be enough combustion air, so I angled the louvers at 30 degrees to provide more air flow.
The louvers took some time, there are 90 louvers per door (360 total). Each louver was rough cut on the table saw, then went to the planer, drum sander 120 grit (both sides), then random orbital sanded at 220 grit (both sides) in a make-shift jig that holds 22 louvers at a time. And finally, the router table to round over the edges (4 passes each for a total of 1440 passes). I used System Three T-88 Epoxy for glue-up due to the time it takes to line up all of the louvers (not fun!)

Tim Karash
I have christened this chip carve "Swirling Around the Drain" AKA my life.
It's 8.5 inches in diameter on 0.75 thick maple, and a quick blast of rattle can gloss poly.
The "Beauty Mark" at 12 o'clock, took extensive planning.
I have christened this chip carve "Swirling Around the Drain" AKA my life.
It's 8.5 inches in diameter on 0.75 thick maple, and a quick blast of rattle can gloss poly.
The "Beauty Mark" at 12 o'clock, took extensive planning.

Michael Messuri
Just added this to my offerings that my wife sells when she is doing her open air markets events. Just need to apply 2 coats of poly to the top and it's done
Just added this to my offerings that my wife sells when she is doing her open air markets events. Just need to apply 2 coats of poly to the top and it's done

Tim Karash
This one is similar to the "Swirling the Drain" that I carved earlier, but just a slight variation on the theme. It's also smaller at 9 inch diameter.
I used 0.75 thick maple, and cut it with a 1 inch 90 degree V bit.
This one I have labeled "The Blade"
This one is similar to the "Swirling the Drain" that I carved earlier, but just a slight variation on the theme. It's also smaller at 9 inch diameter.
I used 0.75 thick maple, and cut it with a 1 inch 90 degree V bit.
This one I have labeled "The Blade"

Tim Karash
Just a simple clock that is guaranteed to confuse Millennials, Gen Z, & Gen Alpha.
Cut from hickory stock.
Just a simple clock that is guaranteed to confuse Millennials, Gen Z, & Gen Alpha.
Cut from hickory stock.

Tony Duderewicz
made this out of maple. Size is 8-1/2" wide x 11" high, I used a .125 tapered ball nose and a .0625 tapered ball nose on this. The font is IFC Railroad and I made the letters .125" high
made this out of maple. Size is 8-1/2" wide x 11" high, I used a .125 tapered ball nose and a .0625 tapered ball nose on this. The font is IFC Railroad and I made the letters .125" high

Tony Duderewicz
I designed and carved this Taylor Bass kicker for the Buffalo Bills vs Miami Dolphins 30-27

Brent Schaffer
Kudos to Rob S for the lesson a while back on epoxy signs. I was commissioned by my neighbor to make a sign for his new cabin. Originally, it was going to be painted. After watching Rob's Learn Your CNC lesson, I decided to take a crack at epoxy. This is my first one and it came out super. Needless to say the neighbor is thrilled. Thanks Rob!!!
Kudos to Rob S for the lesson a while back on epoxy signs. I was commissioned by my neighbor to make a sign for his new cabin. Originally, it was going to be painted. After watching Rob's Learn Your CNC lesson, I decided to take a crack at epoxy. This is my first one and it came out super. Needless to say the neighbor is thrilled. Thanks Rob!!!

Dwight Ferguson
Made this "Pak Flat" Cat House using two cats as an outline for the door. Then lasered a kitten with a butterfly and painted with acrylic paint. Butterflies are cutouts on sides and back. Learned a lot from this project!
Made this "Pak Flat" Cat House using two cats as an outline for the door. Then lasered a kitten with a butterfly and painted with acrylic paint. Butterflies are cutouts on sides and back. Learned a lot from this project!
Ellen Wicker
I am new to this community. Just want to share the last thing I have made for fun. I am all over the place making different projects of all kinds. Lately I have been really enjoying making cutting boards. Love how these are turning out.
I am new to this community. Just want to share the last thing I have made for fun. I am all over the place making different projects of all kinds. Lately I have been really enjoying making cutting boards. Love how these are turning out.

Kevin Zufelt
It’s hard to find time to decorate with an infant. My solution? Make a 6.5 ft tall Grinch to “steal” all my decorations. Now I get it all done in 10 minutes. This was a fun project, except for the painting, and was my first attempt at tiling a project. It’s not perfect, but it was a great learning experience and I’m really happy with how it looks.
It’s hard to find time to decorate with an infant. My solution? Make a 6.5 ft tall Grinch to “steal” all my decorations. Now I get it all done in 10 minutes. This was a fun project, except for the painting, and was my first attempt at tiling a project. It’s not perfect, but it was a great learning experience and I’m really happy with how it looks.

Tony Duderewicz
A colorful plaque I carved and painted.

Jamal Alabbood
Just design and made it , Ohio trivet , in vcarve pro

John Scarlett
A friend of the family is a huge Star Wars fan and my son came up with this idea for a gift exchange. Everything was designed in Aspire. The Death Star was 3D modeled and carved out of Cherry. The storm trooper was split into multiple closed vectors that were then exported to Fusion 360, extruded, 3D printed and assembled. The storm trooper is on 2 pins giving room for LED lights. Had lots of fun with this one.
A friend of the family is a huge Star Wars fan and my son came up with this idea for a gift exchange. Everything was designed in Aspire. The Death Star was 3D modeled and carved out of Cherry. The storm trooper was split into multiple closed vectors that were then exported to Fusion 360, extruded, 3D printed and assembled. The storm trooper is on 2 pins giving room for LED lights. Had lots of fun with this one.

Chris Pelletier
Getting ready for the holiday fair

Tony Duderewicz
A few ornaments I made and carved.

Dwight Ferguson
Made this 19" x 15" by 3/4" inch Christmas tray using BAMX panels made with 1/8 inch mahogany top and bottom with bamboo sandwich in the center from Cutting it Close. What a pleasure it was not having to prep the wood prior to the carving! This was a one and a half hour carve.
I used epoxy with gold flakes to give it a little sparkle in the VCarve design. It was an hour just sanding the epoxy down so a total of 2 1/2 hours from start to finish.
This is the URL: https://cicworkshop.com/collections/wooden-panels/products/bamx?variant=42974606098623
Made this 19" x 15" by 3/4" inch Christmas tray using BAMX panels made with 1/8 inch mahogany top and bottom with bamboo sandwich in the center from Cutting it Close. What a pleasure it was not having to prep the wood prior to the carving! This was a one and a half hour carve.
I used epoxy with gold flakes to give it a little sparkle in the VCarve design. It was an hour just sanding the epoxy down so a total of 2 1/2 hours from start to finish.
This is the URL: https://cicworkshop.com/collections/wooden-panels/products/bamx?variant=42974606098623

Len Greiner
I'd like to say that this was a fun little project but that would be a lie. This thing gave me fits at every turn.
It only works with a .75" or larger 90-degree v-bit, I didn't own one, thanks IDC. Forgot to reset my zero in the controller, ate the first 2 x 2 piece of poplar. That "Little Stiffy" bit is sturdy no doubt.
Because of the small size of the reindeer every time I made the final cut the antlers would break off.
The vacuum table (16 x 16 Airweights) with a fixture plate pulled the one end lower than the other and cut the letters progressively deeper as it cut, now it looks like the excitement is building the closer we get to Christmas.
One positive note, the pocket for the votive candle was a perfect fit on the first try.
Still have to clear coat it before the grandkids gets here today, so back to the frozen shop for more holiday cheer.
If anybody else wants to punish themself with this, please let me know and I'll put it in the Community Member Files page. Merry Christmas everyone.
I'd like to say that this was a fun little project but that would be a lie. This thing gave me fits at every turn.
It only works with a .75" or larger 90-degree v-bit, I didn't own one, thanks IDC. Forgot to reset my zero in the controller, ate the first 2 x 2 piece of poplar. That "Little Stiffy" bit is sturdy no doubt.
Because of the small size of the reindeer every time I made the final cut the antlers would break off.
The vacuum table (16 x 16 Airweights) with a fixture plate pulled the one end lower than the other and cut the letters progressively deeper as it cut, now it looks like the excitement is building the closer we get to Christmas.
One positive note, the pocket for the votive candle was a perfect fit on the first try.
Still have to clear coat it before the grandkids gets here today, so back to the frozen shop for more holiday cheer.
If anybody else wants to punish themself with this, please let me know and I'll put it in the Community Member Files page. Merry Christmas everyone.

Tony Duderewicz
Christmas is coming plaque I carved and painted with acrylic paints. Size is 9" x 8.5" wide. used a 1/4" endmill for roughing and a 1/16" tapered ball nose for finish toolpath, 4 hr carve.
Christmas is coming plaque I carved and painted with acrylic paints. Size is 9" x 8.5" wide. used a 1/4" endmill for roughing and a 1/16" tapered ball nose for finish toolpath, 4 hr carve.
BJ
Bob Jotte
10 months of your course, Kyle, learning Aspire v12, ultimately purchased a Maverick 3 x 5 Pro and finally made my first two real projects this month. I still have a lot to learn and perfect, but couldn't have done it without your tireless teachings. Appreciate what you do for us, especially the newbies, and look forward to many years perfecting my CNC abilities. Thanks!
10 months of your course, Kyle, learning Aspire v12, ultimately purchased a Maverick 3 x 5 Pro and finally made my first two real projects this month. I still have a lot to learn and perfect, but couldn't have done it without your tireless teachings. Appreciate what you do for us, especially the newbies, and look forward to many years perfecting my CNC abilities. Thanks!

Dwight Ferguson
Have you ever wanted to view the actual woodgrain direction of what you're cutting, including end grain cutting boards with inlays?
I have figured it out, and it's really easy to do. I have also attached a zip file in the PDF file,with the different Y direction wood grains.
I have found it amazing to be able to actually see the direction of the wood grain. I am using. It also helps me visualize when I'm cutting small parts to make sure that they are situated in the correct grain direction.
Enjoy! If you have any questions, let me know!
Have you ever wanted to view the actual woodgrain direction of what you're cutting, including end grain cutting boards with inlays?
I have figured it out, and it's really easy to do. I have also attached a zip file in the PDF file,with the different Y direction wood grains.
I have found it amazing to be able to actually see the direction of the wood grain. I am using. It also helps me visualize when I'm cutting small parts to make sure that they are situated in the correct grain direction.
Enjoy! If you have any questions, let me know!

Tony Duderewicz
Did this for a friend who lost her dogs over the years.

Jude Shellito
Sharing my latest project. I made 12 Jubilee crosses. I used the techniques Kyle teaches to create the artwork from a bitmap image. I used vcarve to cut the emblem and poured the 7 different epoxy colors. I also used v carve to create the arms of the cross. Used v carve to make templates since there was 12 of them. The rest was made with conventional wood working equipment, table saw, miter saw etc. The wood is hard white maple I sourced from a local saw mill.
Sharing my latest project. I made 12 Jubilee crosses. I used the techniques Kyle teaches to create the artwork from a bitmap image. I used vcarve to cut the emblem and poured the 7 different epoxy colors. I also used v carve to create the arms of the cross. Used v carve to make templates since there was 12 of them. The rest was made with conventional wood working equipment, table saw, miter saw etc. The wood is hard white maple I sourced from a local saw mill.
DB
Donna Botelho
Haha, when a customer wants what they want you make it. Office humor at it's finest! LOL
Recently finished this new form of Cribbage Game that was requested by a client.

Jamal Alabbood
Handcrafted 3D Wooden Wall Art – Elderly Couple Embrace

Len Greiner
At a family gathering my sister-in-law ask if I could 3D print a "Knitty Knotty" to which I answered " maybe if I had any idea what that is". This is a Knitty Knotty, I had to do some searching to find pictures of one on the internet.
It's used for measuring yard after you spin it. I found many that were indeed 3D printed, usually in two interlocking pieces, all looked rather flimsy. I also saw many others that were made from wood and decided that I would take a stab at making one out of poplar. I had the spindle from another project.
They have a small farm where they raise goats and chickens, so I decided to make a logo that I thought would look nice for it. I used Copilot AI to create the logo and used the generated image to Sketch Carve it on one end along with the name of their farm.
I used Oramask for the V-carving of the letters and airbrushed them before flipping it to the other side. I later gave it 2 coats of shellac and hand painted the logo with a small brush and acrylic paint. A quick sanding job and coated with a couple coats of clear. Ready to do Knitty Knotty things.
This was my first double sided project, and I need to rewatch some of those lessons before next time. It turned out ok but not perfect like I expect of myself.
At a family gathering my sister-in-law ask if I could 3D print a "Knitty Knotty" to which I answered " maybe if I had any idea what that is". This is a Knitty Knotty, I had to do some searching to find pictures of one on the internet.
It's used for measuring yard after you spin it. I found many that were indeed 3D printed, usually in two interlocking pieces, all looked rather flimsy. I also saw many others that were made from wood and decided that I would take a stab at making one out of poplar. I had the spindle from another project.
They have a small farm where they raise goats and chickens, so I decided to make a logo that I thought would look nice for it. I used Copilot AI to create the logo and used the generated image to Sketch Carve it on one end along with the name of their farm.
I used Oramask for the V-carving of the letters and airbrushed them before flipping it to the other side. I later gave it 2 coats of shellac and hand painted the logo with a small brush and acrylic paint. A quick sanding job and coated with a couple coats of clear. Ready to do Knitty Knotty things.
This was my first double sided project, and I need to rewatch some of those lessons before next time. It turned out ok but not perfect like I expect of myself.

Dwight Ferguson
I made this 3" x 27 1/2" x 18" cutting board from a hard Maple slab. I used a combination of Sketch Carve and V-carve, and manipulated the depth of cut in sketch carve in order to get a .45" cut depth for an epoxy fill. It worked out great due to the fact that it was a large carve.
I made this 3" x 27 1/2" x 18" cutting board from a hard Maple slab. I used a combination of Sketch Carve and V-carve, and manipulated the depth of cut in sketch carve in order to get a .45" cut depth for an epoxy fill. It worked out great due to the fact that it was a large carve.
Lester Sak
For Christmas, I made a bunch of lithophanes for the family and fitted them in a one-piece cherry frame that I carved. I used tape LED lighting and carved a diffraction lens for each out of 1/4" acrylic using a 60* v-bit so the light would spread evenly without hotspots. And on the backs, I laser engraved the date the photo was taken, along with a QR code that when scanned gives a link to the original photo. The lithophanes were carved from some solid surface material for countertops with a 1/32" ballnose. Each piece is 3.5"x4" and took a little over 2 hours on average. Everyone loved them, great gift idea if you can find the material!
For Christmas, I made a bunch of lithophanes for the family and fitted them in a one-piece cherry frame that I carved. I used tape LED lighting and carved a diffraction lens for each out of 1/4" acrylic using a 60* v-bit so the light would spread evenly without hotspots. And on the backs, I laser engraved the date the photo was taken, along with a QR code that when scanned gives a link to the original photo. The lithophanes were carved from some solid surface material for countertops with a 1/32" ballnose. Each piece is 3.5"x4" and took a little over 2 hours on average. Everyone loved them, great gift idea if you can find the material!

Tony Duderewicz
A few of my Lithophanes I carved all using a 1/32" tapered ball nose or a 1/16" tapered ball nose bit depending on photo and detail. Fun to make
A few of my Lithophanes I carved all using a 1/32" tapered ball nose or a 1/16" tapered ball nose bit depending on photo and detail. Fun to make

Jamal Alabbood
Finished carving this 3d model added base to it, then added touch of paint to highlight the shadow.

Wayne Burton
Something I made for our pet. My wife painted it.

Marcus Pedroza
A coworker bought a new home so threw this together…
PT
Paul Tuffin
First double sided project using Aspire and an iTECH K6090T Desktop CNC Router.
I didn't use the double sided feature of Aspire as I haven't completed any lessons on this yet. I just created a reverse image on a new sheet and created new tool paths.
I used 20mm dogs as dowels on the centreline. Material - Lacewood for cockerell and golf ball - African rosewood for pedestal.
First double sided project using Aspire and an iTECH K6090T Desktop CNC Router.
I didn't use the double sided feature of Aspire as I haven't completed any lessons on this yet. I just created a reverse image on a new sheet and created new tool paths.
I used 20mm dogs as dowels on the centreline. Material - Lacewood for cockerell and golf ball - African rosewood for pedestal.
TI
Tom Imel
Valentines Day present. Created from one of the Valentines series of Kyles trainings.

Tony Duderewicz
Made a keepsake box overall size is 11" wide x 10-1/8' x 6-1/2" high. Took a while to figure it all out, but Kyle's videos helped, thank you.
Made a keepsake box overall size is 11" wide x 10-1/8' x 6-1/2" high. Took a while to figure it all out, but Kyle's videos helped, thank you.

Robert Pastor
My nephew passed away so I made a lithophane of his parents' favorite picture.
SB
Steve Bobby
Changed a few items. I 3-d printed the knobs and top. The top is a friction fit. The body is 1.25 material but I pocket cut the openings instead of cutting different pieces. So the whole body is 1 solid piece. The base is 1” thick material
Changed a few items. I 3-d printed the knobs and top. The top is a friction fit. The body is 1.25 material but I pocket cut the openings instead of cutting different pieces. So the whole body is 1 solid piece. The base is 1” thick material
TP
TJ Pinta
1st double sided carve. For a coworker who lost her daughter. Cedar

Wendy Davis
Wanted to make a unique project with ocean theme for a fund raising auction.
TK
Tim Karash
This was my first attempt at layering multiple designs and carving them.
The base is hard maple with laminations of 0.125" walnut and a second layer of 0.125" maple.
This was my first attempt at layering multiple designs and carving them.
The base is hard maple with laminations of 0.125" walnut and a second layer of 0.125" maple.

Jude Shellito
I made a cool truck snack tray for my grandson. I made the graphic in v carve. I need to purchase a better bowl bit to make the bottom more smooth.
I made a cool truck snack tray for my grandson. I made the graphic in v carve. I need to purchase a better bowl bit to make the bottom more smooth.
N
Nadine
WONDER BY WOOD
I am designing & making woodart for 2 years now. And I recently percased my CNC to be able to make different kind of designs (more round shaped & curvey) AND faster :) This is one of the first woodart designs I made with my CNC machine after completing the course 2 months ago. Very happy with the result. I only have to figure out how to get rid of the square lines.
I am designing & making woodart for 2 years now. And I recently percased my CNC to be able to make different kind of designs (more round shaped & curvey) AND faster :) This is one of the first woodart designs I made with my CNC machine after completing the course 2 months ago. Very happy with the result. I only have to figure out how to get rid of the square lines.
RS
Randy D. Stanford
Stanford's Quality Wood Carvings
I just had a thrill for fishing and it was fun carving this largemouth bass. The paint job might not be the best.the 3d modeling helped me tackle this project. There was really no real challenges involved that I know of.proud of all the good comments I got on Facebook.
I just had a thrill for fishing and it was fun carving this largemouth bass. The paint job might not be the best.the 3d modeling helped me tackle this project. There was really no real challenges involved that I know of.proud of all the good comments I got on Facebook.

Rodney Snoddon
Idlewood Crafts
This is a project that I made for a friend in a car club I first made some using paint and the next year he asked if I could make him some more. At that time I told him I am making things with epoxy and he said sounds good so I made him four of these using epoxy and he was very happy with the way they turned out as he gave them to the fowls who helped his with the car shows.
This is a project that I made for a friend in a car club I first made some using paint and the next year he asked if I could make him some more. At that time I told him I am making things with epoxy and he said sounds good so I made him four of these using epoxy and he was very happy with the way they turned out as he gave them to the fowls who helped his with the car shows.
Jamal Alabbood
Just finished carving and painting this 3d model golum from the lord of the ring hope you like it

Tony Duderewicz
I missed the live lesson on this on Thursday but have done a lot of stacked text. I have done this 2 yrs ago using aspire. Pocket is .25" deep, bottom text is .125"high and the top text is .15 high. I only used a .125 tapered ball nose bit for the toolpath. All I did was click on the vector border and do a 3D finish toolpath, that's it.
I missed the live lesson on this on Thursday but have done a lot of stacked text. I have done this 2 yrs ago using aspire. Pocket is .25" deep, bottom text is .125"high and the top text is .15 high. I only used a .125 tapered ball nose bit for the toolpath. All I did was click on the vector border and do a 3D finish toolpath, that's it.

Dwight Ferguson
This is another custom 3D carved bench 100% designed in Aspire 12. Used 3" maple for legs and 2" for back and seat. Has the Bonneville Dam carved in the back.(It is a local dam here in the NorthWest on the Columbia river). The legs have the Army Corp of Engineers Castle carved on the ends. It is 36"H X 54"L X 23"W
This is another custom 3D carved bench 100% designed in Aspire 12. Used 3" maple for legs and 2" for back and seat. Has the Bonneville Dam carved in the back.(It is a local dam here in the NorthWest on the Columbia river). The legs have the Army Corp of Engineers Castle carved on the ends. It is 36"H X 54"L X 23"W

Dwight Ferguson
This was a custom design/carve out of crotch maple using Aspire 12. It is 7" X 7" X 1". Going to Australia!

Tim Karash
Chip Carved in maple , just under 12 inches in diameter.

Tony Duderewicz
Carved this cross in cherry, measures 11" x 7 1/2"
John Schmucker
Hey Kyle, just wanted to say thanks for the help on the flowers for my plaque, Here is the pic of how it turned out.
P.s the verse is the Lord's Prayer in German.
Hey Kyle, just wanted to say thanks for the help on the flowers for my plaque, Here is the pic of how it turned out.
P.s the verse is the Lord's Prayer in German.

Scott Vorhees
I decided to just use the rope border in the clip art because I wanted it going one direction.

Marcus Pedroza
Finally tried the tiling! Not as hard as I expected. Thanks for the guidance in your lessons!
David Chamberlain
Kyle, I used your wavey flag file for the front of this.

Eric meertens
CNC
JL
Jack Lucernoni
Making these Soap/Lotion Dispensers to donate to our club. We have a booth each year at our County Fair. All proceeds go to Make-A-Wish Foundation. My inspiration for this was from an article in a Wood Carving magazine. This model is made from Cherry using 30 & 60 Deg. V Bits. Used miter fold techniques from earlier lessons. Grain match was perfect! Designed so the "Center" portion can have various design possibilities for easy customization. Sealed with Shellac prior to carving, then used Ebony stain in carved areas. Finished with Helmsman Spar Urethane.
Making these Soap/Lotion Dispensers to donate to our club. We have a booth each year at our County Fair. All proceeds go to Make-A-Wish Foundation. My inspiration for this was from an article in a Wood Carving magazine. This model is made from Cherry using 30 & 60 Deg. V Bits. Used miter fold techniques from earlier lessons. Grain match was perfect! Designed so the "Center" portion can have various design possibilities for easy customization. Sealed with Shellac prior to carving, then used Ebony stain in carved areas. Finished with Helmsman Spar Urethane.

Len Greiner
I had a piece of popular left over from a sign that I am making and decided to make myself a unique sign for my office wall. I am the only maintenance man for 9 area plants and I'm the only person with old school knowledge left so there is a constant barrage of problems that end up on my slate. This is a sketch carving that I generated using AI (new school) quoting my response to my younger workmates.
Surprisingly the CA glue broke loose about 6 minutes from the end of this carve and I was there to catch it and pause the program. This is the only time that this has ever happened to me and one time that I was glad to have a grid cut into my spoil board. There is one extra line cut into the carve from the movement but I'm the only one who will ever know which one.
This was cut with a 1/4" 60 V-bit completely and took about 2 hours to cut. I put the chamfer on with a DA sander when I was finished since I couldn't trust my XY zero 100%. Oramask and airbrushed with acrylic art paint thinned down, (dries super fast) and cleared. Super hard to weed the mask but well worth the effort.
I had a piece of popular left over from a sign that I am making and decided to make myself a unique sign for my office wall. I am the only maintenance man for 9 area plants and I'm the only person with old school knowledge left so there is a constant barrage of problems that end up on my slate. This is a sketch carving that I generated using AI (new school) quoting my response to my younger workmates.
Surprisingly the CA glue broke loose about 6 minutes from the end of this carve and I was there to catch it and pause the program. This is the only time that this has ever happened to me and one time that I was glad to have a grid cut into my spoil board. There is one extra line cut into the carve from the movement but I'm the only one who will ever know which one.
This was cut with a 1/4" 60 V-bit completely and took about 2 hours to cut. I put the chamfer on with a DA sander when I was finished since I couldn't trust my XY zero 100%. Oramask and airbrushed with acrylic art paint thinned down, (dries super fast) and cleared. Super hard to weed the mask but well worth the effort.

Jude Shellito
Finally finished the project. The top is plywood with maple veneer, the legs are maple with cherry accents and the base is oak. Designed in sketch up. Cut the top and curved pcs using vectric and Avid CNC.
Finally finished the project. The top is plywood with maple veneer, the legs are maple with cherry accents and the base is oak. Designed in sketch up. Cut the top and curved pcs using vectric and Avid CNC.

Robert Pastor
My newest project, an Italian wheellock pistol RBG for LARP. Everything except barrel, ramrod, and brass thimble was designed and cut with Aspire.
My newest project, an Italian wheellock pistol RBG for LARP. Everything except barrel, ramrod, and brass thimble was designed and cut with Aspire.
Robert Jennings
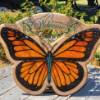
Chip Carving, on 12x17 6/4 Hard Maple, epoxy filled Clock. Picture not so good. The shapes between the Letters/numbers on the clock face are also filled with epoxy even though they do not appear to be. First multi color epoxy pour on chip carve there are a few Boo-Boos but that is the old learning curve acting up.
Chip Carving, on 12x17 6/4 Hard Maple, epoxy filled Clock. Picture not so good. The shapes between the Letters/numbers on the clock face are also filled with epoxy even though they do not appear to be. First multi color epoxy pour on chip carve there are a few Boo-Boos but that is the old learning curve acting up.
RC
Rodney Carpenter
Challenge completed ✅
RD
Randy Dotson
A case for my son's Magic cards.

Len Greiner
My first attempt at chip carving and epoxy resin all in one project. I found the chip carving easier to design than I thought, and the epoxy resin a little more challenging than I expected. I chose to use all straight lines in the carving, and I like the way it came together. I had hoped the star would have turned out a little more translucent to show the figure in the wood better and the detail of the carve but all in all I think it turned out pretty good.
I do see where I will be able to incorporate both of these elements in future projects. Thanks @Kyle Ely for the chip carving lessons and @Tim Adams for the inspiration to try my hand at epoxy.
My first attempt at chip carving and epoxy resin all in one project. I found the chip carving easier to design than I thought, and the epoxy resin a little more challenging than I expected. I chose to use all straight lines in the carving, and I like the way it came together. I had hoped the star would have turned out a little more translucent to show the figure in the wood better and the detail of the carve but all in all I think it turned out pretty good.
I do see where I will be able to incorporate both of these elements in future projects. Thanks @Kyle Ely for the chip carving lessons and @Tim Adams for the inspiration to try my hand at epoxy.
Jamal Alabbood
This exquisite carving of Jesus is crafted from premium maple wood, known for its fine grain and smooth texture. The 3D model is intricately detailed, capturing the profound expression and grace of the figure. After carving, the piece is carefully finished and stained to enhance the natural beauty of the maple, adding depth and warmth to the design. The result is a stunning work of art that embodies both craftsmanship and spiritual significance, making it a perfect addition to any home or sacred space.
This exquisite carving of Jesus is crafted from premium maple wood, known for its fine grain and smooth texture. The 3D model is intricately detailed, capturing the profound expression and grace of the figure. After carving, the piece is carefully finished and stained to enhance the natural beauty of the maple, adding depth and warmth to the design. The result is a stunning work of art that embodies both craftsmanship and spiritual significance, making it a perfect addition to any home or sacred space.

Dwight Ferguson
I designed this using the chip carving lessons that we had recently. It was a really fun set of lessons! I had been wanting to do something similar and had tried in the past and was not successful. Designed the center of the carving and a few others using lesson guidelines. The others I brought in from the chip carving lesson templates from Vetric WUGM 2023. After I was through designing, it kind of looked like something from Brazil so I decided to name it "Save the forest" in Portuguese. Thus Salve a Floresta". I have it raised above a black board background.
I designed this using the chip carving lessons that we had recently. It was a really fun set of lessons! I had been wanting to do something similar and had tried in the past and was not successful. Designed the center of the carving and a few others using lesson guidelines. The others I brought in from the chip carving lesson templates from Vetric WUGM 2023. After I was through designing, it kind of looked like something from Brazil so I decided to name it "Save the forest" in Portuguese. Thus Salve a Floresta". I have it raised above a black board background.

Tony Duderewicz
Made this plaque for a great cnc friend who just turned 80. We have a group of cnc friends that get together every week and surprised him with a surprised Birthday celebration.
Made this plaque for a great cnc friend who just turned 80. We have a group of cnc friends that get together every week and surprised him with a surprised Birthday celebration.

Robert Pastor
These are copies of the 15th-century Glastonbury chair at the Bishop's palace in Wells, UK. I cut the pieces with the CNC, the pegs are turned on the ends with 4th axis, the shield design with the laser.
These are copies of the 15th-century Glastonbury chair at the Bishop's palace in Wells, UK. I cut the pieces with the CNC, the pegs are turned on the ends with 4th axis, the shield design with the laser.

David Chamberlain
I built a Japanese style gazebo over a decorative bench. I used the CNC to cut the curved rafter and the curved 45° braces. I had to place all the items diagonally on my machine to fit.
Next weekend, I will put the finish roofing on.
I built a Japanese style gazebo over a decorative bench. I used the CNC to cut the curved rafter and the curved 45° braces. I had to place all the items diagonally on my machine to fit.
Next weekend, I will put the finish roofing on.
Grant Wilkinson
I followed Kyle's first lesson on chip carving and started by taking his "curved line" idea, but making each section a straight line. Then, I followed his process to offset and clip. From there, I took a vector image of a puppy and trimmed away the chip carve from the outside. This is the result.
I used a 90° downcut V bit from Cadence Mfg for the vcarve toolpath. Finish is just 3 coats of spray shellac.
I followed Kyle's first lesson on chip carving and started by taking his "curved line" idea, but making each section a straight line. Then, I followed his process to offset and clip. From there, I took a vector image of a puppy and trimmed away the chip carve from the outside. This is the result.
I used a 90° downcut V bit from Cadence Mfg for the vcarve toolpath. Finish is just 3 coats of spray shellac.

Len Greiner
My son is a lineman for the local power company so I found this on 3Dwave and carved it out for him. My wife didn't appreciate it being a skeleton but my son loves it. I left it unfinished so he could decide the stain colors as he has just bought a house and it's not decorated yet. The oak board was badly cupped and the relief carving brought it back to flat. It was a little challenging to keep having to adjust my Z zero to compensate for that, but all in all it turned out pretty nice.
My son is a lineman for the local power company so I found this on 3Dwave and carved it out for him. My wife didn't appreciate it being a skeleton but my son loves it. I left it unfinished so he could decide the stain colors as he has just bought a house and it's not decorated yet. The oak board was badly cupped and the relief carving brought it back to flat. It was a little challenging to keep having to adjust my Z zero to compensate for that, but all in all it turned out pretty nice.

Len Greiner
This was my first attempt at doing a relief carving, up until then I just did mostly v-carving and text for signs. I think it turned out pretty good for my first try. It was just a scrap piece of popular that I had left over from a sign that I made.
This was my first attempt at doing a relief carving, up until then I just did mostly v-carving and text for signs. I think it turned out pretty good for my first try. It was just a scrap piece of popular that I had left over from a sign that I made.

Dick Baynes
I think I shared a picture of this double-sided sign before it was delivered to the customer...I do not hang signs at my age. The daffodils were painted by my wife and are specific strains of the flower. Got this picture yesterday from the customer.
I think I shared a picture of this double-sided sign before it was delivered to the customer...I do not hang signs at my age. The daffodils were painted by my wife and are specific strains of the flower. Got this picture yesterday from the customer.
DF
Dennis Feagin
Here is my candy dispenser, I used sapelle in middle and bottom with corian for knobs and top (top still needs some work so it will fit into the top) added some laser and paint…next I’ll post my vectric version.
Here is my candy dispenser, I used sapelle in middle and bottom with corian for knobs and top (top still needs some work so it will fit into the top) added some laser and paint…next I’ll post my vectric version.
DF
Dennis Feagin
This was a fail in my opinion as I inadvertently switched the middle and front pieces gave it to a neighbor she liked it anyway wood is poplar. I really prefer the LYCNC ONE .
This was a fail in my opinion as I inadvertently switched the middle and front pieces gave it to a neighbor she liked it anyway wood is poplar. I really prefer the LYCNC ONE .

Robert Pastor
Another break-down camp chair in the works.

Tim Adams
Nothing fancy, but made some ‘name tags’ for some of our hunting blinds on the property. Used some scrap ends from the treated 1x6‘s we used to build some new campfire chairs. Paint was rushed, so mistakes were made, but they’ll still serve their intended purpose.
Nothing fancy, but made some ‘name tags’ for some of our hunting blinds on the property. Used some scrap ends from the treated 1x6‘s we used to build some new campfire chairs. Paint was rushed, so mistakes were made, but they’ll still serve their intended purpose.

Tom Pulles
After some help from Kyle answering some questions for me in the group I was able to create this for my daughters upcoming wedding, I am so happy with the way it turned out…….. thanks Kyle
After some help from Kyle answering some questions for me in the group I was able to create this for my daughters upcoming wedding, I am so happy with the way it turned out…….. thanks Kyle
Richard Mullet
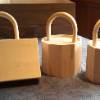
Here is a spice carousel I made for my wife on the cnc. She loves it.
Richard Mullet
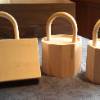
Another recent project. A wedding gift. Walnut live edge slab.
RS
Richard Schultz
Needed a welcome sign for our side lot. got the Idea from a neighbor We have two corgis "Ben" "Nel"

Michael Jameson
Some of my work on display at Ferry park Gallery MacLean NSW au
Some of my work on display at Ferry park Gallery MacLean NSW au

Dave Engelhardt
This was my first major project. I decided a CNC machine can cut circles better than a drill press. This is for essential oils storage.
I purchased a Shark HD510 for this. I used VCarve Desktop V10 for this.
This was my first major project. I decided a CNC machine can cut circles better than a drill press. This is for essential oils storage.
I purchased a Shark HD510 for this. I used VCarve Desktop V10 for this.
RS
Robert Sandstrom
Folks I recently made a heart shaped bowl out of Epoxy and Cherry Wood starting with an STL file I bought from a person named Corbin Dunn. Good guy but his products are intimidating to people at times - mostly because he mainly uses Fusion 360 - not only for the designs but the CAM portion also. I took one of his designs - that he released as an STL and went through Step-by-Step on how the design can be made using vCarve Pro - based on the information Kyle has been teaching us. Kyle's lessons were invaluable to me being able to do the project. To help others I made two YouTube Videos - one that discusses how to create a epoxy and cherry wood block to carve a bowl into, and the other on how to carve the bowl (from an STL) once you have the epoxy and cherry block. I will put a link to this playlist on my YouTube channel and although it seems like self promotion - what I hope is that it will serve as an additional resource for you to carve this bowl or any other bowl using an STL if you should want to tackle one. I will post a picture of the finished bowl. I am never sure how they will show up but will try. https://www.youtube.com/playlist?list=PLbuKRLARGPOzer7NCzMwsXZj_OAxDIS_k
Folks I recently made a heart shaped bowl out of Epoxy and Cherry Wood starting with an STL file I bought from a person named Corbin Dunn. Good guy but his products are intimidating to people at times - mostly because he mainly uses Fusion 360 - not only for the designs but the CAM portion also. I took one of his designs - that he released as an STL and went through Step-by-Step on how the design can be made using vCarve Pro - based on the information Kyle has been teaching us. Kyle's lessons were invaluable to me being able to do the project. To help others I made two YouTube Videos - one that discusses how to create a epoxy and cherry wood block to carve a bowl into, and the other on how to carve the bowl (from an STL) once you have the epoxy and cherry block. I will put a link to this playlist on my YouTube channel and although it seems like self promotion - what I hope is that it will serve as an additional resource for you to carve this bowl or any other bowl using an STL if you should want to tackle one. I will post a picture of the finished bowl. I am never sure how they will show up but will try. https://www.youtube.com/playlist?list=PLbuKRLARGPOzer7NCzMwsXZj_OAxDIS_k

Vicki Wilcox
Owner/operator, The Rusty Pelican Workshop & Design Studio
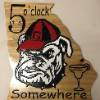
My inspiration for this piece was from friends that lost a loved one. They came to me to create something for their good friend, the widow of the deceased. The tree engraved on the live edge walnut is native to the state they lived and the plaque was meant to be placed beside a favorite tree (of the same variety) in memory of the deceased.
Techniques from the course that I used to create the plaque included information on v-bit depth of cut, how and why the different angled bits cut at different depths. I am still a novice and do not get much machine time and challenges have included depth of cut variances and node editing. Both covered thoroughly in Kyle’s courses. Thank you Kyle!
My inspiration for this piece was from friends that lost a loved one. They came to me to create something for their good friend, the widow of the deceased. The tree engraved on the live edge walnut is native to the state they lived and the plaque was meant to be placed beside a favorite tree (of the same variety) in memory of the deceased.
Techniques from the course that I used to create the plaque included information on v-bit depth of cut, how and why the different angled bits cut at different depths. I am still a novice and do not get much machine time and challenges have included depth of cut variances and node editing. Both covered thoroughly in Kyle’s courses. Thank you Kyle!
Charles Phelps
A project for weddings and Valentine's Day, so the CNC and Laser could bond.
Charles Phelps
Door hanger for grandson birthday party.

Robert Pastor
Three portable chairs all made with Vectric Aspire. The one on the left is an exact reproduction of a Sedia a Tenaglia, 15th-century Italian folding chair. The one on the right is a reproduction 16th-century break-down chair. The middle is a plywood camp chair for medieval reenactments that breaks down flat.
Three portable chairs all made with Vectric Aspire. The one on the left is an exact reproduction of a Sedia a Tenaglia, 15th-century Italian folding chair. The one on the right is a reproduction 16th-century break-down chair. The middle is a plywood camp chair for medieval reenactments that breaks down flat.

Tim Adams
Making a 12" epoxy filled Tree of Life lazy Susan on bamboo for the misses. Made a rookie mistake and forgot to seal the edge and ended up with some bubbles along the edge after I poured the flood coat. Rev 2 is on the machine now, with sealed edges, and should be complete mid-week. Had some of the smaller pieces break, which I knew was going to happen, but it still turned out quite nice.
Making a 12" epoxy filled Tree of Life lazy Susan on bamboo for the misses. Made a rookie mistake and forgot to seal the edge and ended up with some bubbles along the edge after I poured the flood coat. Rev 2 is on the machine now, with sealed edges, and should be complete mid-week. Had some of the smaller pieces break, which I knew was going to happen, but it still turned out quite nice.
Charles Phelps
A double-sided house sign.

Clark Inniger
didn't need a house number but thought the challenge would be fun and I could try an AI picture. I cut this in scrap red oak and used the ai picture without making any changed to it.
didn't need a house number but thought the challenge would be fun and I could try an AI picture. I cut this in scrap red oak and used the ai picture without making any changed to it.
R
Richard F
His very first commissioned sign made with VCarve Pro.

Pete Buehn
First try at edge lighting. Thanks to Kyle's course. Next time I need to set the retract height lower, wasted a lot of time. I like the way it turned out.
First try at edge lighting. Thanks to Kyle's course. Next time I need to set the retract height lower, wasted a lot of time. I like the way it turned out.
Grant Wilkinson
Thanks to Kyle's help, I was able to complete this rotary project. The paint job is not up to much, but the model came out OK, I think.
Thanks to Kyle's help, I was able to complete this rotary project. The paint job is not up to much, but the model came out OK, I think.

Charlie Conway
Though I would add some of the things I have done. I enjoy being able to take an idea and create something you can hold in your hand at the end of the day.
Though I would add some of the things I have done. I enjoy being able to take an idea and create something you can hold in your hand at the end of the day.
RB
Ron Boyes
Carved for a friend's daughter.
The frame is unkown from the scrap pile, model is from Vectric Design and Make "western theme" the horses are from Dario and the timber is Osage Orange.
Carve time is 12 hours using 1/4" EM and 1/32" TBN with 7 percent stepover, size is 300 x 210mm
Carved for a friend's daughter.
The frame is unkown from the scrap pile, model is from Vectric Design and Make "western theme" the horses are from Dario and the timber is Osage Orange.
Carve time is 12 hours using 1/4" EM and 1/32" TBN with 7 percent stepover, size is 300 x 210mm
JG
James Gallo
First test inlay. It came out ok
 Made by Testimonial