

Student Project Gallery for Learn Your CNC Academy
Michael Levine
Retired Custom Woodworker
My inspiration for this project was to take an image from google images and turn it into the best carving I could. I used all the knowledge I had received from this course to accomplish this. I faced the typical challenges of using sculpt ok. I have been using Design and Make for years but have been limited to using whatever they had. Now I am able to make a great carving on my own. Thankyou for this course!
My inspiration for this project was to take an image from google images and turn it into the best carving I could. I used all the knowledge I had received from this course to accomplish this. I faced the typical challenges of using sculpt ok. I have been using Design and Make for years but have been limited to using whatever they had. Now I am able to make a great carving on my own. Thankyou for this course!
Harvey Matyas
I want to make a quick easy AI project. I used the prompts that I learned in M01-L03: Turning Project Ideas into Visual Inspiration with AI. I changed subject to skier going downhill. I then resized the skier and added my own text. The challenge was finding a decent font that I wanted to Vcarve. I am proud that it turned out almost the way I wanted it to (I was a little disappointed with the word quicky).
I want to make a quick easy AI project. I used the prompts that I learned in M01-L03: Turning Project Ideas into Visual Inspiration with AI. I changed subject to skier going downhill. I then resized the skier and added my own text. The challenge was finding a decent font that I wanted to Vcarve. I am proud that it turned out almost the way I wanted it to (I was a little disappointed with the word quicky).
Ruth Woods
This is my first sketch carving project ever. I am headed out Tuesday to meet the newest addition to my extended family and wanted to give them a little something. I am happy with how it turned out.
This is my first sketch carving project ever. I am headed out Tuesday to meet the newest addition to my extended family and wanted to give them a little something. I am happy with how it turned out.
Ruth Woods
They say, go big or go home so I went big.
This is my first large 3d carve. It's 37 inches long and I think 10.5 inches tall. The wood is solid cherry and I did a copper colored epoxy inlay for the deer tracks. The finish is shellac with a top semi-gloss clear coat that is shellac compatible. I used a beast, .25 ball nose, a 1/16 TBN, a 25 em and a 90 v bit. There was a little bit of chip out on the top of some of the antlers so I hand chiseled them for a more finished look. The design comes from Vectric. It is one of their prepared scenes in the deer collection. I have an Axiom Precision AR8 CNC and am running Aspire.
This project was designed specifically to go into an area above the door that leads to the garage. We live in Montana and deer are in our field nearly every day. This carving reflects our furry friends.
I am happy with how it turned out and am excited to do more 3d stuff.
I do have a question for ya'll regarding the chip out on the delicate pieces. I ran my step-overs very small to lower my sanding time and ran my bits conservatively with shallower plunge depths. What else could I have done to try to prevent the chipping? I know wood does chip and it's always a risk. I just want to know if you have any tricks to reduce the chances of chipping. If I would have applied some shellac after I ran my roughing, would that have helped?
Any other ideas?
Have a great day and happy cutting.
They say, go big or go home so I went big.
This is my first large 3d carve. It's 37 inches long and I think 10.5 inches tall. The wood is solid cherry and I did a copper colored epoxy inlay for the deer tracks. The finish is shellac with a top semi-gloss clear coat that is shellac compatible. I used a beast, .25 ball nose, a 1/16 TBN, a 25 em and a 90 v bit. There was a little bit of chip out on the top of some of the antlers so I hand chiseled them for a more finished look. The design comes from Vectric. It is one of their prepared scenes in the deer collection. I have an Axiom Precision AR8 CNC and am running Aspire.
This project was designed specifically to go into an area above the door that leads to the garage. We live in Montana and deer are in our field nearly every day. This carving reflects our furry friends.
I am happy with how it turned out and am excited to do more 3d stuff.
I do have a question for ya'll regarding the chip out on the delicate pieces. I ran my step-overs very small to lower my sanding time and ran my bits conservatively with shallower plunge depths. What else could I have done to try to prevent the chipping? I know wood does chip and it's always a risk. I just want to know if you have any tricks to reduce the chances of chipping. If I would have applied some shellac after I ran my roughing, would that have helped?
Any other ideas?
Have a great day and happy cutting.
TR
Tim Rogers
This is my grandson sitting on a porch swing his great grandfather used at his age (4 years old)
Imported the photo using Easy Create.
I was disappointed with the details in his face when I carved it. I need to find out how to increase the depth of those details without destroying the whole picture.
The worst thing is the time required. I had 2 hours for rough carving and 5 hours for finishing tool path.
This is my grandson sitting on a porch swing his great grandfather used at his age (4 years old)
Imported the photo using Easy Create.
I was disappointed with the details in his face when I carved it. I need to find out how to increase the depth of those details without destroying the whole picture.
The worst thing is the time required. I had 2 hours for rough carving and 5 hours for finishing tool path.
GS
Garry Strout
Latest project. Hard maple for the picture (10 x10) and walnut for the frame. Created with VistaSculpt.

Billy Jennings
Made with EasyCreate carved in mahogany

Wayne Burton
I made the memorial plaque out of walnut and maple, the guy that purchased it wants to put a finish on it himself. It’s 20” x 10”.
The cardinal plaque is made out of cherry from a model using Easy Create. My wife painted it. It’s 14” x14”.
I made the memorial plaque out of walnut and maple, the guy that purchased it wants to put a finish on it himself. It’s 20” x 10”.
The cardinal plaque is made out of cherry from a model using Easy Create. My wife painted it. It’s 14” x14”.

Tom Imel
Made this sign for a client.

Tom Imel
Made the cross from Kyle's class.

Tom Imel
Made a baby memory box for a friend.

Jim Reitz
Maker of Things
Cat's are a huge seller at the Wishing Spring Gallery where I generally sell completed works, not claimed by family. This piece was developed from a Steve Good Scroll Saw pattern. It's first shot at modeling 2D vectors with Aspire.
Cat's are a huge seller at the Wishing Spring Gallery where I generally sell completed works, not claimed by family. This piece was developed from a Steve Good Scroll Saw pattern. It's first shot at modeling 2D vectors with Aspire.

Rob Sandstrom
Rob Sandstrom Designs Sole Proprietor
This was a commission project for someone that wanted an Heirloom Backgammon Board that he was giving to his son and daughter-in-law for their wedding. They had a previous family heirloom that burned up in a house fire. So they had the player pieces and wanted a complimentary board to math the player piece colors.
I used AI several times during this build to help understand wood movement, methods for attaching the boards in the borders to account for seasonable and area wood movement, as well as other key and unique features with the board.
I implemented temporary spoiler board jigs to get my dados installed in each of the borer pieces and to properly place the player and dice holding carvings in the borders.
Challenges I had to overcome were primarily mistakes I made such as I forgot to carve the dice holders before assembling the board and I got the wrong information on how many pieces there are in a Backgammon Game.
I had to add extra carvings in the borders after the board was assembled because of these errors.
I used the technique of creating individual component models for these additions and using an xy center location to be able to properly locate and carve these additions after the board was assembled.
The client was very pleased but have to admit it was my most stressful project to date and took me 5 weeks between the design and making of the board. Not sure I want to do this project again - I hear time heals all wounds so who knows after I have had some time away from the project.
This was a commission project for someone that wanted an Heirloom Backgammon Board that he was giving to his son and daughter-in-law for their wedding. They had a previous family heirloom that burned up in a house fire. So they had the player pieces and wanted a complimentary board to math the player piece colors.
I used AI several times during this build to help understand wood movement, methods for attaching the boards in the borders to account for seasonable and area wood movement, as well as other key and unique features with the board.
I implemented temporary spoiler board jigs to get my dados installed in each of the borer pieces and to properly place the player and dice holding carvings in the borders.
Challenges I had to overcome were primarily mistakes I made such as I forgot to carve the dice holders before assembling the board and I got the wrong information on how many pieces there are in a Backgammon Game.
I had to add extra carvings in the borders after the board was assembled because of these errors.
I used the technique of creating individual component models for these additions and using an xy center location to be able to properly locate and carve these additions after the board was assembled.
The client was very pleased but have to admit it was my most stressful project to date and took me 5 weeks between the design and making of the board. Not sure I want to do this project again - I hear time heals all wounds so who knows after I have had some time away from the project.
GE
Gary Enzinger
I found the plans for this cabinet and thought it would be a challenge. I used the cnc to cut the legs. Corbils, drawer fronts, and handles. Challenges were overcome by asking questions to Kyle and the group. Wonderful source of information and assistance. My wife will be using it for a jewelry cabinet.
I found the plans for this cabinet and thought it would be a challenge. I used the cnc to cut the legs. Corbils, drawer fronts, and handles. Challenges were overcome by asking questions to Kyle and the group. Wonderful source of information and assistance. My wife will be using it for a jewelry cabinet.

Scott Silvia
I find myself intimidated by all your guys and girl's beautiful work. But I'd still like to post my attempts to make good projects. With this Academy and the great community, I'm learning.
I finally got a finish on my last project.
I don't like cherry.
I find myself intimidated by all your guys and girl's beautiful work. But I'd still like to post my attempts to make good projects. With this Academy and the great community, I'm learning.
I finally got a finish on my last project.
I don't like cherry.

Jude Shellito
I thought i would share my latest project. This was my first use of Vectric easy create AI. My client had an AI generated picture of a sign he wanted made. I used Easy create to generate the 3d files. I think it went well. The only thing I struggled with is removing the background around the sign. I ended up creating vectors around the sign which took a bit of time. Does anyone know what verbiage to use so Easy create removes the background around the final files. Here are both the AI image and the finished sign.
I thought i would share my latest project. This was my first use of Vectric easy create AI. My client had an AI generated picture of a sign he wanted made. I used Easy create to generate the 3d files. I think it went well. The only thing I struggled with is removing the background around the sign. I ended up creating vectors around the sign which took a bit of time. Does anyone know what verbiage to use so Easy create removes the background around the final files. Here are both the AI image and the finished sign.

Dwight Ferguson
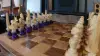
This is a project I started 2 1/2 months ago. I was going to make a chessboard to go with the chess pieces that I have had for about 40 years. I lost the chessboard in one of my many military moves, so I thought it would be a good time to make a chessboard. The chess pieces are an inch and a half in diameter and 6 inches tall. When I was making the project in aspire to make the chess pieces fit on the chessboard they had to be 1.6 inches square. And I wanted a design around the edges. That made the chessboard 19 inches square. Then I decided I wanted to make decorations around the board and that turned into a chess table.
So a long story short, I built a chest table! It is 24 inches wide by 30 inches long and 2 1/2 inches thick on the top. The whole table is 24 x 30 x 28" high with a drawer to hold the chess pieces. I did an epoxy inlay on the drawer face and back panel, of chess pieces.
It's made out of spalted maple and stained with walnut stain. I used the glazing process on all of the carved nautical designs on the legs and the top, then a poly satin finish.
This is a project I started 2 1/2 months ago. I was going to make a chessboard to go with the chess pieces that I have had for about 40 years. I lost the chessboard in one of my many military moves, so I thought it would be a good time to make a chessboard. The chess pieces are an inch and a half in diameter and 6 inches tall. When I was making the project in aspire to make the chess pieces fit on the chessboard they had to be 1.6 inches square. And I wanted a design around the edges. That made the chessboard 19 inches square. Then I decided I wanted to make decorations around the board and that turned into a chess table.
So a long story short, I built a chest table! It is 24 inches wide by 30 inches long and 2 1/2 inches thick on the top. The whole table is 24 x 30 x 28" high with a drawer to hold the chess pieces. I did an epoxy inlay on the drawer face and back panel, of chess pieces.
It's made out of spalted maple and stained with walnut stain. I used the glazing process on all of the carved nautical designs on the legs and the top, then a poly satin finish.
DN
Darrin Nicholson
Here’s a coin display I recently designed and machined entirely with my CNC router. Made with American Walnut and Peruvian Walnut, with velvet covered coin slots.
Plan on offering customized variations for service branches or government agencies.
Here’s a coin display I recently designed and machined entirely with my CNC router. Made with American Walnut and Peruvian Walnut, with velvet covered coin slots.
Plan on offering customized variations for service branches or government agencies.
Ruth Woods
This is very simple and kind of silly but my niece is really into anime. For her birthday/valentine's day, I whipped up a couple items and this wall hanging is one of them. It is a character from one of her favorite shows. I used slightly different colors--ones she likes. The wall hanging is about 16 inches tall and is cut from a reclaimed pine panel I had made from pallet wood. The colors were done with epoxy inlays.
Axiom Pro AR8 CNC with Aspire software
.25 and .125 endmills
The picture on the right is what I modeled it after.
I am not a fan of anime but I am a fan of my niece. :-)
This is very simple and kind of silly but my niece is really into anime. For her birthday/valentine's day, I whipped up a couple items and this wall hanging is one of them. It is a character from one of her favorite shows. I used slightly different colors--ones she likes. The wall hanging is about 16 inches tall and is cut from a reclaimed pine panel I had made from pallet wood. The colors were done with epoxy inlays.
Axiom Pro AR8 CNC with Aspire software
.25 and .125 endmills
The picture on the right is what I modeled it after.
I am not a fan of anime but I am a fan of my niece. :-)
Ruth Woods
We recently upgraded our built-in refrigerators to built-in column refrigerators. As a result, I had to retro-fit the cabinet to allow for the taller units. The original unit had two cubby holes/shelves above the units. But now those cubby holes were only 5 inches tall and useless. I came up with an idea to add art to the cabinet. Being that we live in the Bitterroot Mountain area of Montana, I created a mountain scene. The mountains are made with solid mahogany. They are embellished with epoxy-resin inlayed snow capped mountains and an abstract river "swoosh". I utilized textured plastic (the kind that is used with fluorescent lighting) behind the mountains. Within the cabinet, I have two forms of lighting. One is a multi-color changing rope light. The other is an "aurora" light. Working together, the unit creates the illusion that we are looking at the aurora on a cold winter's night. It was a fun project and is now fully done. :-). Pictured is the original cabinet, an overview of the new cabinet and a close-up of the art. I have an Axiom AR8 Pro and was using V-Carve at that time.
We recently upgraded our built-in refrigerators to built-in column refrigerators. As a result, I had to retro-fit the cabinet to allow for the taller units. The original unit had two cubby holes/shelves above the units. But now those cubby holes were only 5 inches tall and useless. I came up with an idea to add art to the cabinet. Being that we live in the Bitterroot Mountain area of Montana, I created a mountain scene. The mountains are made with solid mahogany. They are embellished with epoxy-resin inlayed snow capped mountains and an abstract river "swoosh". I utilized textured plastic (the kind that is used with fluorescent lighting) behind the mountains. Within the cabinet, I have two forms of lighting. One is a multi-color changing rope light. The other is an "aurora" light. Working together, the unit creates the illusion that we are looking at the aurora on a cold winter's night. It was a fun project and is now fully done. :-). Pictured is the original cabinet, an overview of the new cabinet and a close-up of the art. I have an Axiom AR8 Pro and was using V-Carve at that time.

Eric Meertens
one of my beautiful stl work💪

Tom Imel
Keepsake box for my nephew.
GN
George Navarre
Imade two of these for my great granddaughters for their 1-year birthday this pass January.

Dwight Ferguson
This is one of the first projects I did 3 years ago out of 1 1/2" x 8" walnut.
I just revised my ashtray project with what I've learned since I originally made this and decreased cut time by more than half! Down to 1 hr 30 min for two of them, from 3 hr 12 min before! Also made 2 sided and added pocket for legs on the back.
This is one of the first projects I did 3 years ago out of 1 1/2" x 8" walnut.
I just revised my ashtray project with what I've learned since I originally made this and decreased cut time by more than half! Down to 1 hr 30 min for two of them, from 3 hr 12 min before! Also made 2 sided and added pocket for legs on the back.

Wayne Burton
I created this in Easy Creat, it’s about 7.5” in diameter, made of cherry and my wife painted it. This was a test piece made from a piece of scrap, if I make it for a customer it would be around 12”.
I created this in Easy Creat, it’s about 7.5” in diameter, made of cherry and my wife painted it. This was a test piece made from a piece of scrap, if I make it for a customer it would be around 12”.
PV
Philip Virnoche
Finished this one today.

Mark Lasby
I was asked to carve a raised house number. The material is 10" x 20" x 3/4" hard maple. The numbers are 6" tall. I wanted to paint the top and edges of the numbers without worrying about paint over spray. The depth of cut was 0.3" with a 60 deg V bit. The width of the sloping sides were 0.173" ( 0.3 tan(30) ).
The first tool path was a pocket 0.22" deep with a pocket allowance of 0.18".
Then I cut the sloping edges of the numbers to 0.28" deep with a 60 deg V bit.
Then I sanded and wire brushed the surface to remove the fuzziness, sealed with quick dry spray polyurethane and painted with 2 coats of black spray paint.
After the paint dried for 3 days I pocketed around the numbers to 0.3" deep with a pocket allowance of 0.16" using a 5 deg tapered ball nose and 1/4" dia. up cut end mill. All that is left to do is apply a few coats of spar polyurethane for weather protection.
I was asked to carve a raised house number. The material is 10" x 20" x 3/4" hard maple. The numbers are 6" tall. I wanted to paint the top and edges of the numbers without worrying about paint over spray. The depth of cut was 0.3" with a 60 deg V bit. The width of the sloping sides were 0.173" ( 0.3 tan(30) ).
The first tool path was a pocket 0.22" deep with a pocket allowance of 0.18".
Then I cut the sloping edges of the numbers to 0.28" deep with a 60 deg V bit.
Then I sanded and wire brushed the surface to remove the fuzziness, sealed with quick dry spray polyurethane and painted with 2 coats of black spray paint.
After the paint dried for 3 days I pocketed around the numbers to 0.3" deep with a pocket allowance of 0.16" using a 5 deg tapered ball nose and 1/4" dia. up cut end mill. All that is left to do is apply a few coats of spar polyurethane for weather protection.

Dwight Ferguson
Here are two models I did from pictures of a dog when he was two years old and 12 years old. They are 13 inches bye 15 inches by 3 inches thick! Cut out of live edge spalted maple. I used Vistasculpt to make the STLs from the pictures. These are very close to life sized. Customer said the older one was exactly like him down to the broken canine tooth on the left side!
Again I'm showing the process from carving, carved, glazed and finished.
Here are two models I did from pictures of a dog when he was two years old and 12 years old. They are 13 inches bye 15 inches by 3 inches thick! Cut out of live edge spalted maple. I used Vistasculpt to make the STLs from the pictures. These are very close to life sized. Customer said the older one was exactly like him down to the broken canine tooth on the left side!
Again I'm showing the process from carving, carved, glazed and finished.

Robert Pastor
As some of you know, I specialize in medieval reproductions. My latest project is based on a 15th-century stool held by the Metropolitan Museum of Modern Art in NY. The legs were carved with the CNC. The angled mortises and tenons had to be chopped by hand, though.
As some of you know, I specialize in medieval reproductions. My latest project is based on a 15th-century stool held by the Metropolitan Museum of Modern Art in NY. The legs were carved with the CNC. The angled mortises and tenons had to be chopped by hand, though.

Scott Silvia
We were away from home and my machine for a couple of months but I finally got it done. The first time i have set up and used the Air Weights vacuum table. Used AI and photos to get as close as I could to an original true to scale Springfield Arms model 1911 (Colt) even down to the smith inspection marks. (Except for the grip).
Inspration by Doug Engle's previous project share post.
Gift for my back in the day partner, a firearms instructor/gunsmith.
12 X 8 Cherry still to be finished
We were away from home and my machine for a couple of months but I finally got it done. The first time i have set up and used the Air Weights vacuum table. Used AI and photos to get as close as I could to an original true to scale Springfield Arms model 1911 (Colt) even down to the smith inspection marks. (Except for the grip).
Inspration by Doug Engle's previous project share post.
Gift for my back in the day partner, a firearms instructor/gunsmith.
12 X 8 Cherry still to be finished

Chris Pelletier
Love the power of Aspire.
AS
Allan Smith
This is from a free file from Vectric. I used walnut and cherry panels from Cutting it Close and curly maple shelves. If I do another one, I'm going to sand the paint to give it a weathered look.
This is from a free file from Vectric. I used walnut and cherry panels from Cutting it Close and curly maple shelves. If I do another one, I'm going to sand the paint to give it a weathered look.

Marcus Pedroza
Hey y’all, I’ve been dabbling in the epoxy world. I can say I have a lot to learn but it’s been fun!

Dwight Ferguson
Just finished my last of "Sealife" carving series using Vista Sculpt AI. It is cut out of a Black Walnut live edge slab (Bark left on and sealed with CA glue) 28" x 11" x 1 1/2" Entitled "Seaboat Captain-Weatherd by the Sea". It is sanded to 1000 grit and finished with Bush Oil.
Just finished my last of "Sealife" carving series using Vista Sculpt AI. It is cut out of a Black Walnut live edge slab (Bark left on and sealed with CA glue) 28" x 11" x 1 1/2" Entitled "Seaboat Captain-Weatherd by the Sea". It is sanded to 1000 grit and finished with Bush Oil.

Dwight Ferguson
Just finished my latest of "Sealife" carvings using AI. This is a scene of a dolphin jumping out of the water.
This is on a live edge Spalted Maple slab 32" x 15" x 2 1/2 ". The slab is textured midway through showing water movement.
The dolphin is cut from 2 1/2" black walnut and is 19" x 9" x 2" and mounted on the maple slab.
Just finished my latest of "Sealife" carvings using AI. This is a scene of a dolphin jumping out of the water.
This is on a live edge Spalted Maple slab 32" x 15" x 2 1/2 ". The slab is textured midway through showing water movement.
The dolphin is cut from 2 1/2" black walnut and is 19" x 9" x 2" and mounted on the maple slab.
ALAN BYRD
AR BYRD COMPANY, INC.
My this using EasyCreate, Wow what a game changer!!
PV
Philip Virnoche
Fresh off the CNC!

Wayne Burton
A friend sent me this picture and wanted plaque made. It’s made from cherry and my wife painted it.

Tom Imel
Carved the IDC Woodcraft sign provided by Garrett

Tom Imel
Live edge Cutting board

Tom Imel
Stand for round signs

Luke Lefurge
I have the soul of an artist and have often incorporated the human hand into my art; they’re expressive and interesting. It obtained 3d images from commonly known AI programs. I love getting lost in the process, debating with myself color and composition.
I have the soul of an artist and have often incorporated the human hand into my art; they’re expressive and interesting. It obtained 3d images from commonly known AI programs. I love getting lost in the process, debating with myself color and composition.

Billy Jennings
My first time ever using a rotary. Such a valuable add-on to a CNC machine. Kyle how would I add this to my tool database? 🤣
My first time ever using a rotary. Such a valuable add-on to a CNC machine. Kyle how would I add this to my tool database? 🤣

Tom Imel
Sign for my son.

Tom Imel
Modified version of the CIC Game Case.
RH
Rich Hauptvogel
This past weekend attempted my first endgrain cutting board inlay. Using CIC's bits and YouTube video. Came out pretty good for my first one, there are a few gaps that I need to fill. I believe they are due to some flex in the bit or gantry on my Shapeoko 3xxl
This past weekend attempted my first endgrain cutting board inlay. Using CIC's bits and YouTube video. Came out pretty good for my first one, there are a few gaps that I need to fill. I believe they are due to some flex in the bit or gantry on my Shapeoko 3xxl

Billy Jennings
Made this coin display case with v carve pro using clip art level clipping technique
MN
Michael Norman
A dual seal flag for a friend of mine that served in both the USMC and the Navy.
MN
Michael Norman
I made this flag for my father-in-law. He is a WWII veteran and served in the Navy.
MN
Michael Norman
I made this wavy flag for a good friend of mine at his wife's request for his birthday.

Brian Condon
This is my first 3D project using the various AI tools to create the image and then Easy Create to create the 3D models. I used 2 models one for the deer and another for the background scene. Overall pretty happy with the results.
This is my first 3D project using the various AI tools to create the image and then Easy Create to create the 3D models. I used 2 models one for the deer and another for the background scene. Overall pretty happy with the results.
Lester Sak
My daughter got married last month so here are a few Christmas gifts for them and the rest of the family made with EasyCreate. I sprayed the wedding carving with water based dye stain first and then sealed with lacquer. I found it's pretty easy to spray the frame a little darker for separation. Once the lacquer is dry, I paint in gel stain with a small brush and wipe off leaving just the details I want. Then a final coat or 2 of lacquer.
My daughter got married last month so here are a few Christmas gifts for them and the rest of the family made with EasyCreate. I sprayed the wedding carving with water based dye stain first and then sealed with lacquer. I found it's pretty easy to spray the frame a little darker for separation. Once the lacquer is dry, I paint in gel stain with a small brush and wipe off leaving just the details I want. Then a final coat or 2 of lacquer.
Dave Parkerson
My friend’s dad was a bee keeper and now that he’s moved on, she really appreciates bees. She needed a coat rack so I made one for her.
My friend’s dad was a bee keeper and now that he’s moved on, she really appreciates bees. She needed a coat rack so I made one for her.
PV
Philip Virnoche
Designed and cut thjs morning for one of my nephews.

Dwight Ferguson
I made my own low-level clamps out of 1/2" HDPE that I got from Cutting it Close Workshop(CIC). They work great!
DS
Don Scott
I made this Nativity Scene using easy Create. Carved in Cedar. Hand painted. Unfortunately, the Challenge only allows one entry or I would have put this in the Challenge.
I made this Nativity Scene using easy Create. Carved in Cedar. Hand painted. Unfortunately, the Challenge only allows one entry or I would have put this in the Challenge.
LD
Lee Dodd
Doing some Christmas gifts for grand kids with Easy Create. I use mainly plywood because the price is right. Happy with results and having fun.
Doing some Christmas gifts for grand kids with Easy Create. I use mainly plywood because the price is right. Happy with results and having fun.
GS
Garry Strout
I created this as a memorial for Christmas. The young lady died in a car accident and this was the only picture he had of the two of them together. It is hard maple with a mahogany frame.
I created this as a memorial for Christmas. The young lady died in a car accident and this was the only picture he had of the two of them together. It is hard maple with a mahogany frame.
JB
Jason Barthel
Christmas present for the principal of one of our local elementary schools. He LOVED it!!
David Parkerson
I’m a Luthier
I get my inspiration from my wife mostly. I love surprising her with things she loves. She loves to sew and loves Tinkerbell, so the first one is what I came up with. The second one is an olive wood plaque. I did this with epoxy resins. I really learned how to manipulate nodes here. The work was extensive but super rewarding.
I get my inspiration from my wife mostly. I love surprising her with things she loves. She loves to sew and loves Tinkerbell, so the first one is what I came up with. The second one is an olive wood plaque. I did this with epoxy resins. I really learned how to manipulate nodes here. The work was extensive but super rewarding.

Wayne Burton
I made this from the project lesson for two of our grandchildren.It’s not an ornament I just put it there for the festive backdrop. Now it’s time to make a couple more. Lol
I made this from the project lesson for two of our grandchildren.It’s not an ornament I just put it there for the festive backdrop. Now it’s time to make a couple more. Lol
PV
Philip Virnoche
Here are a couple of things that I cut this week. I am so enjoying this learning experience!
RS
Robert Sandstrom
I recently took a friends picture and removed the background in Affinity Photo - found this works better sometimes then relying on EasyCreate or VistaSculpt to remove the background. I have been creating literally 100's of reliefs in EasyCreate and VistaSculpt and have shared much of this in my YouTube Channel so others can learn from my experience. I have created reliefs from bot prompted AI and uploaded photos to turn into reliefs. I am attaching a carving I did yesterday.
This was carved in a 2" Mahogany piece of wood about 11x11". My final finishing bit was a 1/8" TBN. The carving was designed to be 1.25" thick. EasyCreates likeness to the people in the photograph was awesome, I thought so, but more importantly so did the person who gave me the photo. It was a photo of his wife and son from about 50 years ago.
The carve took a little over 5hrs. I am attaching two photos. One showing the carve before finish applied. The second with finish applied. More coats of finish will be applied. The person i did this for is a fellow woodworker that does not have CNC skills yet so I felt comfortable handing the finishing part of the job back to him. He told me he applied "wipe-on Poly" and immediately wiped it off. He will be putting additional coats of finish but think it looks pretty good so far. He will also make a custom frame in his wood shop. He was very happy. In fact, I am doing a second carve of the boy's family now - the one in the picture. These are Christmas gifts from my friend to his family that I am helping him with.
I recently took a friends picture and removed the background in Affinity Photo - found this works better sometimes then relying on EasyCreate or VistaSculpt to remove the background. I have been creating literally 100's of reliefs in EasyCreate and VistaSculpt and have shared much of this in my YouTube Channel so others can learn from my experience. I have created reliefs from bot prompted AI and uploaded photos to turn into reliefs. I am attaching a carving I did yesterday.
This was carved in a 2" Mahogany piece of wood about 11x11". My final finishing bit was a 1/8" TBN. The carving was designed to be 1.25" thick. EasyCreates likeness to the people in the photograph was awesome, I thought so, but more importantly so did the person who gave me the photo. It was a photo of his wife and son from about 50 years ago.
The carve took a little over 5hrs. I am attaching two photos. One showing the carve before finish applied. The second with finish applied. More coats of finish will be applied. The person i did this for is a fellow woodworker that does not have CNC skills yet so I felt comfortable handing the finishing part of the job back to him. He told me he applied "wipe-on Poly" and immediately wiped it off. He will be putting additional coats of finish but think it looks pretty good so far. He will also make a custom frame in his wood shop. He was very happy. In fact, I am doing a second carve of the boy's family now - the one in the picture. These are Christmas gifts from my friend to his family that I am helping him with.
JM
Jim Mott
My current project is a cherry hanging bookcase using a French cleat. It goes in a reading nook at my son's house and holds his Manga collection (whatever that is). He asked for some anime decoration on the sides and sent me some examples.
Initially I planned to embed liqthophanes that allowed changing out image if he got bored. When he saw the prototype I made for 3D printer cabinet, he said yuck.
Next idea was to create some color reliefs and embed them with magnets in pockets on the bookcase sides. I eventually discovered that color reliefs don't seem to have been invented yet. But it is a good idea.
So I've started some experiments to get 30ish layer reliefs that can be colored into a .3mf file. This is how Makerlabs and HueForge create liqthophanes. In fact, HueForge hints at how it might be possible to make FrontLit versions. Unfortunately, I think the hint is mostly in my head, but I continue to try.
Step 1 is creating a relief from line drawings or photos of anime artwork. Vectric seems to have accidentally let me in to a Beta a few weeks ago and I've been busy playing with EasyCreate. I'm now sure the image to .v3m relief flow will work for what I need.
I'm also sure that Aspire can output decent quality .stl files that can be translated into single color 3D prints. Using Bambu Studio, I can apply surface painting to give some simple color. If only I had the skill or patience to make it so. Not good enough for the dark mood demanded by this anime stuff anyway.
Attached is a series of attempts to 3D print single color reliefs that could be embedded in the bookcase sides. Perhaps somebody will find it useful. Better yet, somebody might show me a full solution. Or at least a more likely to work approach.
There are 4 samples in the photo. Looking left to right we have:
1) Large brown Harry Potter train.
This came from a photograph my wife took. It was my first attempt and after seeing Kyle's lesson #264, I know I can improve it substantially. That said, it isn't too bad. Bambu H2D, 0.6 nozzle, Bambu PLA wood classic birch.
2) Ugly gray Statue of Liberty like thing
This was an anime picture, fed to EasyCarve, and downloaded with the background. I did some work in Aspire to remove the messy background and put the rest on a .1" rectangle. Printed on an X1C, 0,2 nozzle, Bambu PLA tough+ gray. It took forever.
3) Same starting point as #2
I had EasyCarve remove the background and Aspire mount it on a .1" rectangle. Probably has slightly more first real layer detail and certainly a lot easier to get done. Printed on an H2D, 0.6 nozzle, Bambu PLA wood classic birch. This printed much faster and looks, at least to me, as good as slow .02 one. The wood PLA hides the missing detail in the relief itself.
4) Small line drawing of an angry girl (I guess)
This started life as a 167 KB .svg file. It was black and white and will be my starting point for coloring a relief. The gray panel and the poor lighting don't show much of the detail, but my fingers can feel it. The BANG! text is very obvious and would look good in black. The depth of the mouth is creepy and I didn't apply variable layer height to smooth the top arm layers.
My current project is a cherry hanging bookcase using a French cleat. It goes in a reading nook at my son's house and holds his Manga collection (whatever that is). He asked for some anime decoration on the sides and sent me some examples.
Initially I planned to embed liqthophanes that allowed changing out image if he got bored. When he saw the prototype I made for 3D printer cabinet, he said yuck.
Next idea was to create some color reliefs and embed them with magnets in pockets on the bookcase sides. I eventually discovered that color reliefs don't seem to have been invented yet. But it is a good idea.
So I've started some experiments to get 30ish layer reliefs that can be colored into a .3mf file. This is how Makerlabs and HueForge create liqthophanes. In fact, HueForge hints at how it might be possible to make FrontLit versions. Unfortunately, I think the hint is mostly in my head, but I continue to try.
Step 1 is creating a relief from line drawings or photos of anime artwork. Vectric seems to have accidentally let me in to a Beta a few weeks ago and I've been busy playing with EasyCreate. I'm now sure the image to .v3m relief flow will work for what I need.
I'm also sure that Aspire can output decent quality .stl files that can be translated into single color 3D prints. Using Bambu Studio, I can apply surface painting to give some simple color. If only I had the skill or patience to make it so. Not good enough for the dark mood demanded by this anime stuff anyway.
Attached is a series of attempts to 3D print single color reliefs that could be embedded in the bookcase sides. Perhaps somebody will find it useful. Better yet, somebody might show me a full solution. Or at least a more likely to work approach.
There are 4 samples in the photo. Looking left to right we have:
1) Large brown Harry Potter train.
This came from a photograph my wife took. It was my first attempt and after seeing Kyle's lesson #264, I know I can improve it substantially. That said, it isn't too bad. Bambu H2D, 0.6 nozzle, Bambu PLA wood classic birch.
2) Ugly gray Statue of Liberty like thing
This was an anime picture, fed to EasyCarve, and downloaded with the background. I did some work in Aspire to remove the messy background and put the rest on a .1" rectangle. Printed on an X1C, 0,2 nozzle, Bambu PLA tough+ gray. It took forever.
3) Same starting point as #2
I had EasyCarve remove the background and Aspire mount it on a .1" rectangle. Probably has slightly more first real layer detail and certainly a lot easier to get done. Printed on an H2D, 0.6 nozzle, Bambu PLA wood classic birch. This printed much faster and looks, at least to me, as good as slow .02 one. The wood PLA hides the missing detail in the relief itself.
4) Small line drawing of an angry girl (I guess)
This started life as a 167 KB .svg file. It was black and white and will be my starting point for coloring a relief. The gray panel and the poor lighting don't show much of the detail, but my fingers can feel it. The BANG! text is very obvious and would look good in black. The depth of the mouth is creepy and I didn't apply variable layer height to smooth the top arm layers.
JM
Jim Mott
Our metal mailbox cover eventually rusted and broke at the bottom hinge line. This is my first attempt at printing a replacement. The design was done in Aspire 12.5, and the 4 pieces were printed on a Bambu H2D using ASA-CF (black bits) and ASA (white joining line cover).
The cover is not perfect as it was my first attempt with carbon fibre. I installed it anyway to see if the environment would damage the plastic or the glue (IPS 16 fast set medium bonded solvent cement). After most of a year, there are no issues. The metal sleeves holding the hinges on the bottom are fine and the holes have not been visibly stressed by the yanking and slamming from the mail carrier.
The main trick here was the ears on the bottom left and right side need a hole for the metal sleeves, and Aspire doesn't allow overhangs. I designed them flat on the build plate and used Bambu Studio to add them to the front cover. A little fiddly, but it works.
The other picture is of the 2nd one I did to fix the things that bugged me on the first. If/when the first fails, I have a replacement ready to go. Can't be without a mailbox cover.
Our metal mailbox cover eventually rusted and broke at the bottom hinge line. This is my first attempt at printing a replacement. The design was done in Aspire 12.5, and the 4 pieces were printed on a Bambu H2D using ASA-CF (black bits) and ASA (white joining line cover).
The cover is not perfect as it was my first attempt with carbon fibre. I installed it anyway to see if the environment would damage the plastic or the glue (IPS 16 fast set medium bonded solvent cement). After most of a year, there are no issues. The metal sleeves holding the hinges on the bottom are fine and the holes have not been visibly stressed by the yanking and slamming from the mail carrier.
The main trick here was the ears on the bottom left and right side need a hole for the metal sleeves, and Aspire doesn't allow overhangs. I designed them flat on the build plate and used Bambu Studio to add them to the front cover. A little fiddly, but it works.
The other picture is of the 2nd one I did to fix the things that bugged me on the first. If/when the first fails, I have a replacement ready to go. Can't be without a mailbox cover.
JM
Jim Mott
This is a cabinet created to hold 3D printer material management components, tools and maintenance materials, build plates, power strips, and a first pass at some ideals for embedding artsy stuff.
The wood pieces were designed in Aspire 12.5. The plastic bits were from Bambu maker world /MakerLab, or designed in locally in Aspire.
The wood cabinet parts and the local plastic bits were different sheets in the same Aspire project. This allowed things like easy alignment of the magnets on the lithophane covers with the CNC holes for the magnets in the wood.
There are a few tricks to get plastic pieces with overhangs. Mostly using double sided designs on the switch insert.
The CNC machine is a 5-10 year old Next Wave HD520. The plastic parts were created on a Bambu X1C (0.2 nozzle) or H2D (0.6 nozzle). Maybe the 0.4 nozzle snuck in for some things.
This is a cabinet created to hold 3D printer material management components, tools and maintenance materials, build plates, power strips, and a first pass at some ideals for embedding artsy stuff.
The wood pieces were designed in Aspire 12.5. The plastic bits were from Bambu maker world /MakerLab, or designed in locally in Aspire.
The wood cabinet parts and the local plastic bits were different sheets in the same Aspire project. This allowed things like easy alignment of the magnets on the lithophane covers with the CNC holes for the magnets in the wood.
There are a few tricks to get plastic pieces with overhangs. Mostly using double sided designs on the switch insert.
The CNC machine is a 5-10 year old Next Wave HD520. The plastic parts were created on a Bambu X1C (0.2 nozzle) or H2D (0.6 nozzle). Maybe the 0.4 nozzle snuck in for some things.

Dwight Ferguson
This is a sign I did for a customer in Portland. It is 24" x 24"x 1 1/2" from Ash. Made this similar to Disney signs. I finished this with transparent deck stain to seal, airbrushed around the edges, then painted the gold letters. Next I sealed front and back with epoxy then when dry finish that with a Satin-Marine Spar Varnish.---No I didn't get a free massage!
This is a sign I did for a customer in Portland. It is 24" x 24"x 1 1/2" from Ash. Made this similar to Disney signs. I finished this with transparent deck stain to seal, airbrushed around the edges, then painted the gold letters. Next I sealed front and back with epoxy then when dry finish that with a Satin-Marine Spar Varnish.---No I didn't get a free massage!
Doug Engle
My first Vectric easy create just prompt and this came out
SS
Scott Silvia
Used Easy Create to generate a 3D model from a line drawing made by my son a city of Miami firefighter.
RR
Ron Roth
Gave this to a nice lady at the end of the boardwalk, who has lost a few friends lately. First I had shown her a picture, then I could see her tear up , so I knew she was the one to give it to.
Gave this to a nice lady at the end of the boardwalk, who has lost a few friends lately. First I had shown her a picture, then I could see her tear up , so I knew she was the one to give it to.
RR
Ron Roth
Made this for my brother in law .
Used ScuptOk for the depth map

Wayne Burton
I made this leash holder for our dog using Vectric AI from pictures of her face and paw.

Dwight Ferguson
This is a 3D model created from Vetric's EasyCreate Ai! A 16"X10". side and 3/4 view of a Shelby Cobra on 1.5" Black Walnut.
This is a 3D model created from Vetric's EasyCreate Ai! A 16"X10". side and 3/4 view of a Shelby Cobra on 1.5" Black Walnut.
RS
Robert Sandstrom
I recently did this Owl and Chiclet Design using Mid Journey, Vista Sculpt and Aspire. I just released a YouTube Video on my channel going through the details of how I designed this. I went through the following in Aspire: Two Rail Sweep to make the appearance of live edges on the orginal model, Fade and Tilt, Creating a Sculpting Brush Unique to this project, using the sculpting brush to texture the live edges, setting up location of the model in the wood, and setup of the roughing and finish toolpaths. I also provide a link to the stl of this model if people are interested in carving the same model. https://youtu.be/WCQCw0VTyKM
I recently did this Owl and Chiclet Design using Mid Journey, Vista Sculpt and Aspire. I just released a YouTube Video on my channel going through the details of how I designed this. I went through the following in Aspire: Two Rail Sweep to make the appearance of live edges on the orginal model, Fade and Tilt, Creating a Sculpting Brush Unique to this project, using the sculpting brush to texture the live edges, setting up location of the model in the wood, and setup of the roughing and finish toolpaths. I also provide a link to the stl of this model if people are interested in carving the same model. https://youtu.be/WCQCw0VTyKM
Alan Byrd
Made this for my Granddaughter from one of the free files. It's made from Cherry and I used a spray lacquer finish on it.
Made this for my Granddaughter from one of the free files. It's made from Cherry and I used a spray lacquer finish on it.
Alan Byrd
Made this name plate for a friend to put on a custom bed he made for his granddaughter.
Alan Byrd
Made this for my Wife. She's a disabled Veteran.

Mike Bennett
This is a Double 'Seed of Life' Wall Light, designed in VCarve Pro 12.5 and machined as a 2-sided project with a Laguna SmartShop II - 4x8 ATC.
This is a Double 'Seed of Life' Wall Light, designed in VCarve Pro 12.5 and machined as a 2-sided project with a Laguna SmartShop II - 4x8 ATC.

Dick Baynes
After nearly 18 years of doing CNC work, I never had to do a “tiling” project…thanks to Rob Sandstrom and Kyle’s videos on the subject I was able to recondition this sign (planed off old letters) and then tile the 4’ sign on a 3’ bed. Thanks!
After nearly 18 years of doing CNC work, I never had to do a “tiling” project…thanks to Rob Sandstrom and Kyle’s videos on the subject I was able to recondition this sign (planed off old letters) and then tile the 4’ sign on a 3’ bed. Thanks!
RS
Robert Sandstrom
Used Vista Sculpt and Aspire to create this carving of my friend Shane and his dog. Shane didn’t have any pictures where he wasn’t wearing mirrored sunglasses. I am discovering this makes a large difference in the quality of portrait carves. It removes much of the facial details.
If doing portraits in future will continue to push for pictures with no sunglasses or glasses in which the eyes can be seen.
Used Vista Sculpt and Aspire to create this carving of my friend Shane and his dog. Shane didn’t have any pictures where he wasn’t wearing mirrored sunglasses. I am discovering this makes a large difference in the quality of portrait carves. It removes much of the facial details.
If doing portraits in future will continue to push for pictures with no sunglasses or glasses in which the eyes can be seen.

Dwight Ferguson
I watched the lesson today from last week, as I missed it due to working with a repairman all day...UGH!
Anyhow, as I made a pizza peel a couple years ago, I was given the inspiration of making a Pizza server, with a little twist. Idea is for date night. A person takes/eats a slice and has to do what is written.
It is 12" round (18" total length) and3/8" thick Maple. I used 60V bit for Vcarve text and lines and to chamfer the edges. I used dark glaze on top, and wiped leaving the glaze in letters and lines, then used mineral oil to seal it.
It took about 30 min to carve.
I watched the lesson today from last week, as I missed it due to working with a repairman all day...UGH!
Anyhow, as I made a pizza peel a couple years ago, I was given the inspiration of making a Pizza server, with a little twist. Idea is for date night. A person takes/eats a slice and has to do what is written.
It is 12" round (18" total length) and3/8" thick Maple. I used 60V bit for Vcarve text and lines and to chamfer the edges. I used dark glaze on top, and wiped leaving the glaze in letters and lines, then used mineral oil to seal it.
It took about 30 min to carve.
GD
Greg Dunkelberger
made this cutting board for my sister. who just said surprise me with the wood choices. it is maple, cherry, walnut, purple heart, and sapele. she was very pleased with the results.
made this cutting board for my sister. who just said surprise me with the wood choices. it is maple, cherry, walnut, purple heart, and sapele. she was very pleased with the results.
GD
Greg Dunkelberger
made this picnic table and benches. used the cnc as much as possible. it took me about 250 hours to complete the table and benches. a lot of cutting. a lot of joinery and not so many screws. pretty pleased with the outcome
made this picnic table and benches. used the cnc as much as possible. it took me about 250 hours to complete the table and benches. a lot of cutting. a lot of joinery and not so many screws. pretty pleased with the outcome
Ruth Woods
I made some deviled egg trays thanks to Kyle's video tutorial. They turned out pretty good
Ruth Woods
I made a couple cribbage boards (not with the CNC) and decided to make some custom boxes to hold them in. I used the CNC to cut the card and peg holders. I also used the CNC to do an epoxy inlay of the perfect cribbage on the lid. The box was made old school. It is solid walnut with maple splines and decorative borders.
I made a couple cribbage boards (not with the CNC) and decided to make some custom boxes to hold them in. I used the CNC to cut the card and peg holders. I also used the CNC to do an epoxy inlay of the perfect cribbage on the lid. The box was made old school. It is solid walnut with maple splines and decorative borders.
SS
Scott Silvia
My first try to use Dwight's glazing method. It is still wet in this pic. Guess I got to work a bunch more to get this right. Glad this is just a test run.
My first try to use Dwight's glazing method. It is still wet in this pic. Guess I got to work a bunch more to get this right. Glad this is just a test run.

Tony Duderewicz
Made a couple Halloween figures out of 1-1/2" white oak using a 1/8" tapered ball nose bit, they are 10" high.

Dwight Ferguson
This is a charcuterie board I got from CIC workshop. I was playing around with optical illusion graphics that I searched for on Google. I had to do a lot of node editing of the imported design, basically re-drawing the whole design. I used black epoxy to fill in the design after the inlay-Vcarve, carving. 12" x 24". By the way, I did not carve the plug.
This is a charcuterie board I got from CIC workshop. I was playing around with optical illusion graphics that I searched for on Google. I had to do a lot of node editing of the imported design, basically re-drawing the whole design. I used black epoxy to fill in the design after the inlay-Vcarve, carving. 12" x 24". By the way, I did not carve the plug.

Grandpa Spath
Here is some records I cut recently from 12 in. using a 1/32tbn bit.

Tony Duderewicz
I seen an eagle clock picture and took it into VistaSculpt and made a 3D model of it and than imported the model into aspire to tweaked it a little. Sprayer 1 coat of shellac and painted the numbers. I used a 15" pine round from Home Depot and cut it out 12" round. Can't believe how nice it came out.
I seen an eagle clock picture and took it into VistaSculpt and made a 3D model of it and than imported the model into aspire to tweaked it a little. Sprayer 1 coat of shellac and painted the numbers. I used a 15" pine round from Home Depot and cut it out 12" round. Can't believe how nice it came out.

Dwight Ferguson
This is a donation to our local hardware store for their support of veterans in the area. It is carved from Maple one and 3/4 of an inch by 11" x 20".
I modeled Amboy Hardware letters and epoxy in laid supports veterans. I again glazed the 3-D model in the center then finished with semi gloss clearcoat. This was a nine hour carve.
This is a donation to our local hardware store for their support of veterans in the area. It is carved from Maple one and 3/4 of an inch by 11" x 20".
I modeled Amboy Hardware letters and epoxy in laid supports veterans. I again glazed the 3-D model in the center then finished with semi gloss clearcoat. This was a nine hour carve.

Billy Jennings
Maple cutting board with walnut inlay.
RR
Ron Roth
Not my design
Just liked the look 1" cherry
@ptiensuu designer credit
Not my design
Just liked the look 1" cherry
@ptiensuu designer credit

Dwight Ferguson
This is a plaque I did for the local post of the Veterans of Foreign Wars. I call it "Home". The boots sit in front of a door on a step. It is 10 inches wide by 16 inches tall and 2 1/2 inches deep. It is cut from spalted Maple. It is from a picture I imported into VistaSculpt to make the model. The top of the plaque is reclaimed mahogany from an old Church pew. I thought that was appropriate.
This is a plaque I did for the local post of the Veterans of Foreign Wars. I call it "Home". The boots sit in front of a door on a step. It is 10 inches wide by 16 inches tall and 2 1/2 inches deep. It is cut from spalted Maple. It is from a picture I imported into VistaSculpt to make the model. The top of the plaque is reclaimed mahogany from an old Church pew. I thought that was appropriate.

Tony Duderewicz
Hung some projects in my workshop, where we have our CNC club

George Postmus
Just Finished this yesterday
JB
John Barker
Finally got this two sided project to work :)
RR
Ron Roth
My first Vcarve inlay end grain cutting board . I have learned so much great information from the community

Barrie Knop
An oval bowl
Made from Western Australian Sheoak,
300mm long x 175mm wide and 45mm high.
An oval bowl
Made from Western Australian Sheoak,
300mm long x 175mm wide and 45mm high.
 Made by Testimonial