.png)
Do not index
Logo
Product name
Kajabi
Added to /integrations
Done
Category
Popular
Virtual Events
Online Courses
Kajabi is a complete platform for serious entrepreneurs, experts, and influencers. It has everything you need to create, grow, and manage your knowledge and creator business.
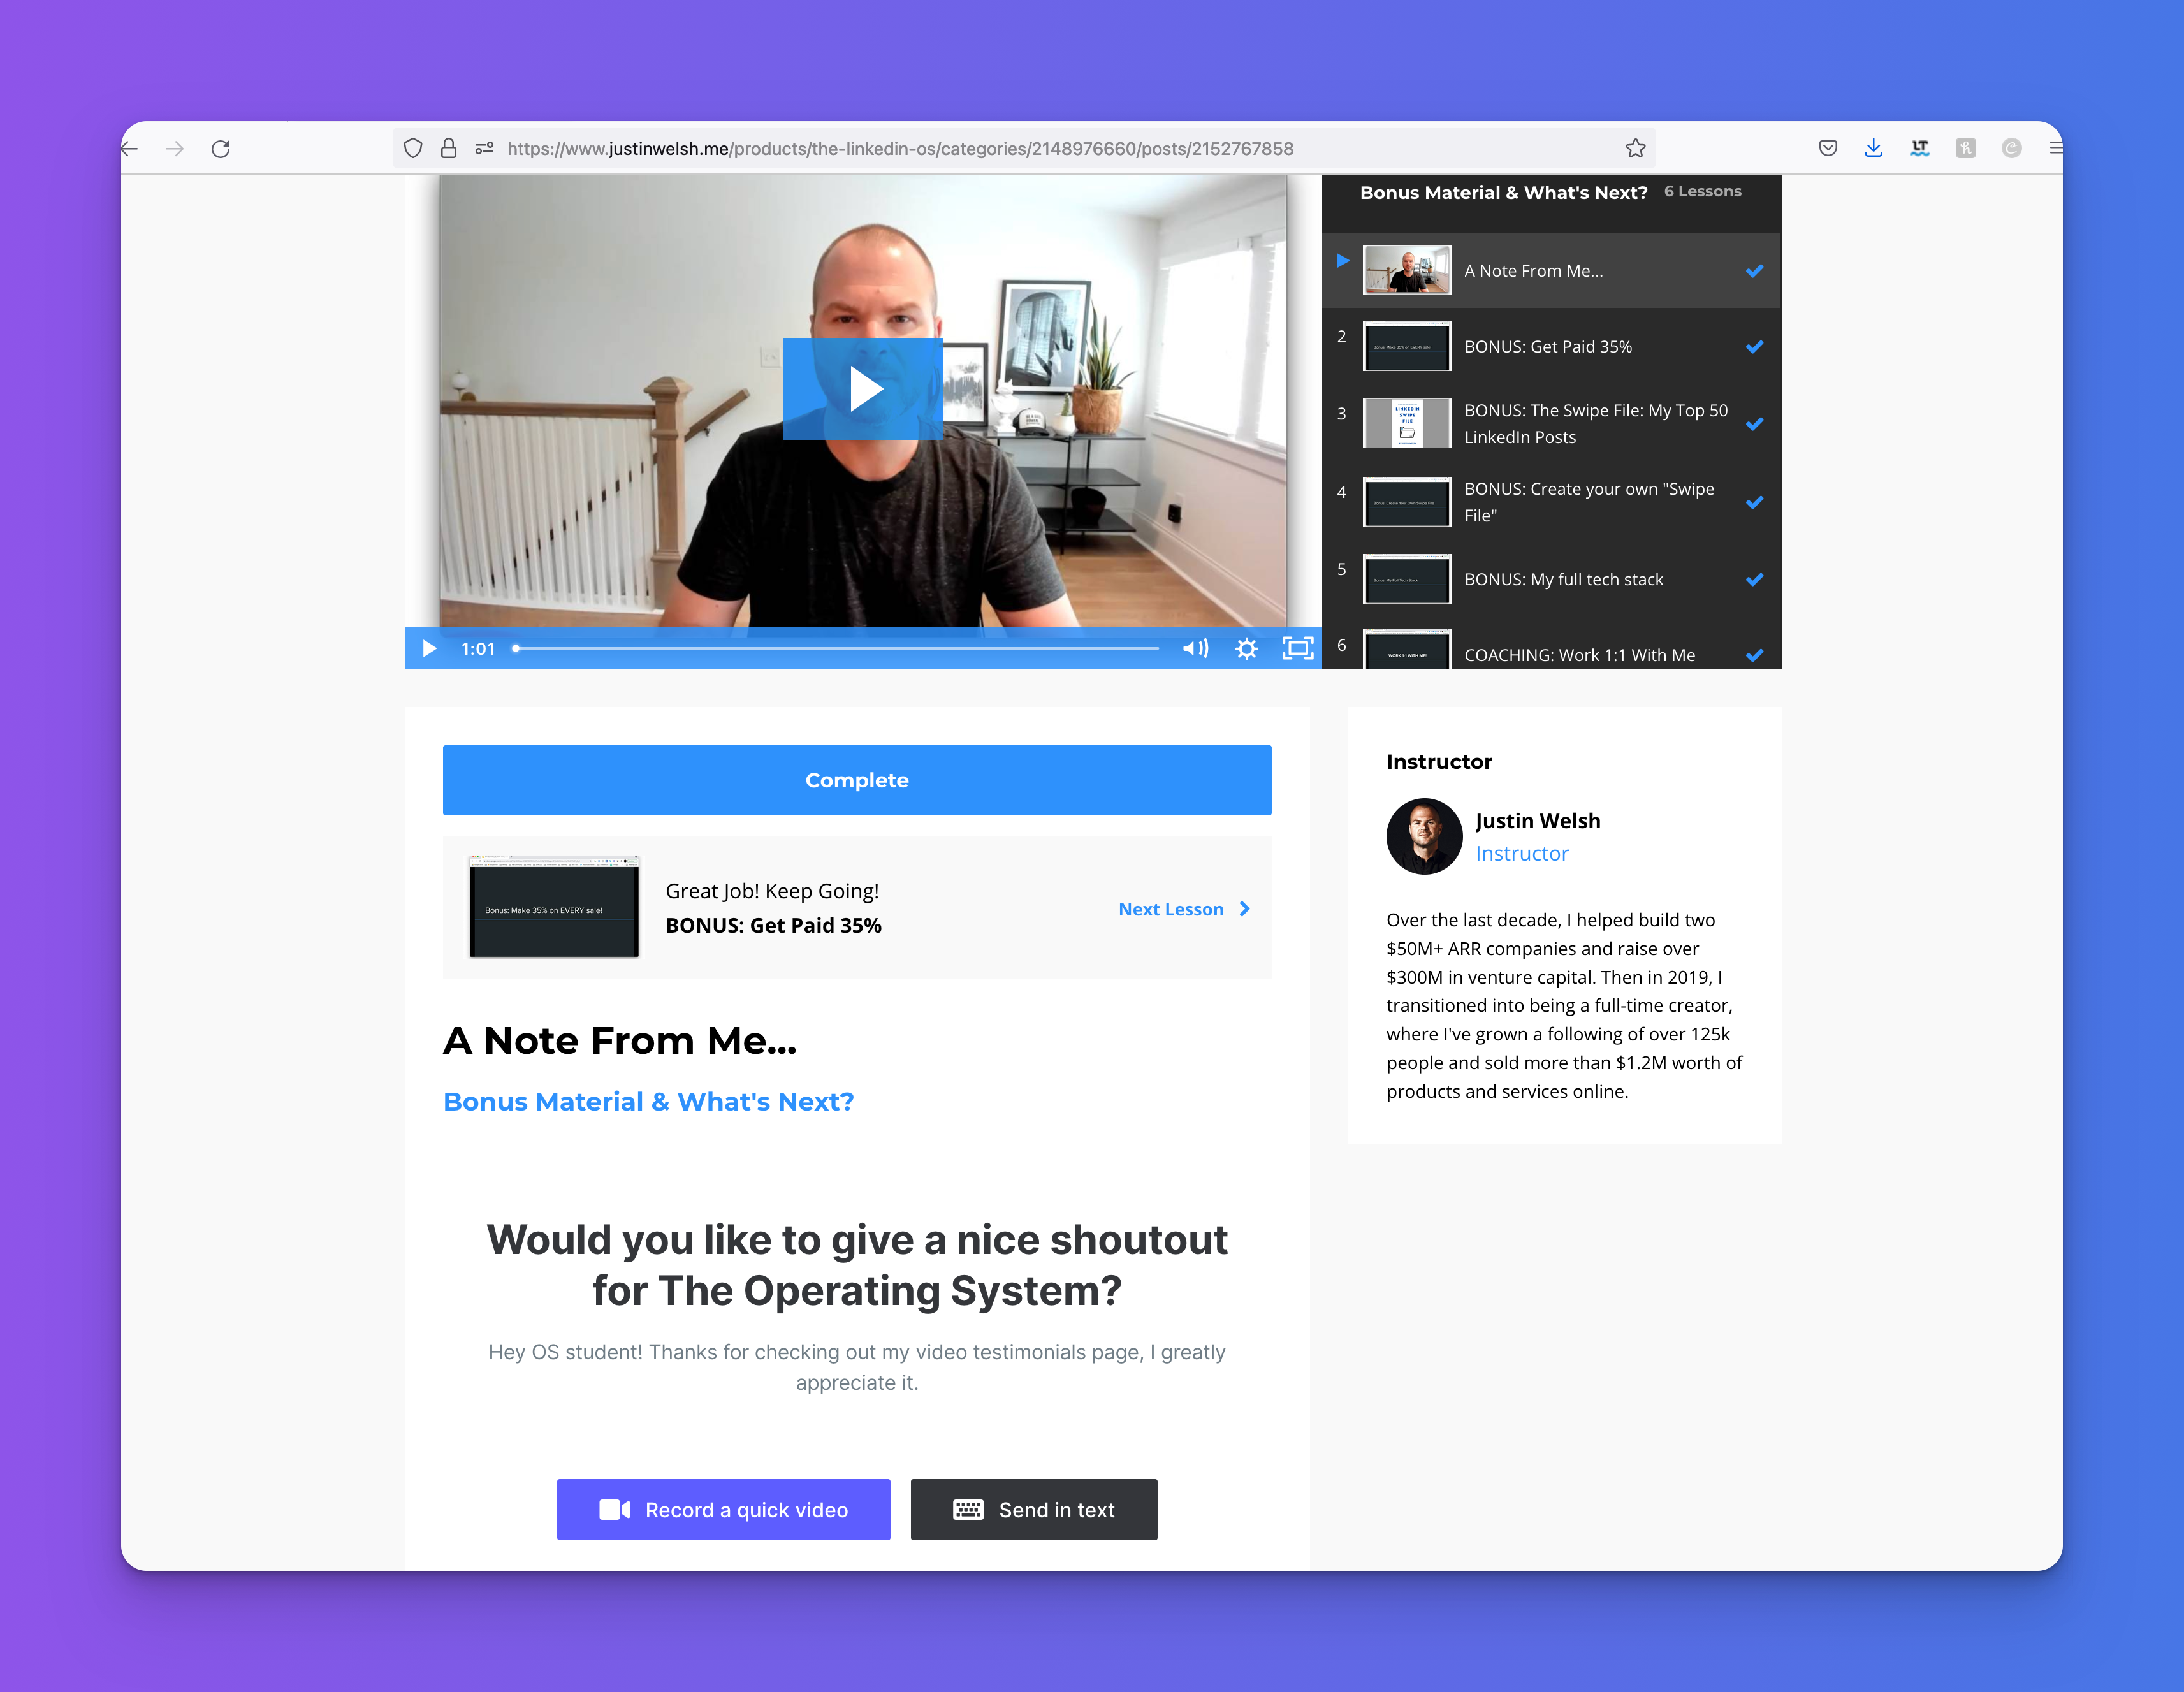
Now that your Kajabi course is live, you may be wondering how to collect or display testimonials and that’s by using Testimonial.to
In this article, we will show you how to add and collect testimonials on Kajabi. Here’s an example from Justin Welsh requesting testimonials during his course. 👇
What is Testimonial.to?
Testimonial effortlessly lets you collect customer reviews and display them on Kajabi with customized, interactive, and beautiful review widget features.
We make it easy to capture, manage, and broadcast testimonials to improve the reputation of your brand or service and help you convert better.
What’s more? With testimonial.to, integrating your reviews on Kajabi only requires adding a single line of code onto your site. You don't need any specialist tools or a developer — just copy and paste!
Our Kajabi Integration
- Embed your widget to collect text and video testimonials
- Embed your wall of love
- Display a testimonial slider or a single testimonial
- Automate your workflows with our Zapier integrations
How to display Testimonials on Kajabi
With Kajabi, you can add Testimonials to your site or even collect text and video testimonials within your course.
TL;DR
- Create an account on Testimonial.to and import your testimonials
- Create your Wall of Love or collecting widget and copy the HTML code
- Navigate to your Kajabi pages and click on customize
- On the left side, under sections click ‘Add Section’.
- Scroll down to the custom code option, and click on ‘add’.
- Paste the code, click ‘Save’, and voila!
Your Kajabi site is now ready to convert better with social proof 💪
Step by Step
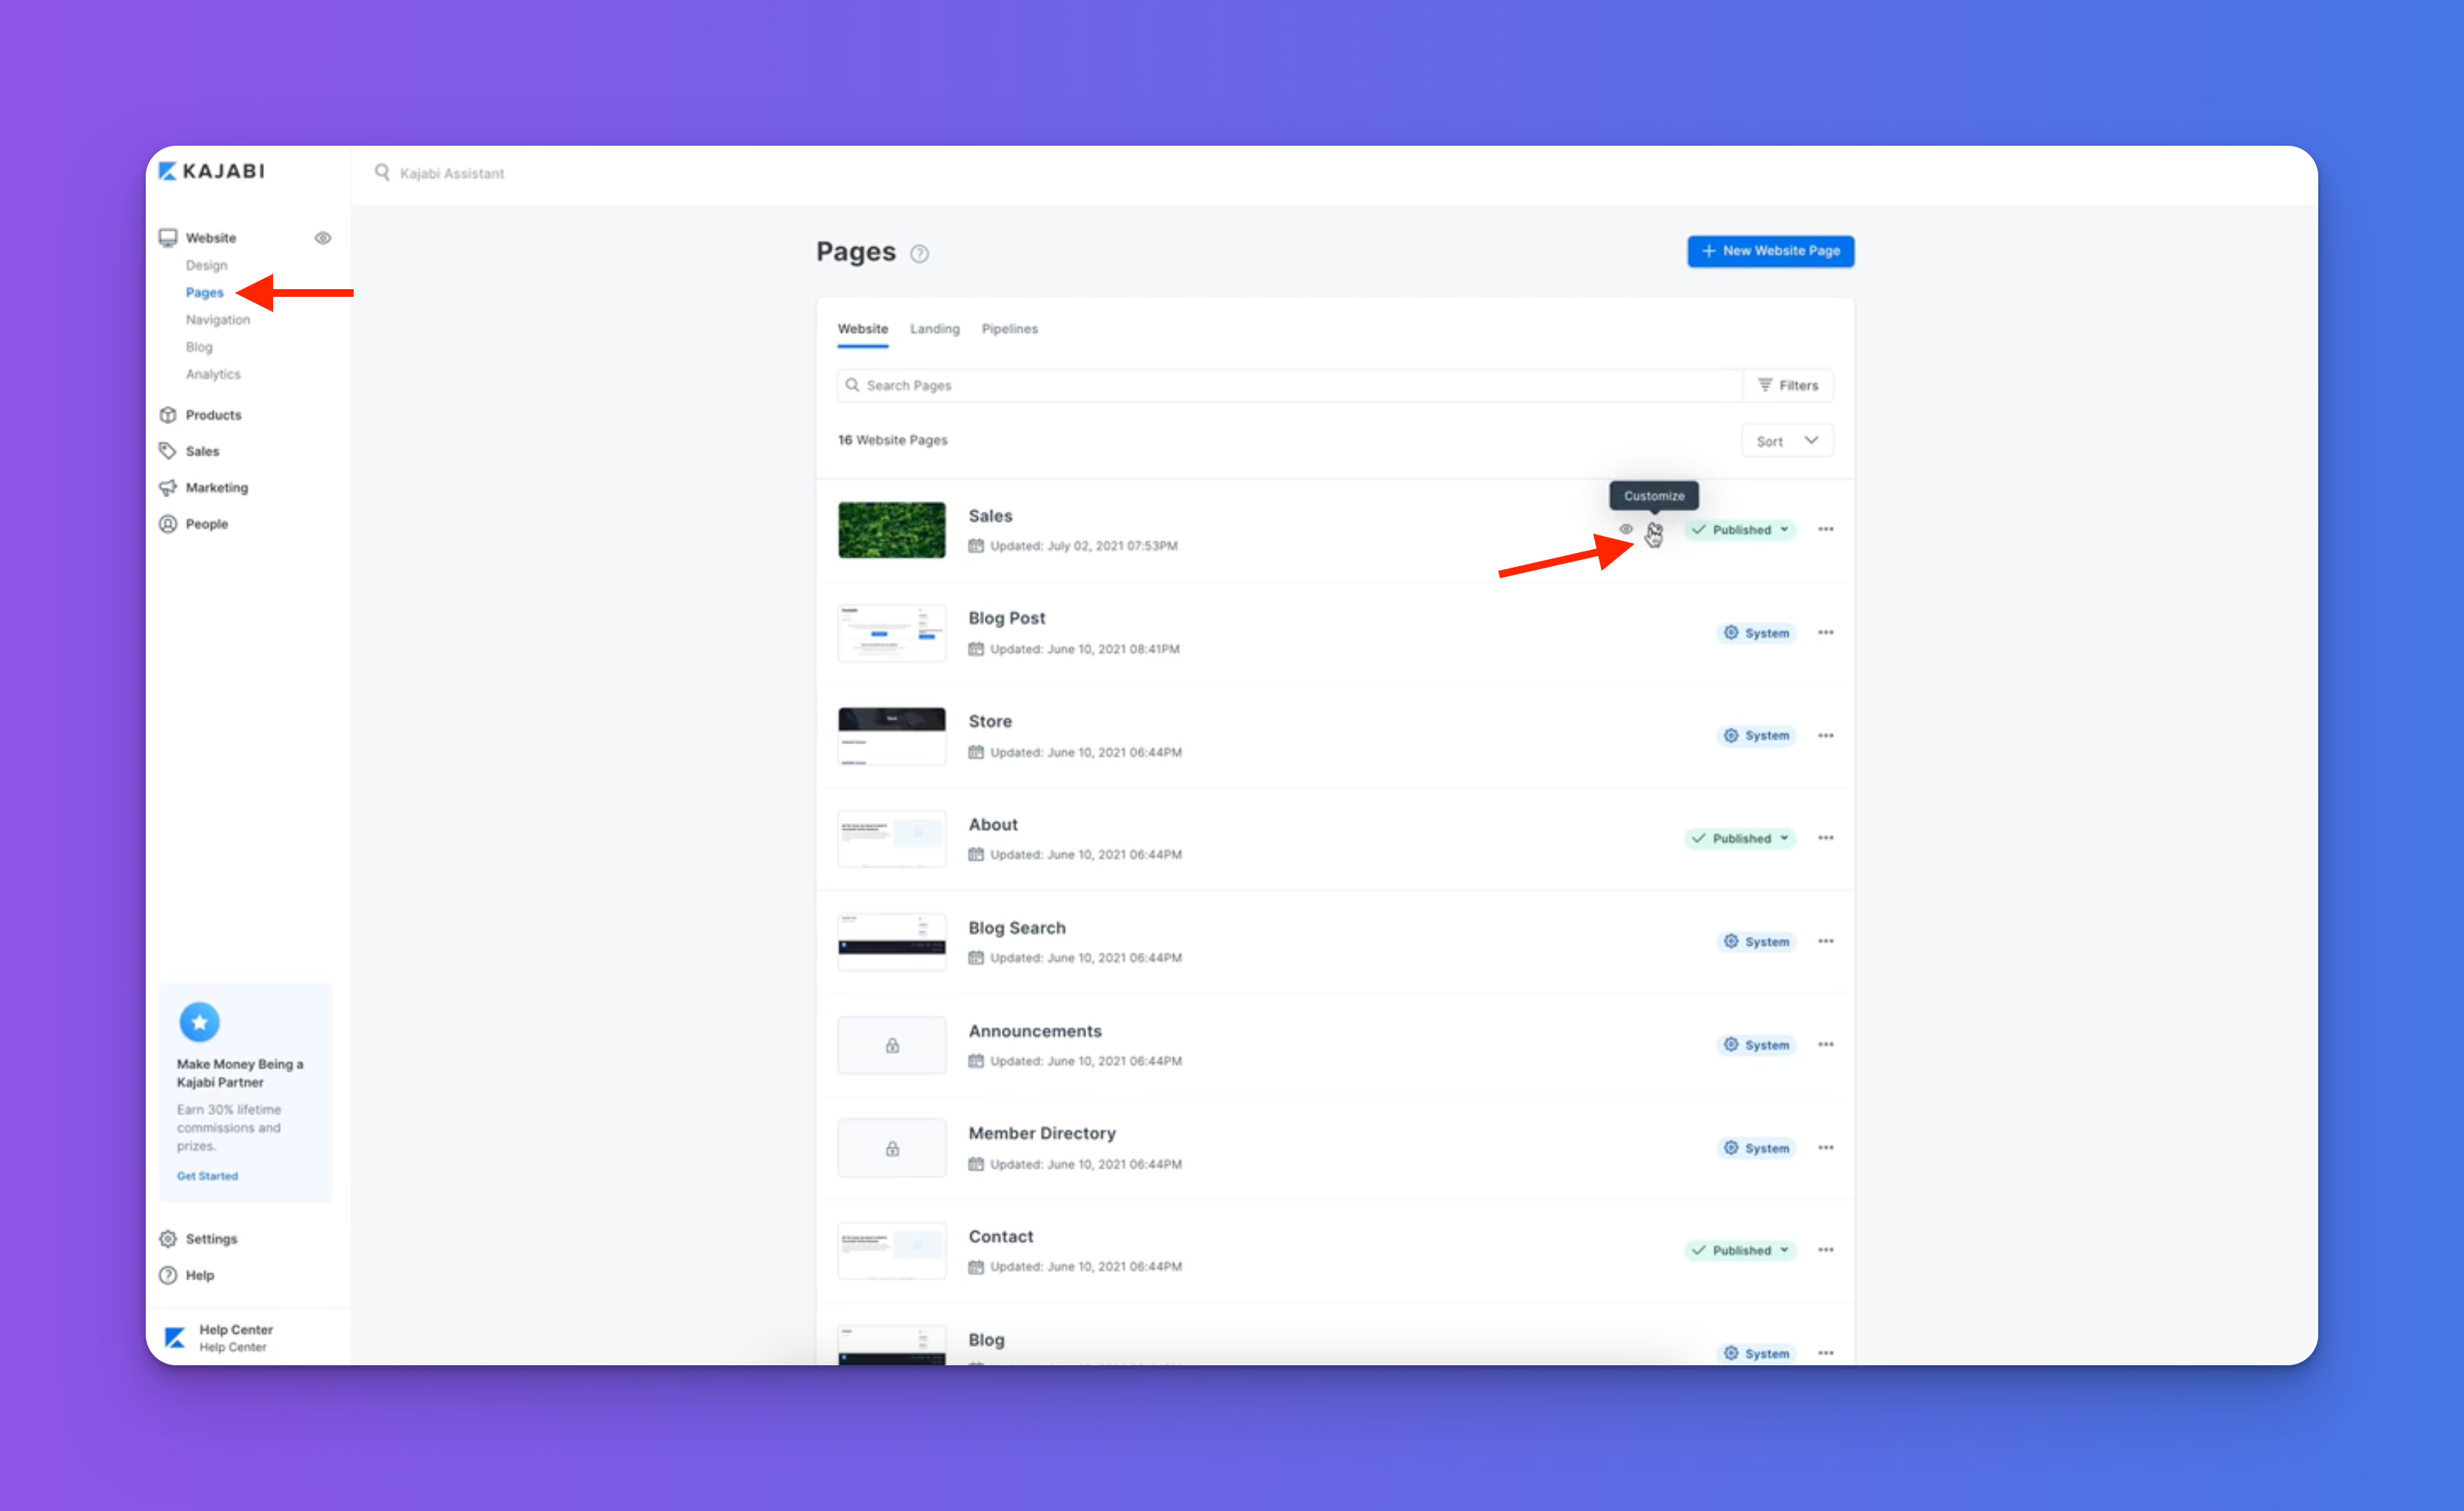
Step 1. Under Websites, click on pages followed by customize.
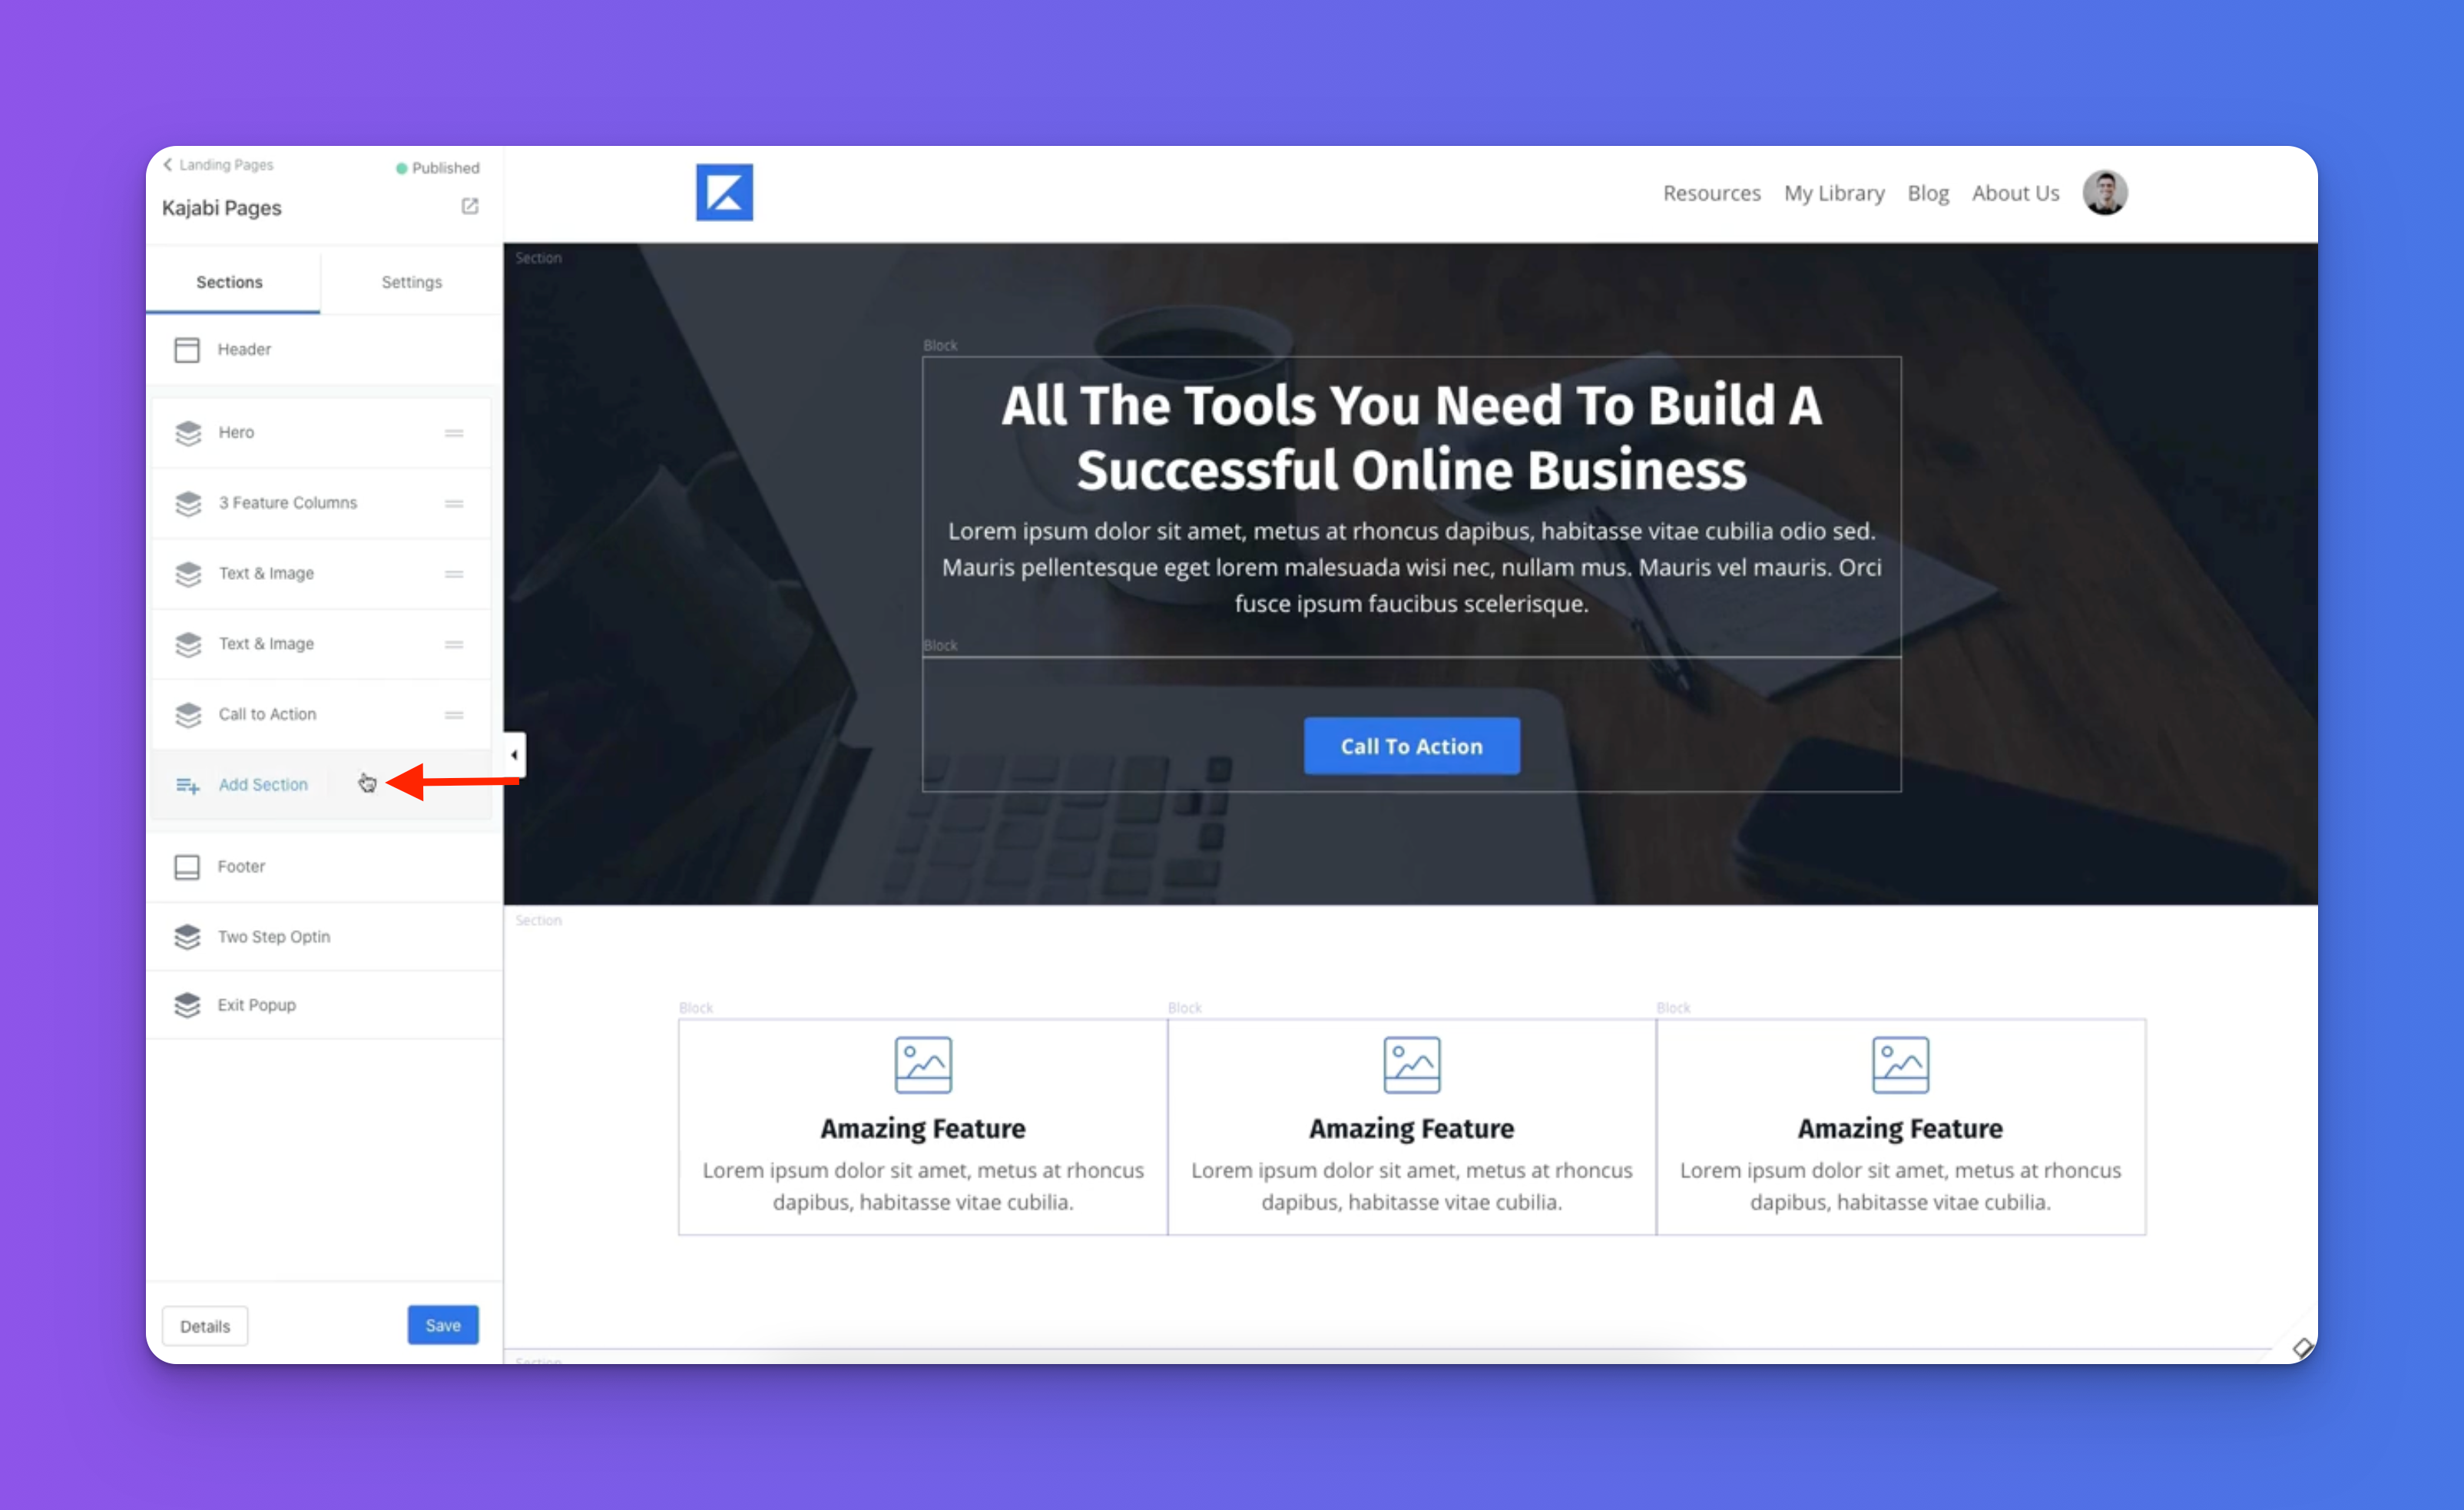
Step 2. On the left side, under sections click ‘Add Section’.
Step 3. Scroll down to the custom code option, and click on ‘add’.

Step 4. Go to your account dashboard and visit the space you want to add to Kajabi. After clicking the space, you will see "Wall of Love" option on the left sidebar in the Embed section.
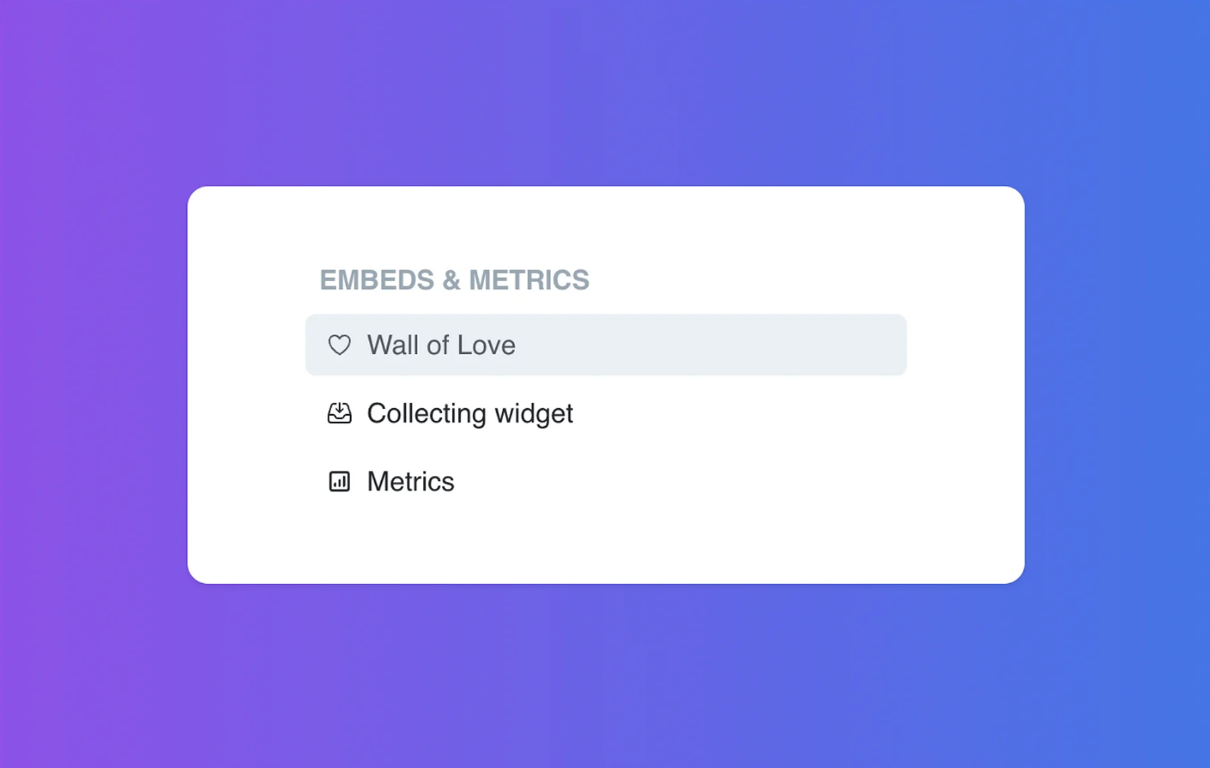
Step 5. Click that, then choose the styles you want to display the wall of love, in the last step, you will find the embed code. Click the "Copy code" button will copy the code to the clipboard automatically.
You can learn more about customizing your Wall of Love by visiting this article.

Step 6. Paste the code in the HTML editor in step 3, then click the Save button.
Step 7. Voila! look no further than Testimonial.to 🤩 With our platform, you can easily display or collect video & text testimonials, social media shoutouts, and more in one convenient place.
How to collect testimonials right from your Kajabi course
Here’s how to request testimonials from within your course just like Justin did.

Step 1. Visit your course on Kajabi

Step 2. Select the module you'd like to request testimonials from

Step 3. Click "Expand"

Step 4. Click "Edit"

Step 5. You will see the following. Go back to Testimonial.to

Step 6. Copy the code for your collecting widget

Step 7. Click the code option

Step 8. Paste the code of your 'Collecting Widget'

Step 9. Click "Ok"

Step 10. Click "Save"

