.png)
Do not index
Logo


Product name
ConvertKit
Added to /integrations
Not added
Category
Website Builders
Newsletters
ConvertKit is the go-to marketing hub for creators that helps you grow and monetize your audience with ease.
Now that your ConvertKit account is set up, you may be wondering how to improve your conversion rate, and that’s by adding Testimonials!
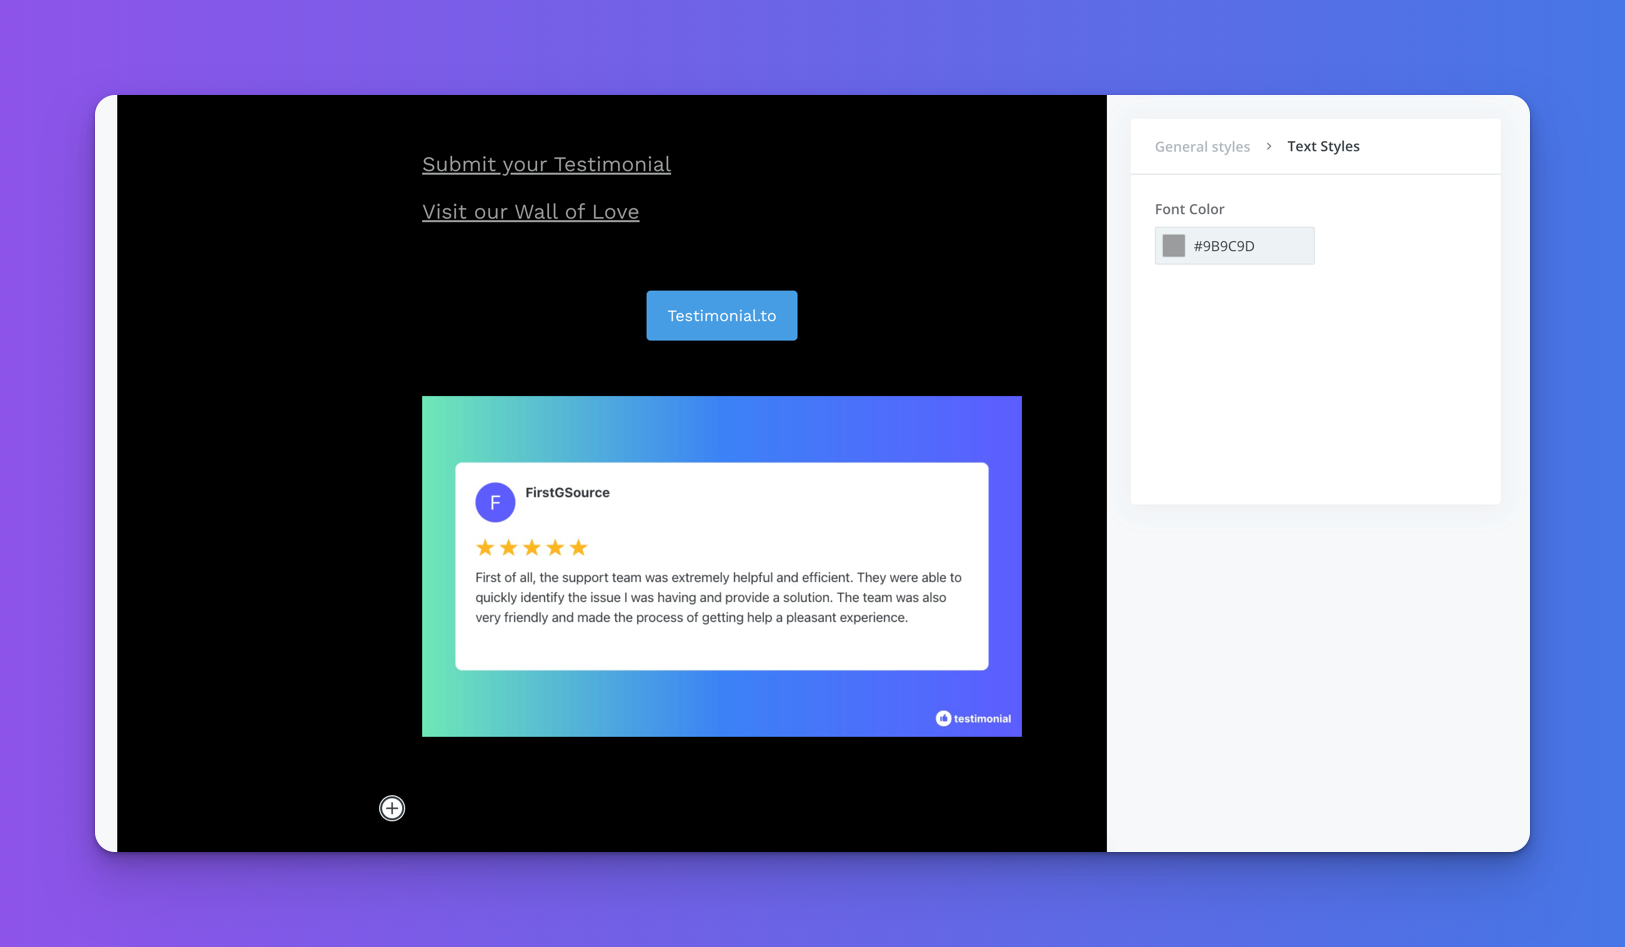
In this article, we will show you how to link to your wall of love or collect testimonials right from ConvertKit. Here’s an example showing links, a button, and a testimonial image 👇
What is Testimonial.to?
Testimonial effortlessly lets you collect customer reviews and display them on your ConvertKit website in a customized, interactive, and beautiful way.
We make it easy to capture, manage, and broadcast testimonials to improve the reputation of your brand or service and help you convert better.
What’s more? With testimonial.to, integrating your reviews on Linktree only requires adding a single line of code onto your site. You don't need any specialist tools or a developer — just copy and paste!
Our ConvertKit Integration
- Link to your public pages to collect text and video testimonials
- Link to your Wall of Love or testimonial page
- Generate and upload an image of your testimonials
- Automate your workflows with our zapier integrations
TL;DR
- Create an account on Testimonial.to and import your testimonials
- Copy the URL to your wall of love or page to collect testimonials
- You can also generate an image for your testimonial(s)
- Go back to ConvertKit and add the link or upload the image(s)
Voila! You are now ready to convert better with social proof 💪
Step by Step instructions
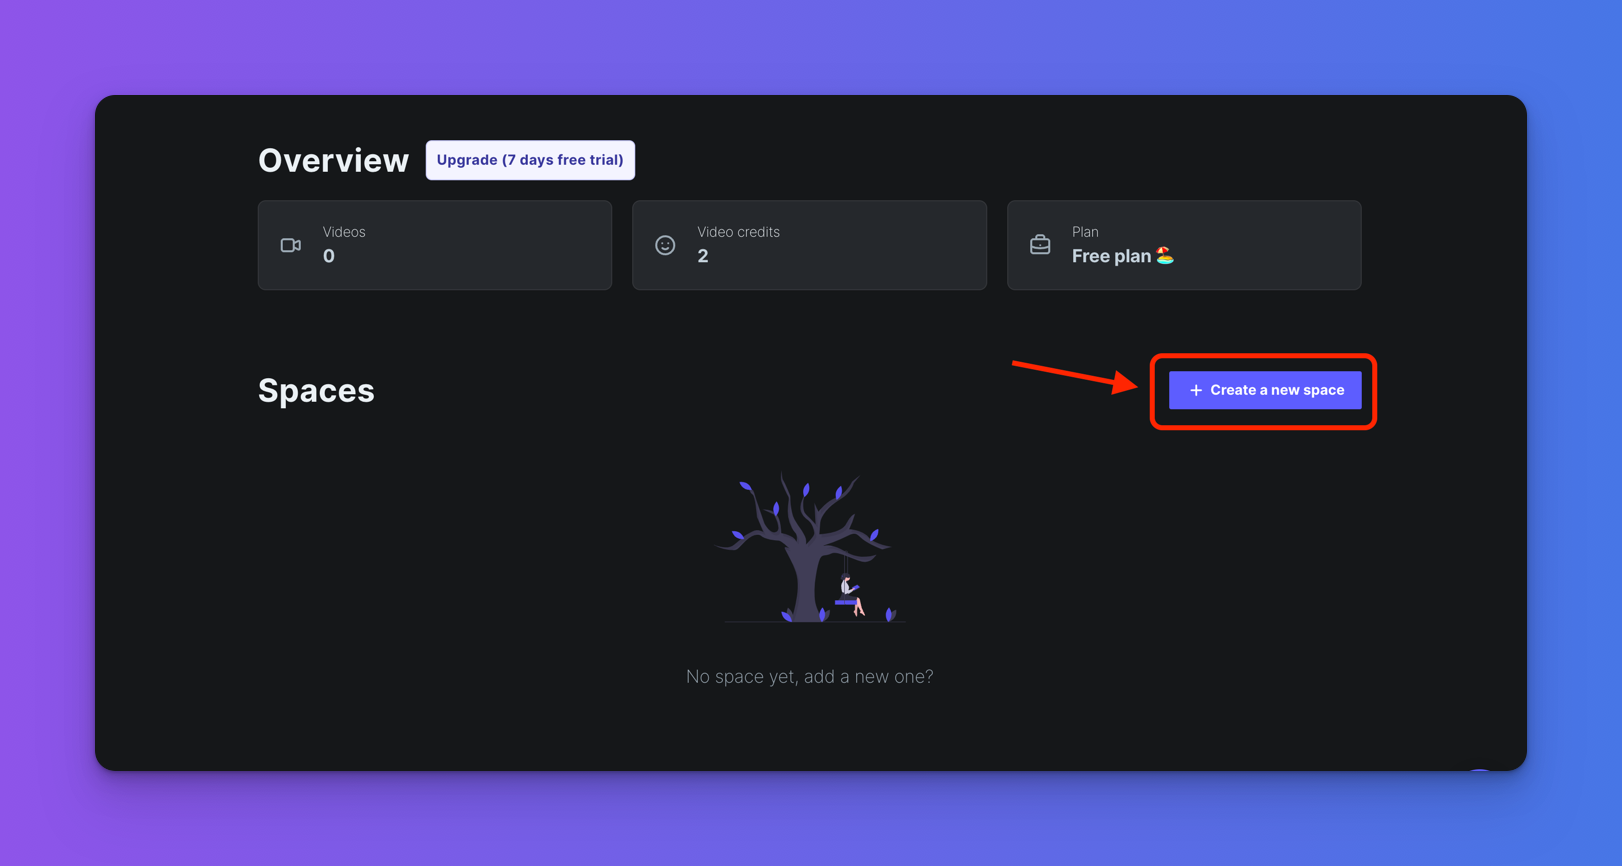
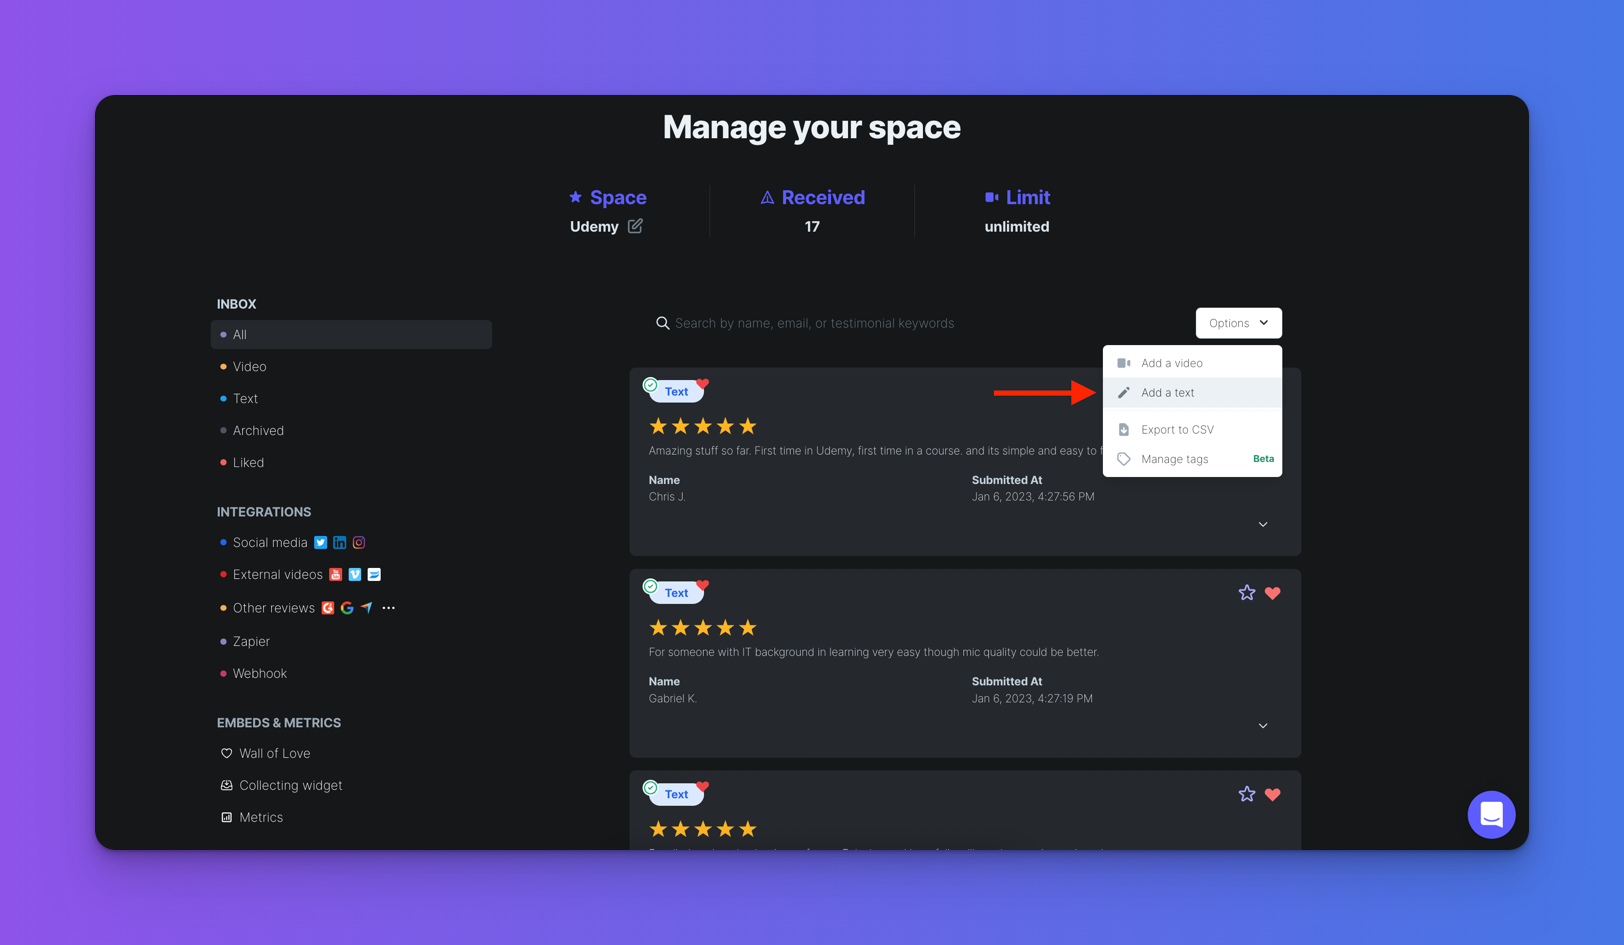
1. Import your reviews and testimonials to Testimonial.to
Start your free trial for Testimonial and create a new space. To learn more about all the settings and features below, you can visit the Get started collection in our help center.
Step 1. After registering, visit the dashboard and click on + Create a new space.
Step 2. After clicking, you will see the Create a new space popup modal.
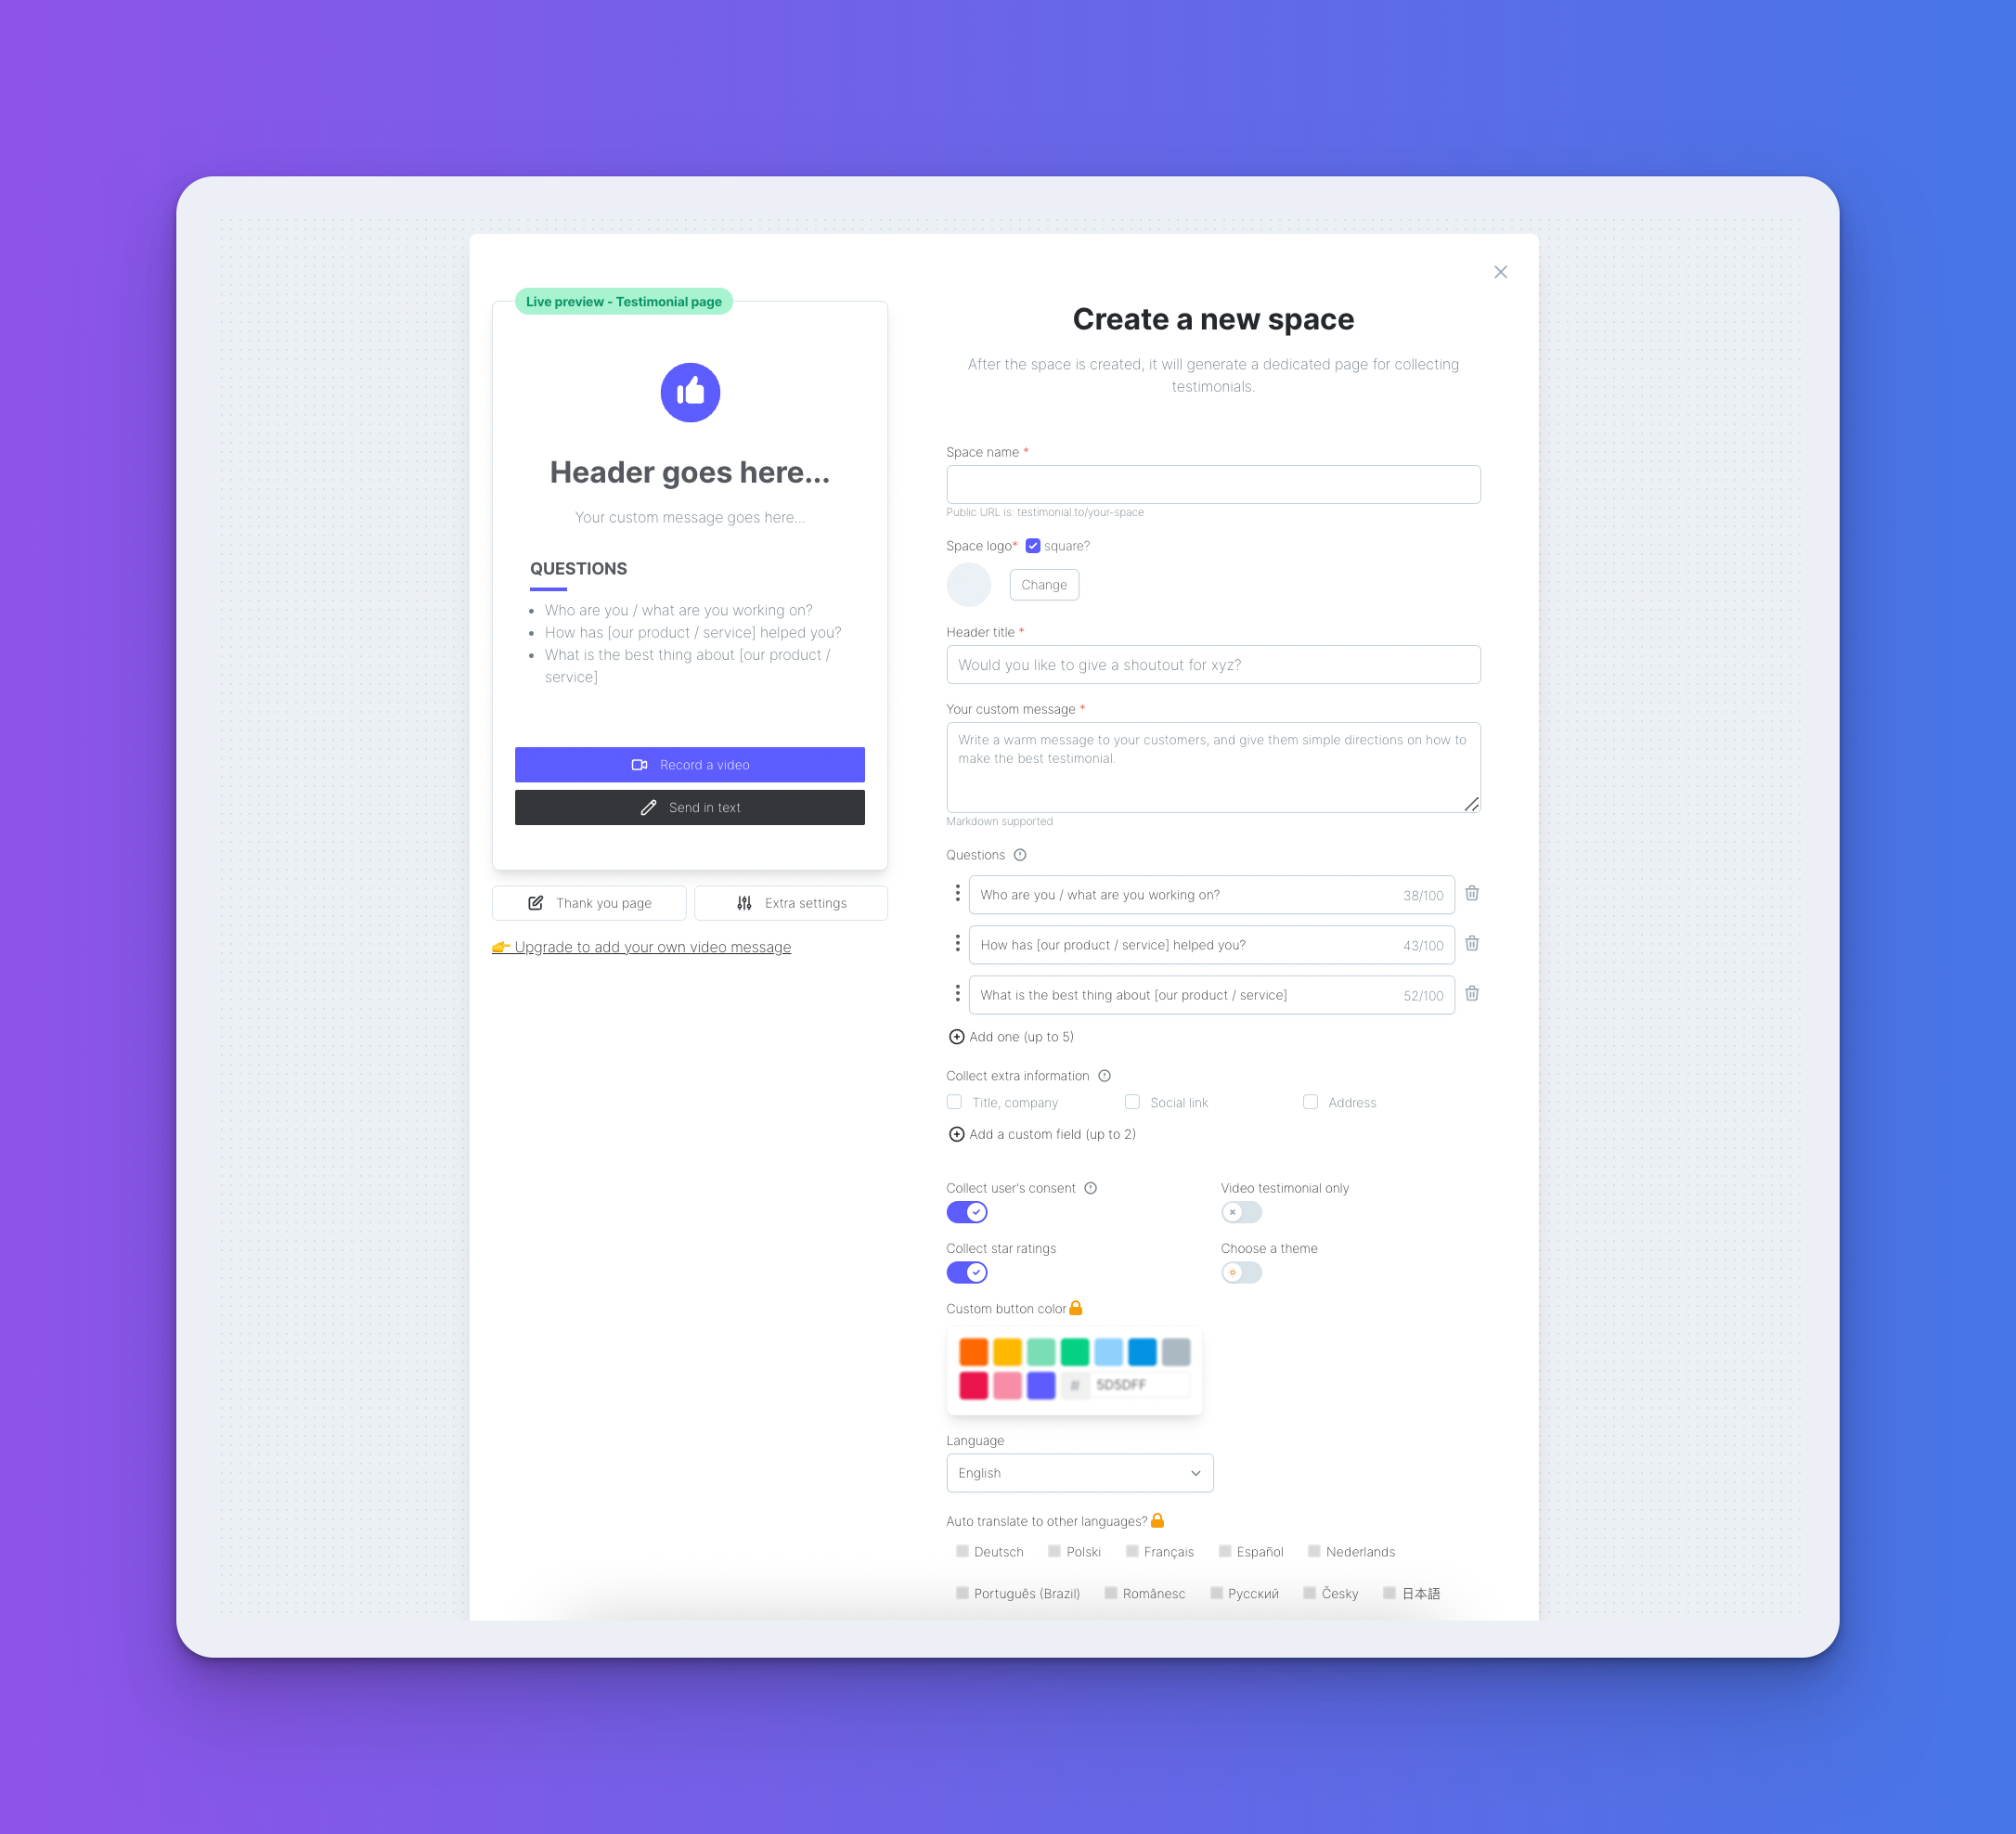
Step 3. Now that your space is ready, import your testimonials. This article will help you learn more about the many options you have to import your existing testimonials.
2: Generate an image for your testimonials
Step 1. Within a testimonial, click on ‘More’ followed by ‘create an image’.

Step 2. Customize the image to your liking and click on ‘download PNG’.
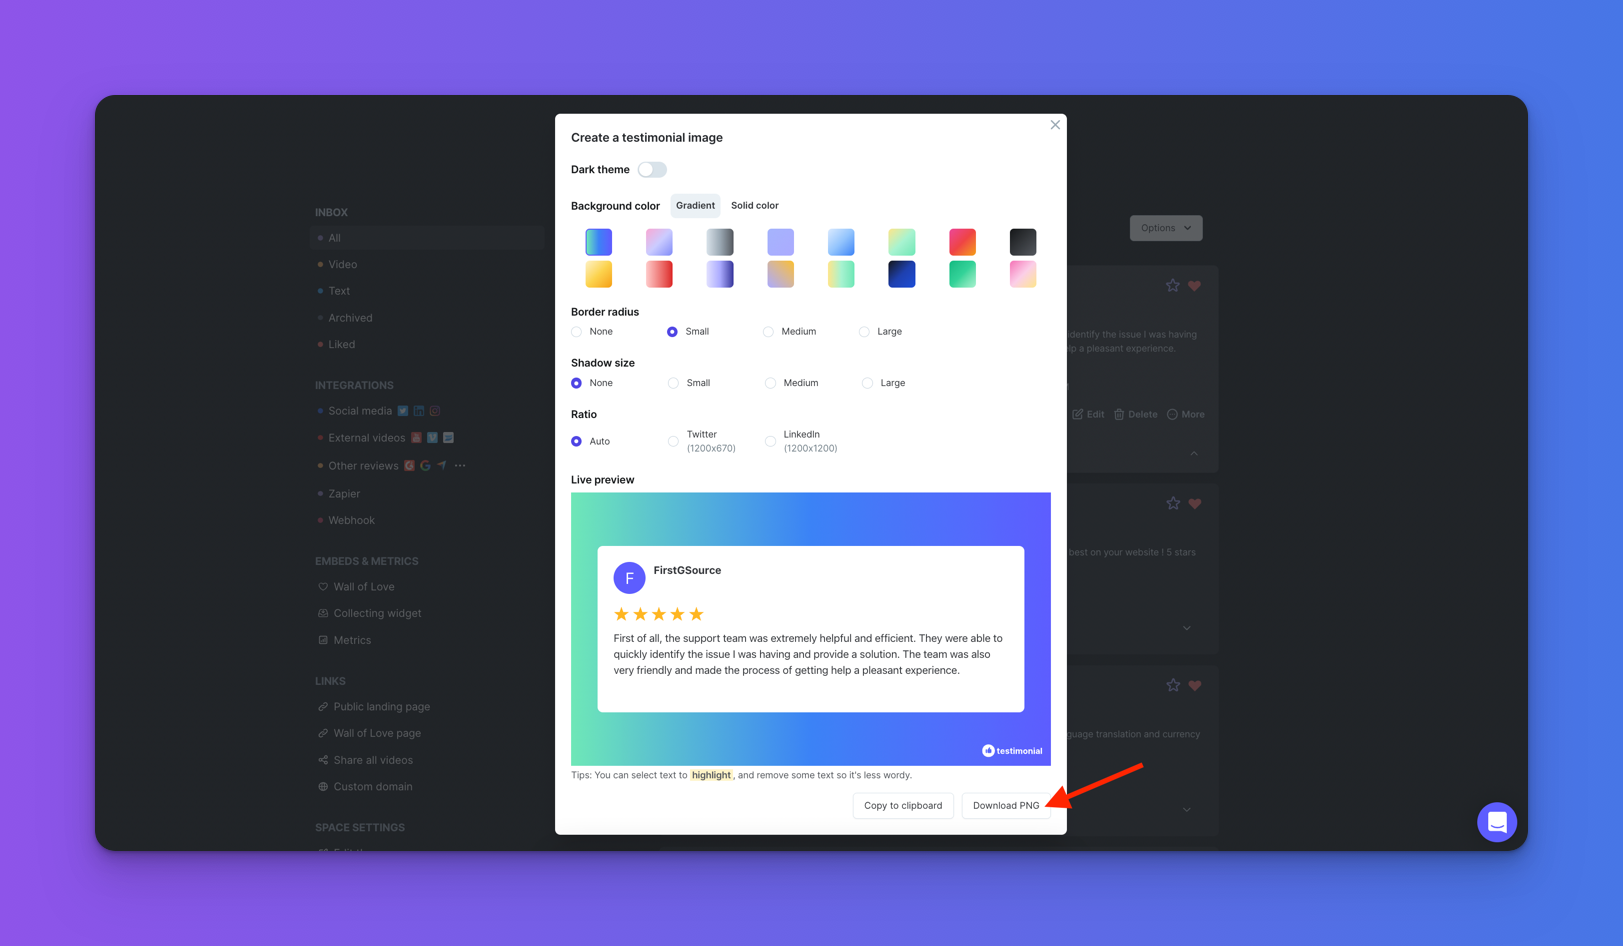
Step 3. Go back to ConvertKit and upload the downloaded PNG.
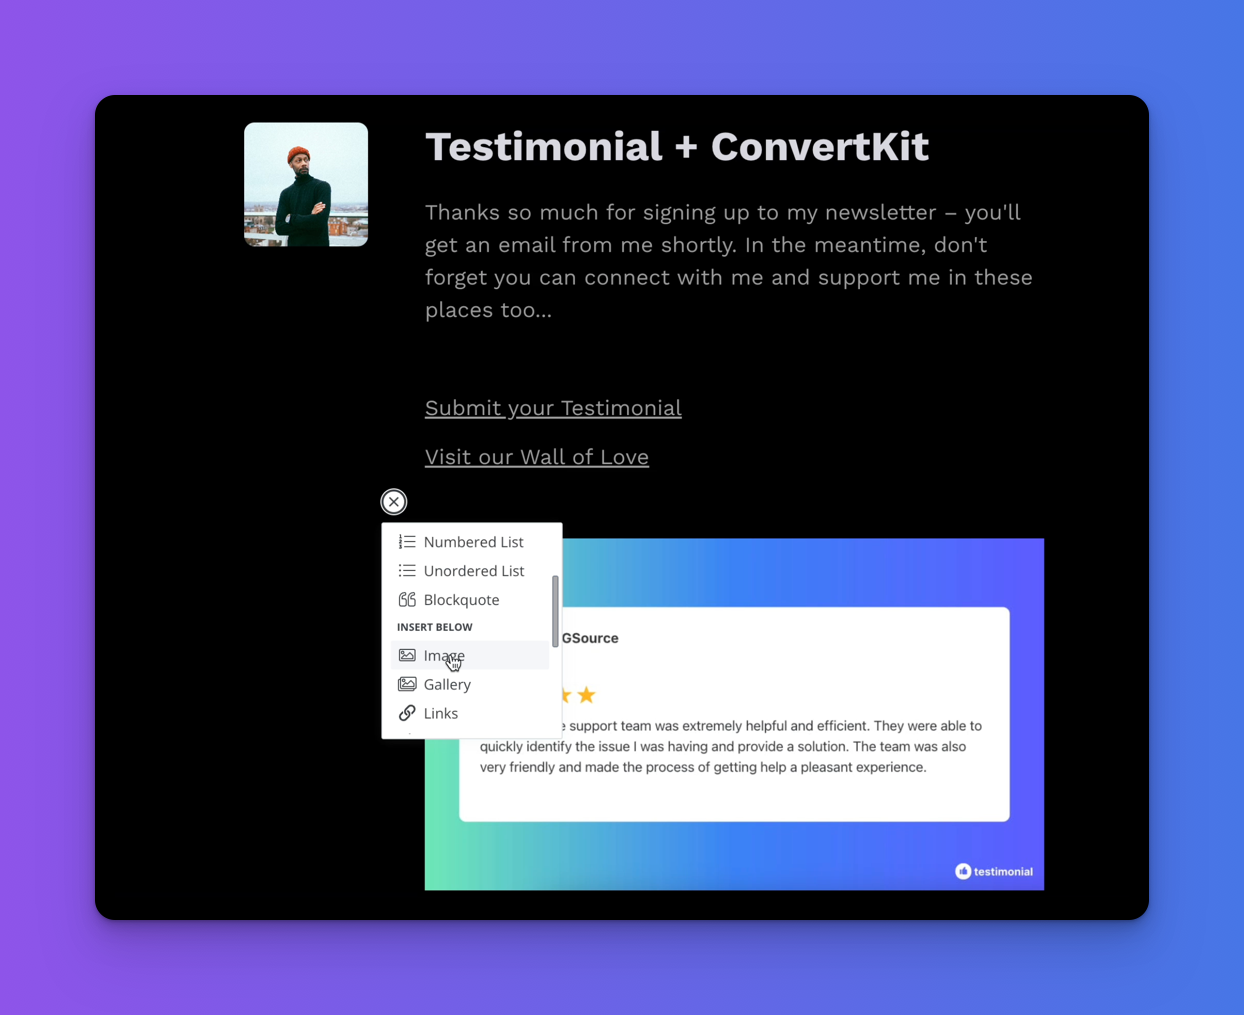
Step 4. That’s it! Your testimonial(s) will appear on ConvertKit 💪
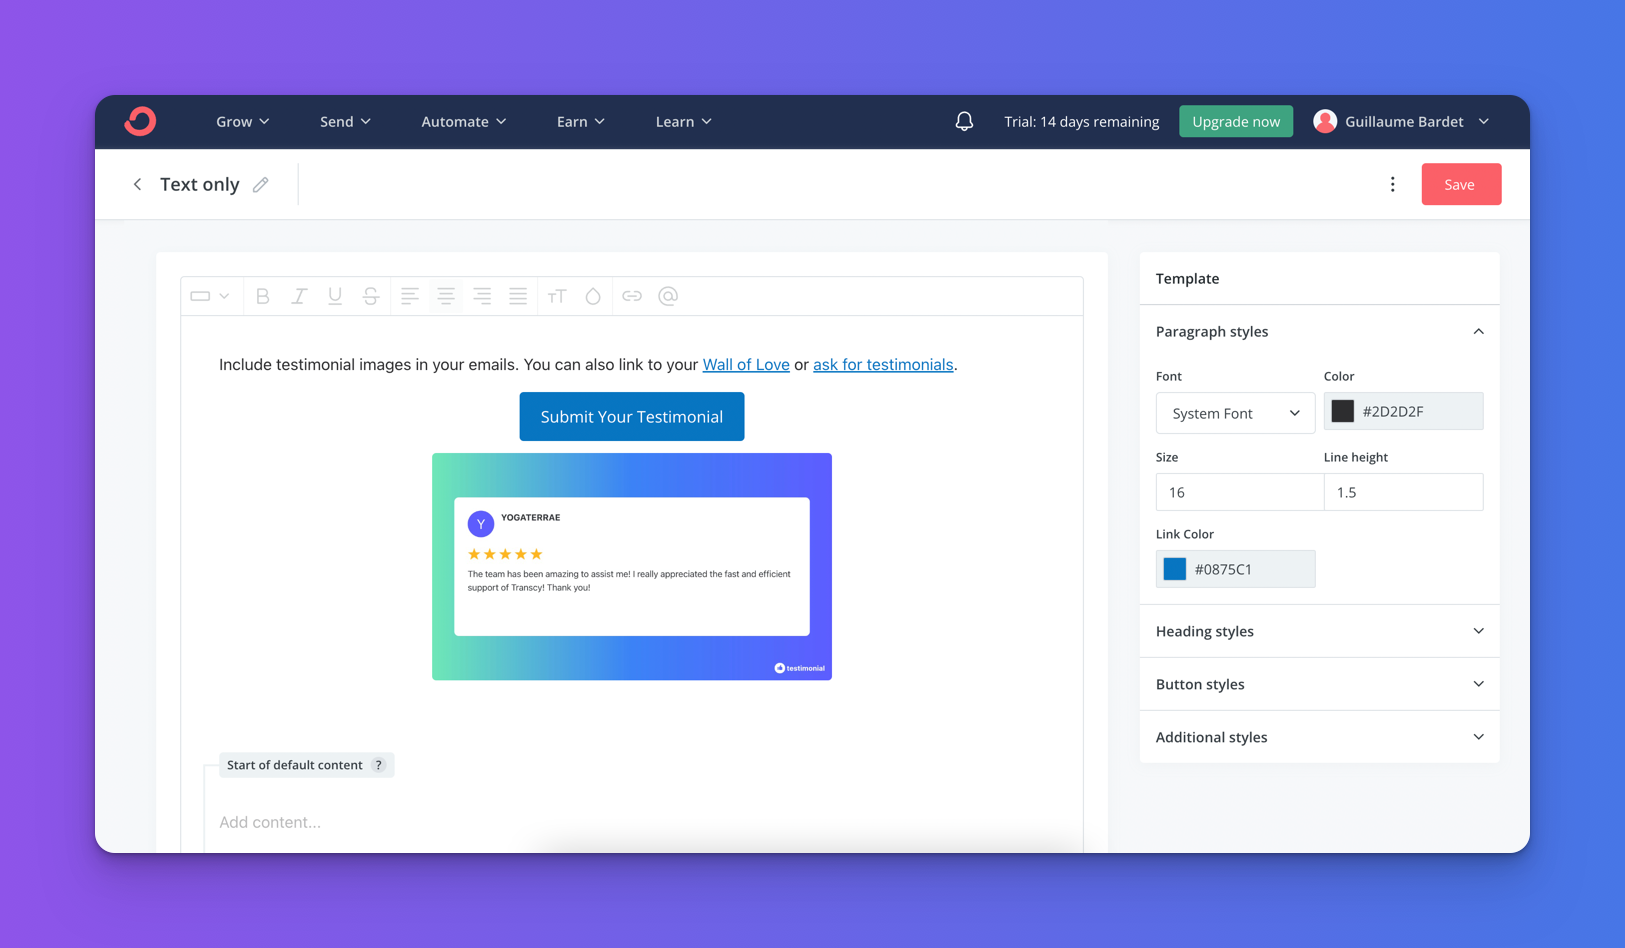
Tip #1: You can also create a button and link to your Wall of Love or testimonial request page
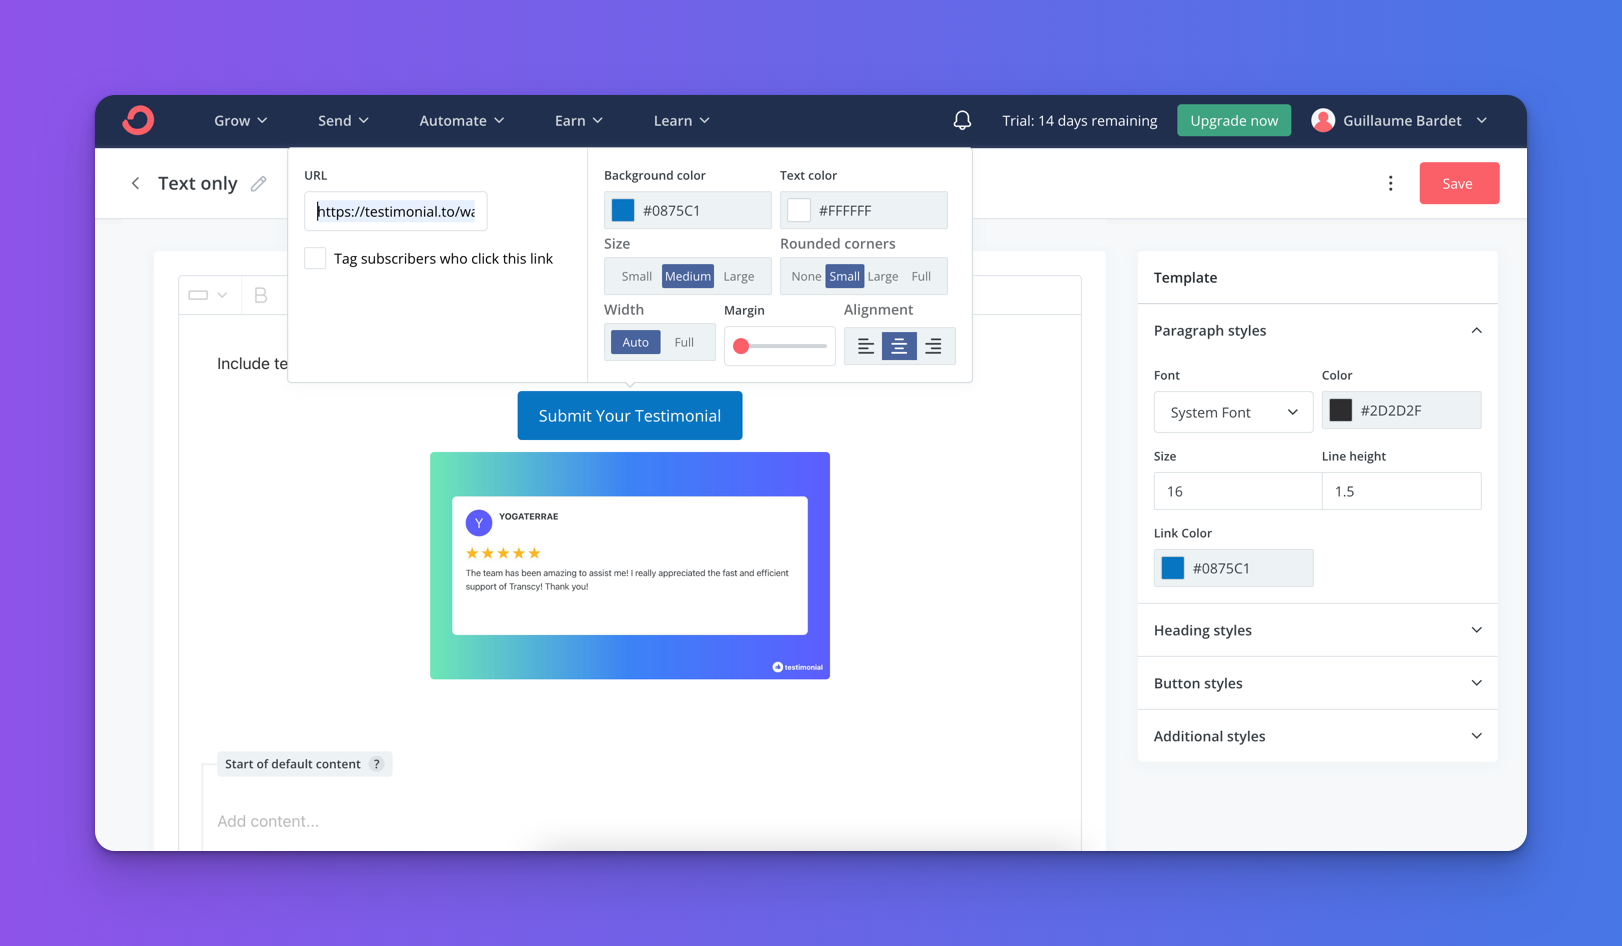
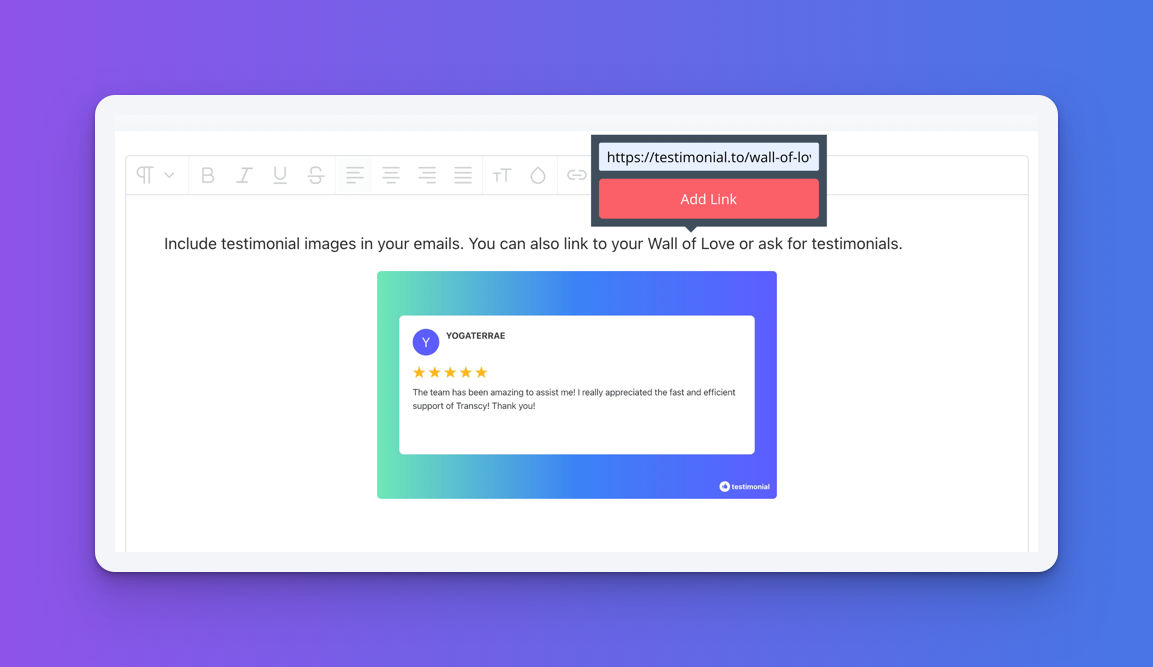
Tip #2: And of course, you can create hyperlinks
Here’s an example when sending out a campaign on ConvertKit 📧
Before you go, we should mention that you can automate your testimonial process with our Zapier + ConvertKit integration! You can learn more about it here.

With Testimonial.to, you can add video & text testimonials, Twitter tweets, etc., all in one place. 🥳
