.png)
Do not index
Logo
.png)
Product name
HubSpot Website
Added to /integrations
Not added
Category
Website Builders
Now that your HubSpot website site is live, you may be wondering how to improve your conversion rate, and that’s by adding Testimonials!
This article will show you how to add reviews and testimonials to your HubSpot website.
What is Testimonial.to?
Testimonial effortlessly lets you collect customer reviews and display them on your HubSpot website with customized, interactive, and beautiful review widget features.
We make it easy to capture, manage, and broadcast testimonials to improve the reputation of your brand or service and help you convert better.
What’s more? With testimonial.to, integrating your reviews on Leadpages only requires adding a single line of code onto your site. You don't need any specialist tools or a developer — just copy and paste!
Our HubSpot Integration
- Embed your widget to collect text and video testimonials
- Create a wall of love or testimonial page (ex: /wall-of-love)
- Create a page to collect testimonials
- Display a testimonial slider or a single testimonial
- Automate your workflows with our zapier integrations
TL;DR
- Create an account on Testimonial.to and import your testimonials
- Create your Wall of Love or collecting widget
- Customize your widget and copy the HTML code
- Navigate to your HubSpot website
- Click on ‘rich text module’ and edit the ‘embed code’.
- Paste the code and click ‘Apply’
Voila! Your website is now ready to convert better with social proof 💪
Step-by-Step Instructions
Step 1. Navigate to your content:
- Website Pages: In your HubSpot account, navigate to Marketing > Website > Website Pages.
- Landing Pages: In your HubSpot account, navigate to Marketing > Landing Pages.
- Blog: In your HubSpot account, navigate to Marketing > Website > Blog.
- Knowledge Base: In your HubSpot account, navigate to Service > Knowledge Base.
Step 2. Hover over your page, post, or article, then click Edit.
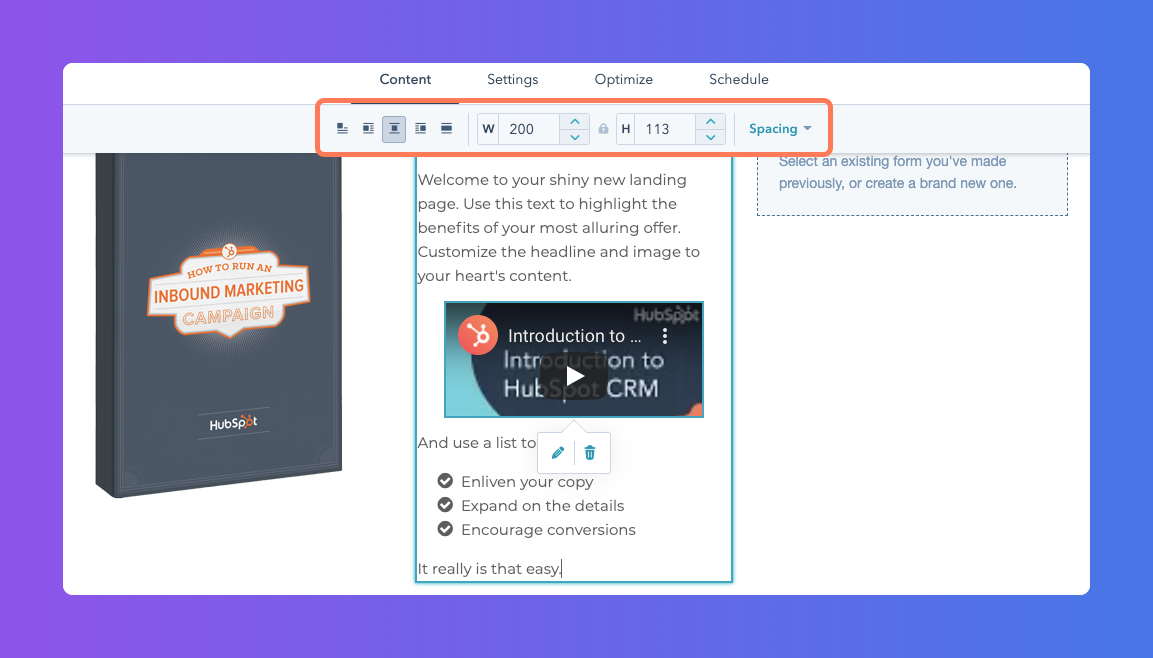
Step 3. In the content editor, click the rich text module.
Step 4. Click the embedded file.
Step 5. Edit your media file's position, dimensions, and spacing in the toolbar.
- To resize your file, enter pixel values for the width and height.
Step 6. To adjust the media file's position within a block of text, click the inline alignment icons. To make your video responsive, click the fullWidth full-width icon. The video will take up the entire width of the device it's viewed on.
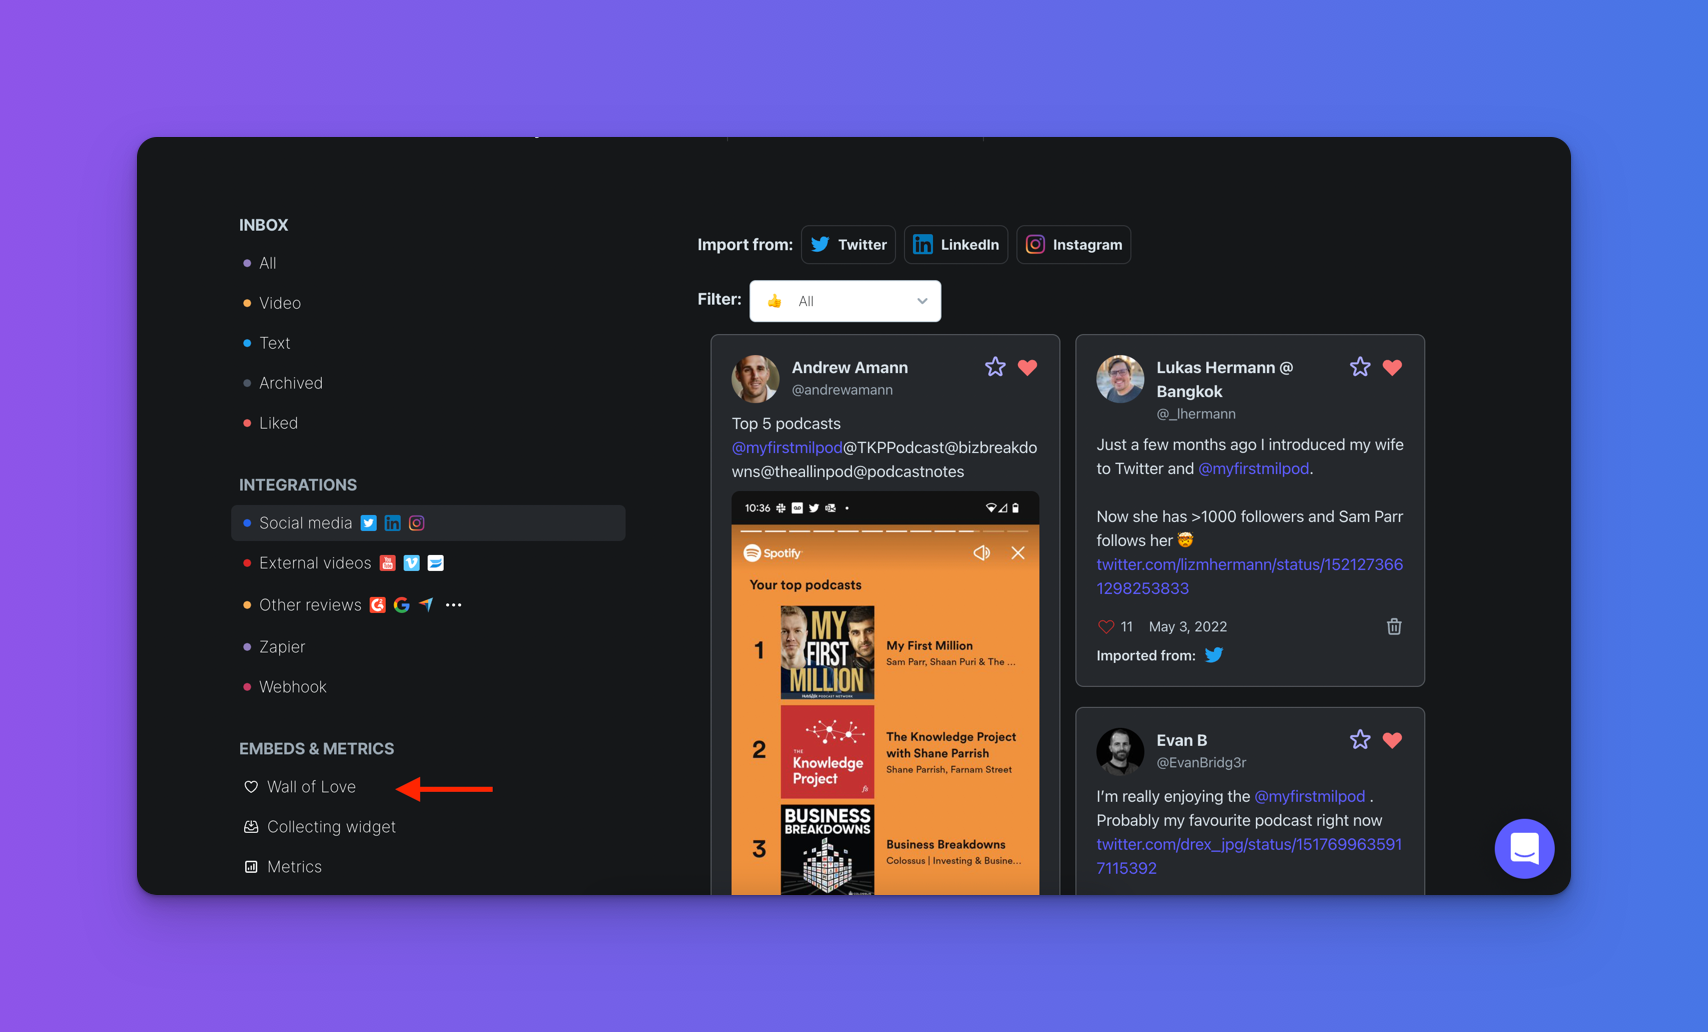
Step 3. Go to your Testimonial account dashboard and visit the space you want to add to HubSpot. After clicking the space, you will see "Wall of Love" option on the left sidebar in the Embed section.
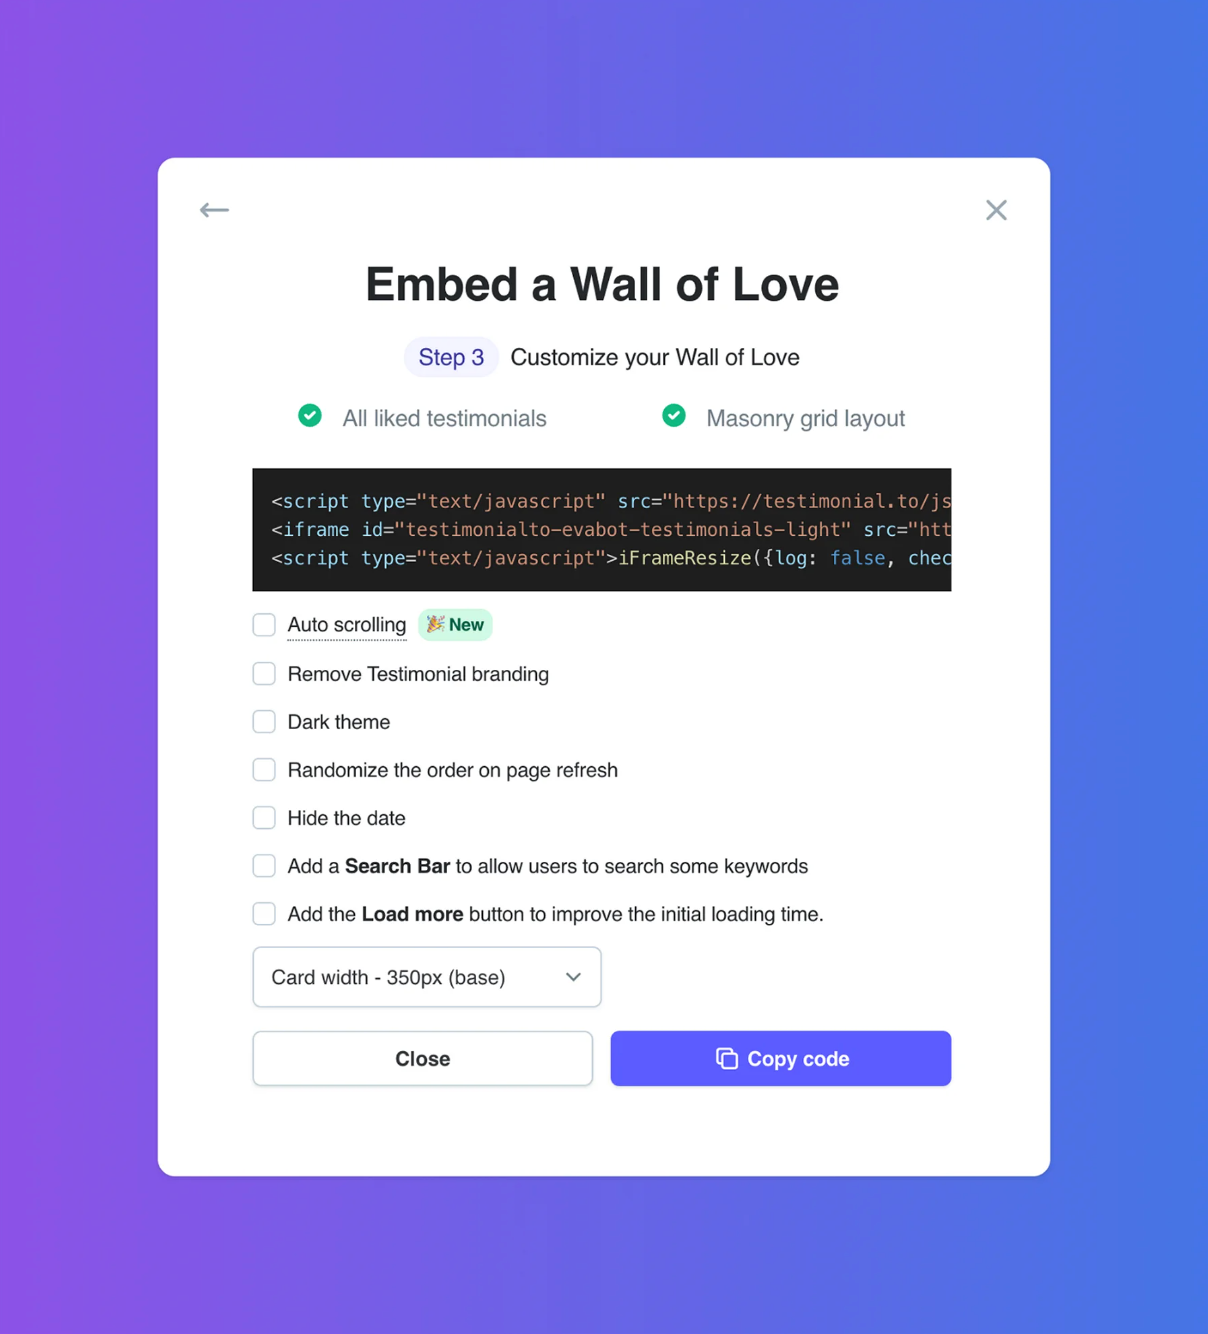
Step 4. Click that, then choose the styles you want to display the wall of love, in the last step, you will find the embed code. Click the "Copy code" button will copy the code to the clipboard automatically.
You can learn more about customizing your Wall of Love by visiting this article.
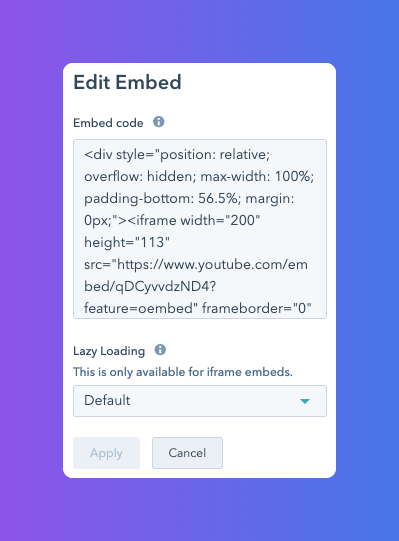
Step 7. To edit advanced options for your media file, click the edit icon.
- Developers can edit the style and behavior of an embedded video in the Embed code text field.
- By default, media files use lazy loading and will only load if a visitor scrolls to their area of a page. To have your media file start loading when the page loads, click the Loading options dropdown menu and select Eager.
With Testimonial.to, you can add video & text testimonials, Tweets, etc., all in one place! ✌️
