
Do not index
Logo
.jpeg)
Product name
Crisp
Added to /integrations
Not added
Category
Customer Support
Crisp is one of the most reputable live chat platforms.
Now that you receive live chats from customers, have you considered turning them into beautiful testimonials?
With how busy everyone is today, it is a frictionless way to collect some shoutouts from your customers.
The best part is that once you turn them into testimonials and embed them on your site, you won’t have to touch the code when you want to add, move, or update testimonials.
This article will show you how to add Crisp chats as testimonials to your website. Testimonial.to integrates with 100+ tools; here’s a demo using Airtable form submissions.👇
What is Testimonial.to?
Testimonial effortlessly lets you collect customer reviews from Crisp and display them on your website with customized, interactive, and beautiful review widget features.
We make it easy to capture, manage, and broadcast testimonials to improve the reputation of your brand or service and help you convert better.
What’s more? With testimonials, integrating your reviews on your website only requires adding a single line of code to your site. You don't need any specialist tools or developers — just copy and paste!
Our Crisp Integration
- Manually Import Crisp conversations (via our chrome extension)
- Bulk Import live chat conversations
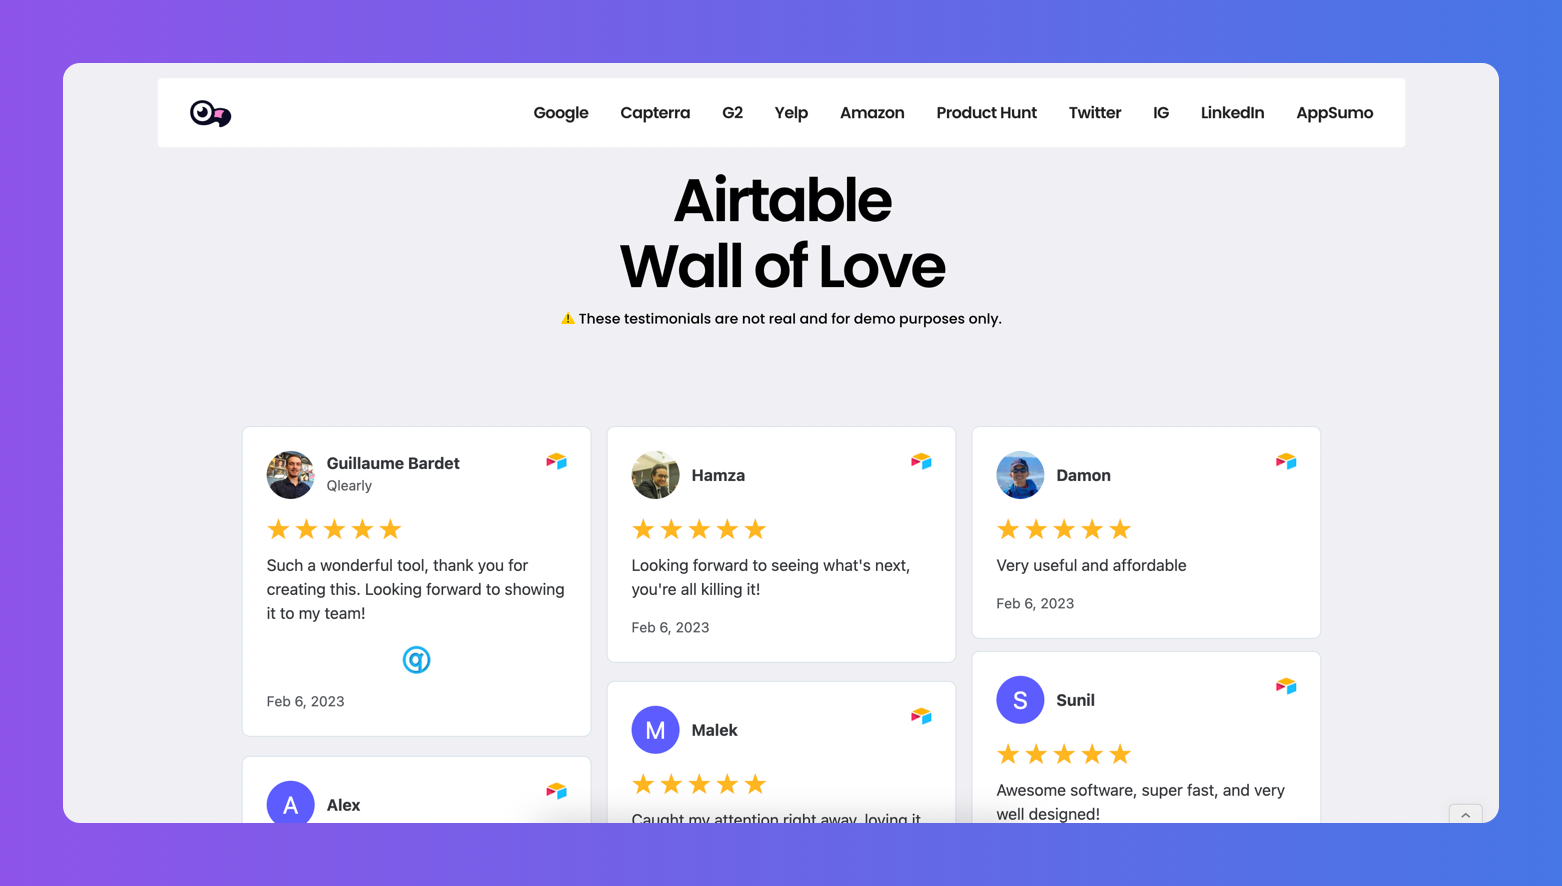
- Create a Wall of Love or testimonial page (ex: /wall-of-love)
- Display a testimonial slider or a single testimonial
- Generate images for social media and more
TL;DR
- Create an account on Testimonial.to and install our browser extension
- Do a right-click and turn any text into testimonials
- Create and customize your Wall of Love
- Copy the HTML code and navigate to your website builder
- Paste the code in the HTML editor, and Publish your site
Voila! Your website is now ready to convert better with social proof 💪
Import Your Crisp chats to Testimonial
Before being able to display Crisp chats on your website, you need to gather them in one place.
Tip: The three options mentioned below also work on many other review sites. This means you can display your reviews and testimonials from all platforms on one testimonial page!
Option 1: Import Crisp chats within Testimonial.to
Start your free trial for Testimonial.to and create a new space. To learn more about all the settings and features below, you can visit the Get Started collection in our help center.
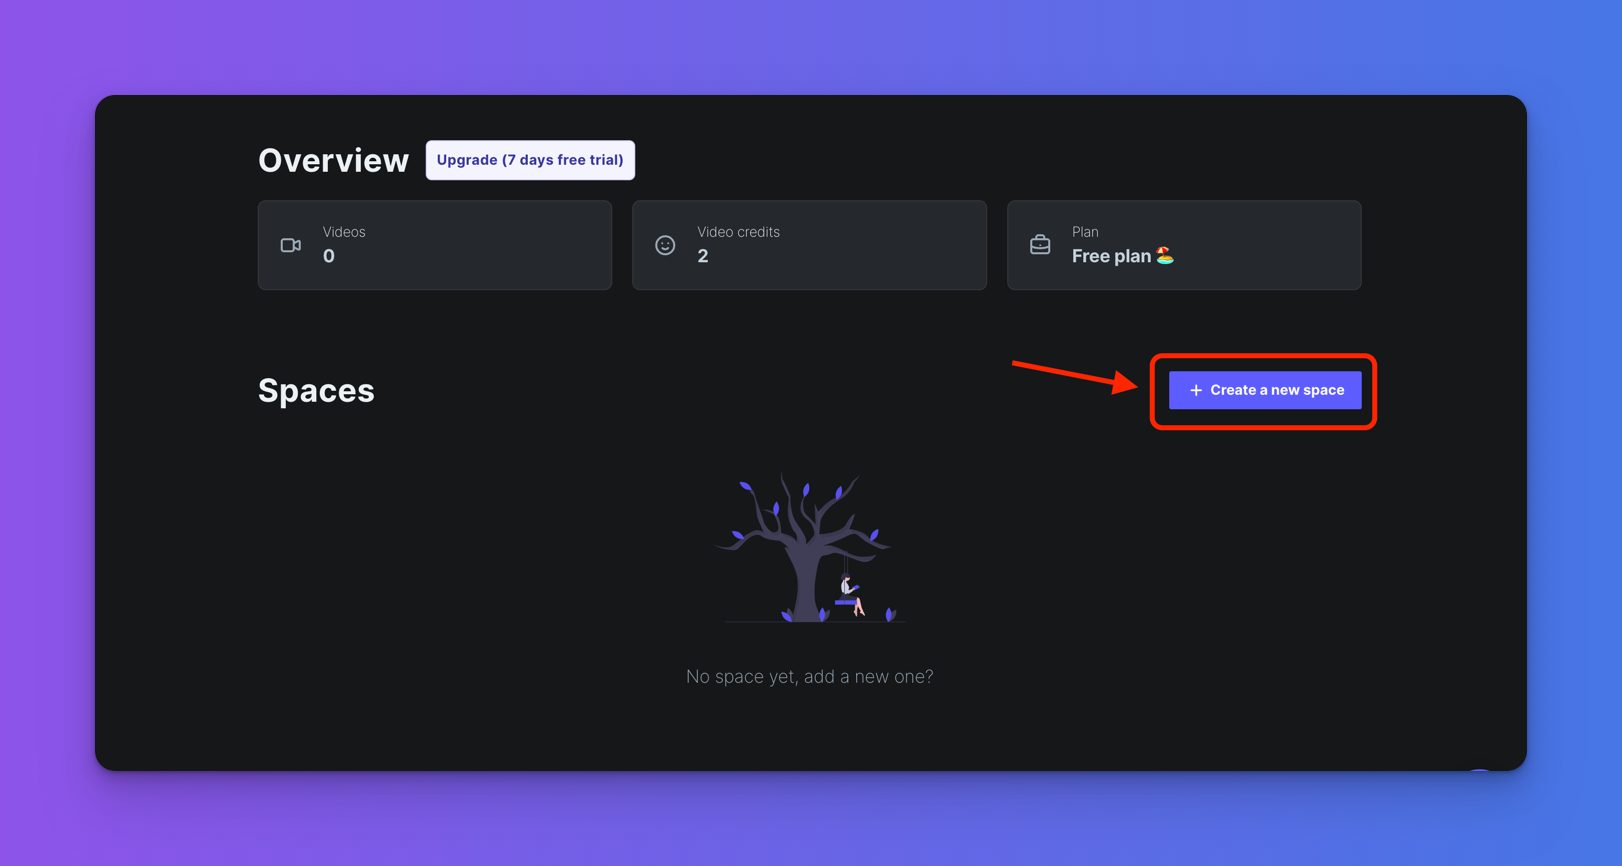
Step 1. After registering, visit the dashboard and click on + Create a new space.
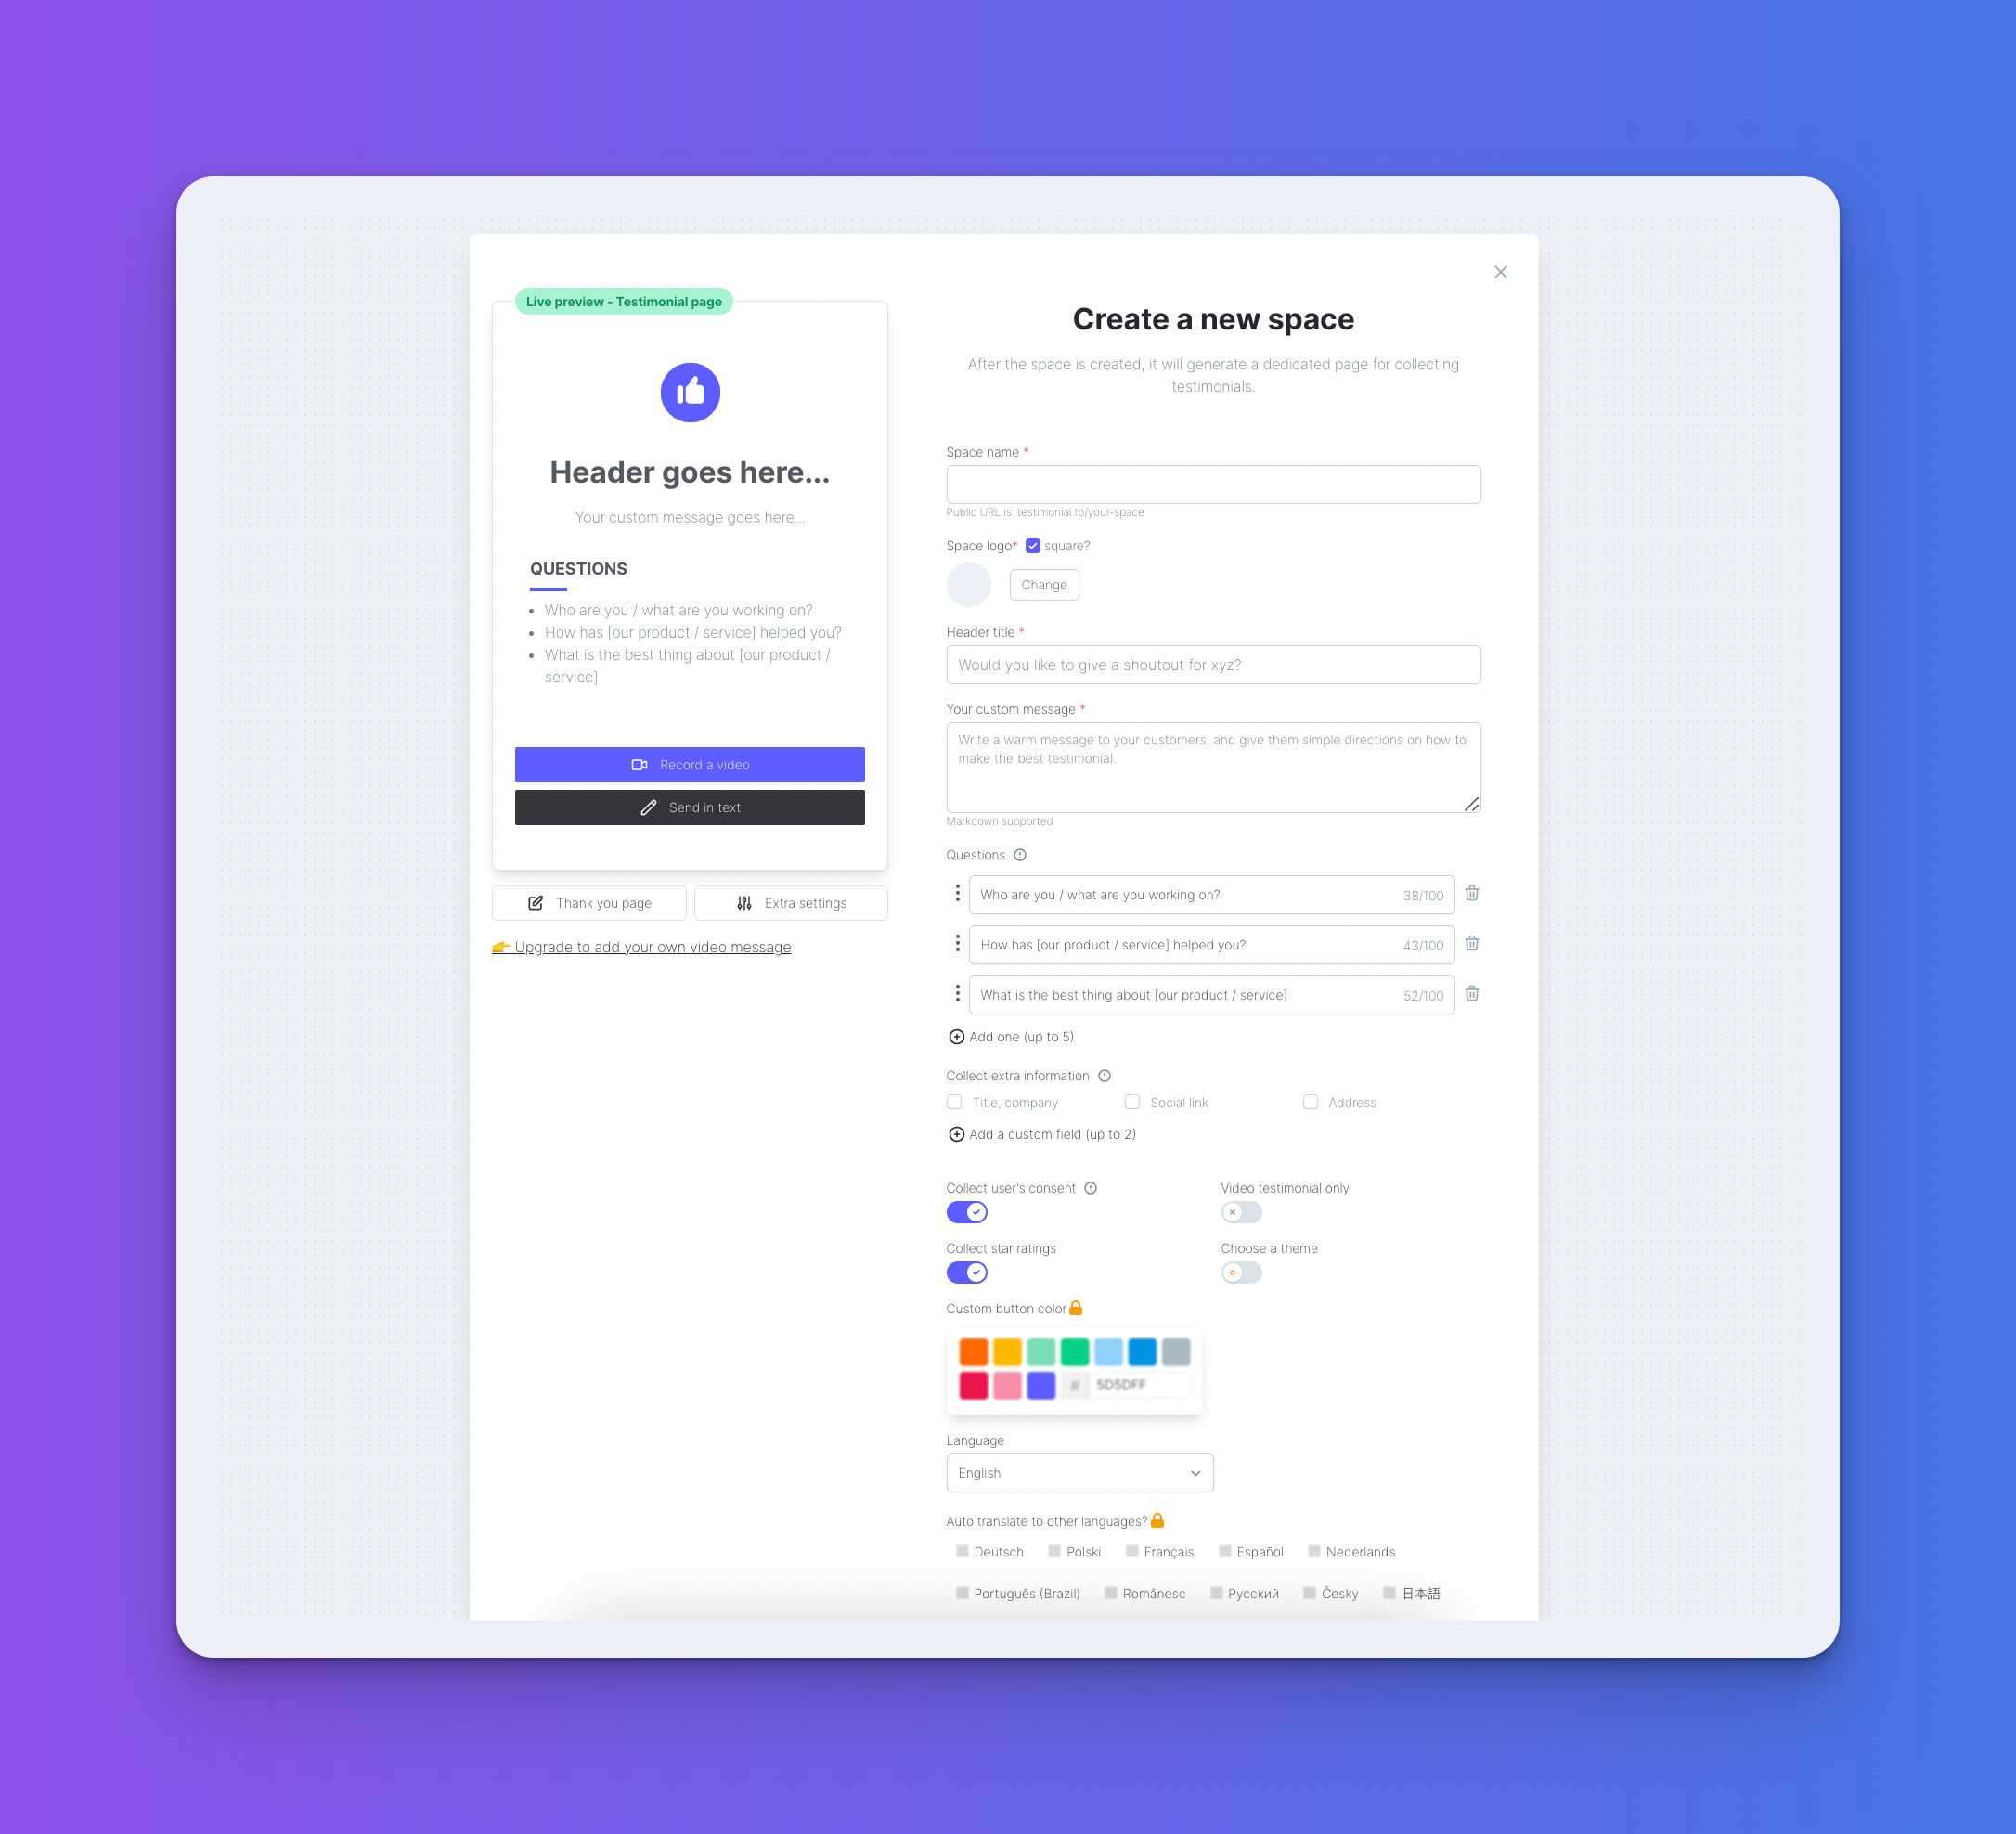
Step 2. After clicking, you will see the Create a new space popup modal.
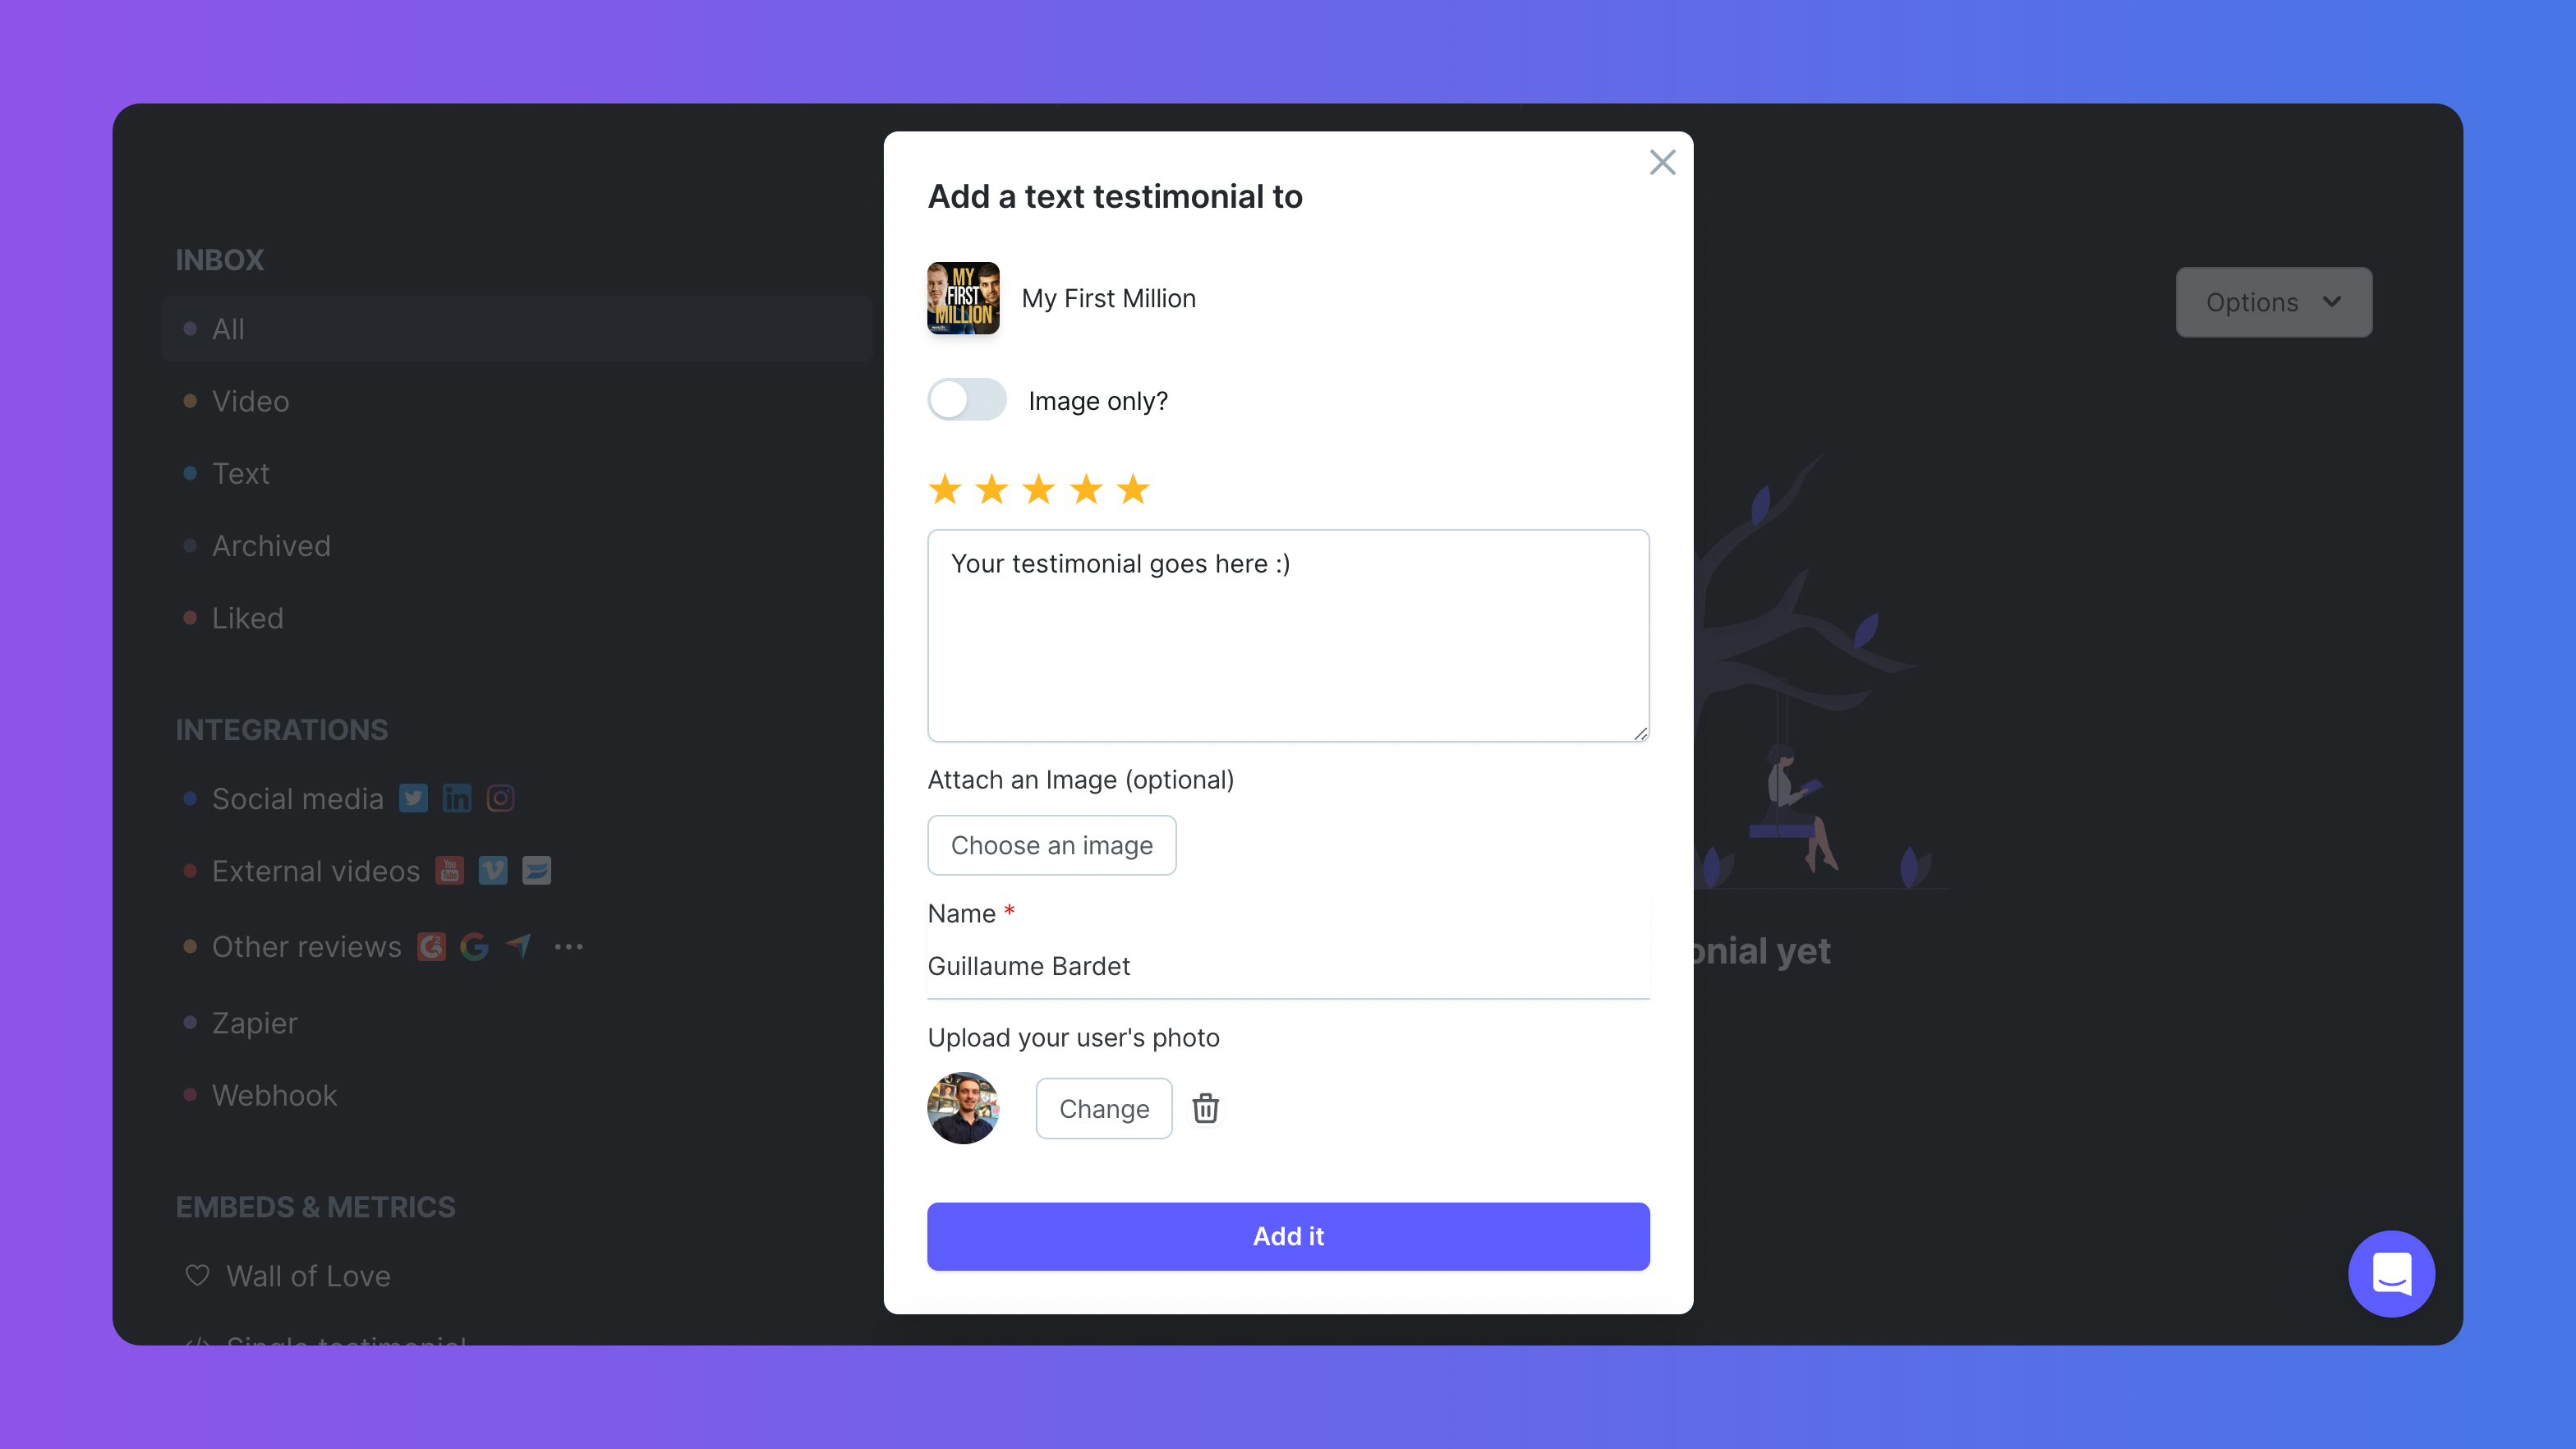
Step 3. Now that your space is ready, click on ‘Options’ followed by ‘Add a text’.
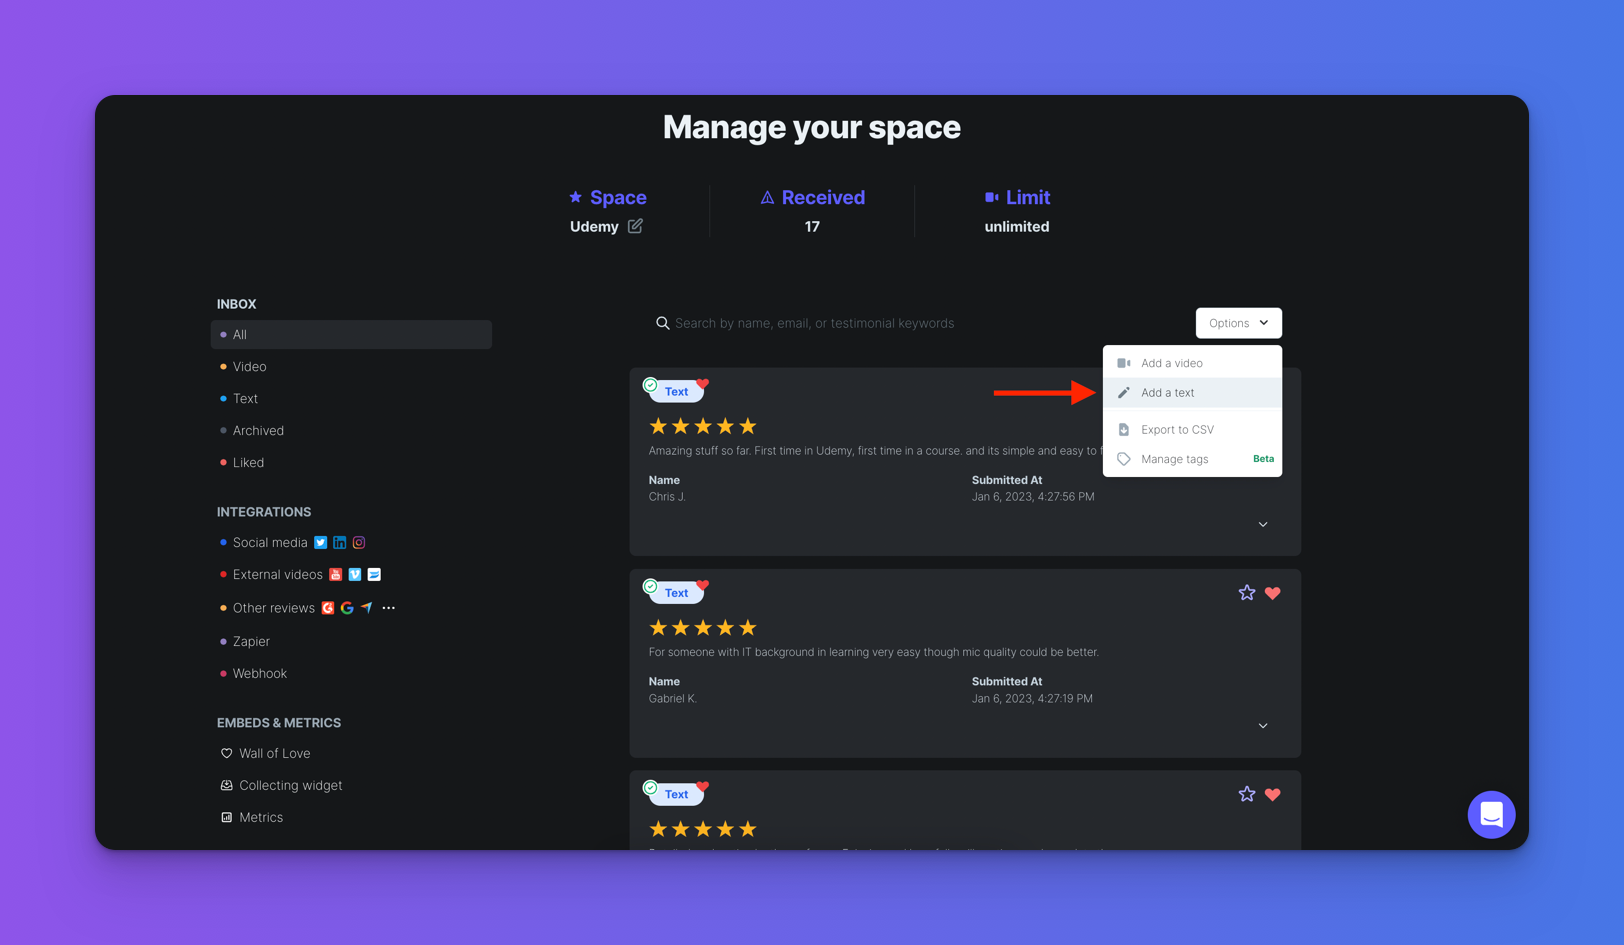
Step 4. Within that popup, add the information of your testimonial, and voila! 💪
Option 2: Import Crisp chats with our browser extension
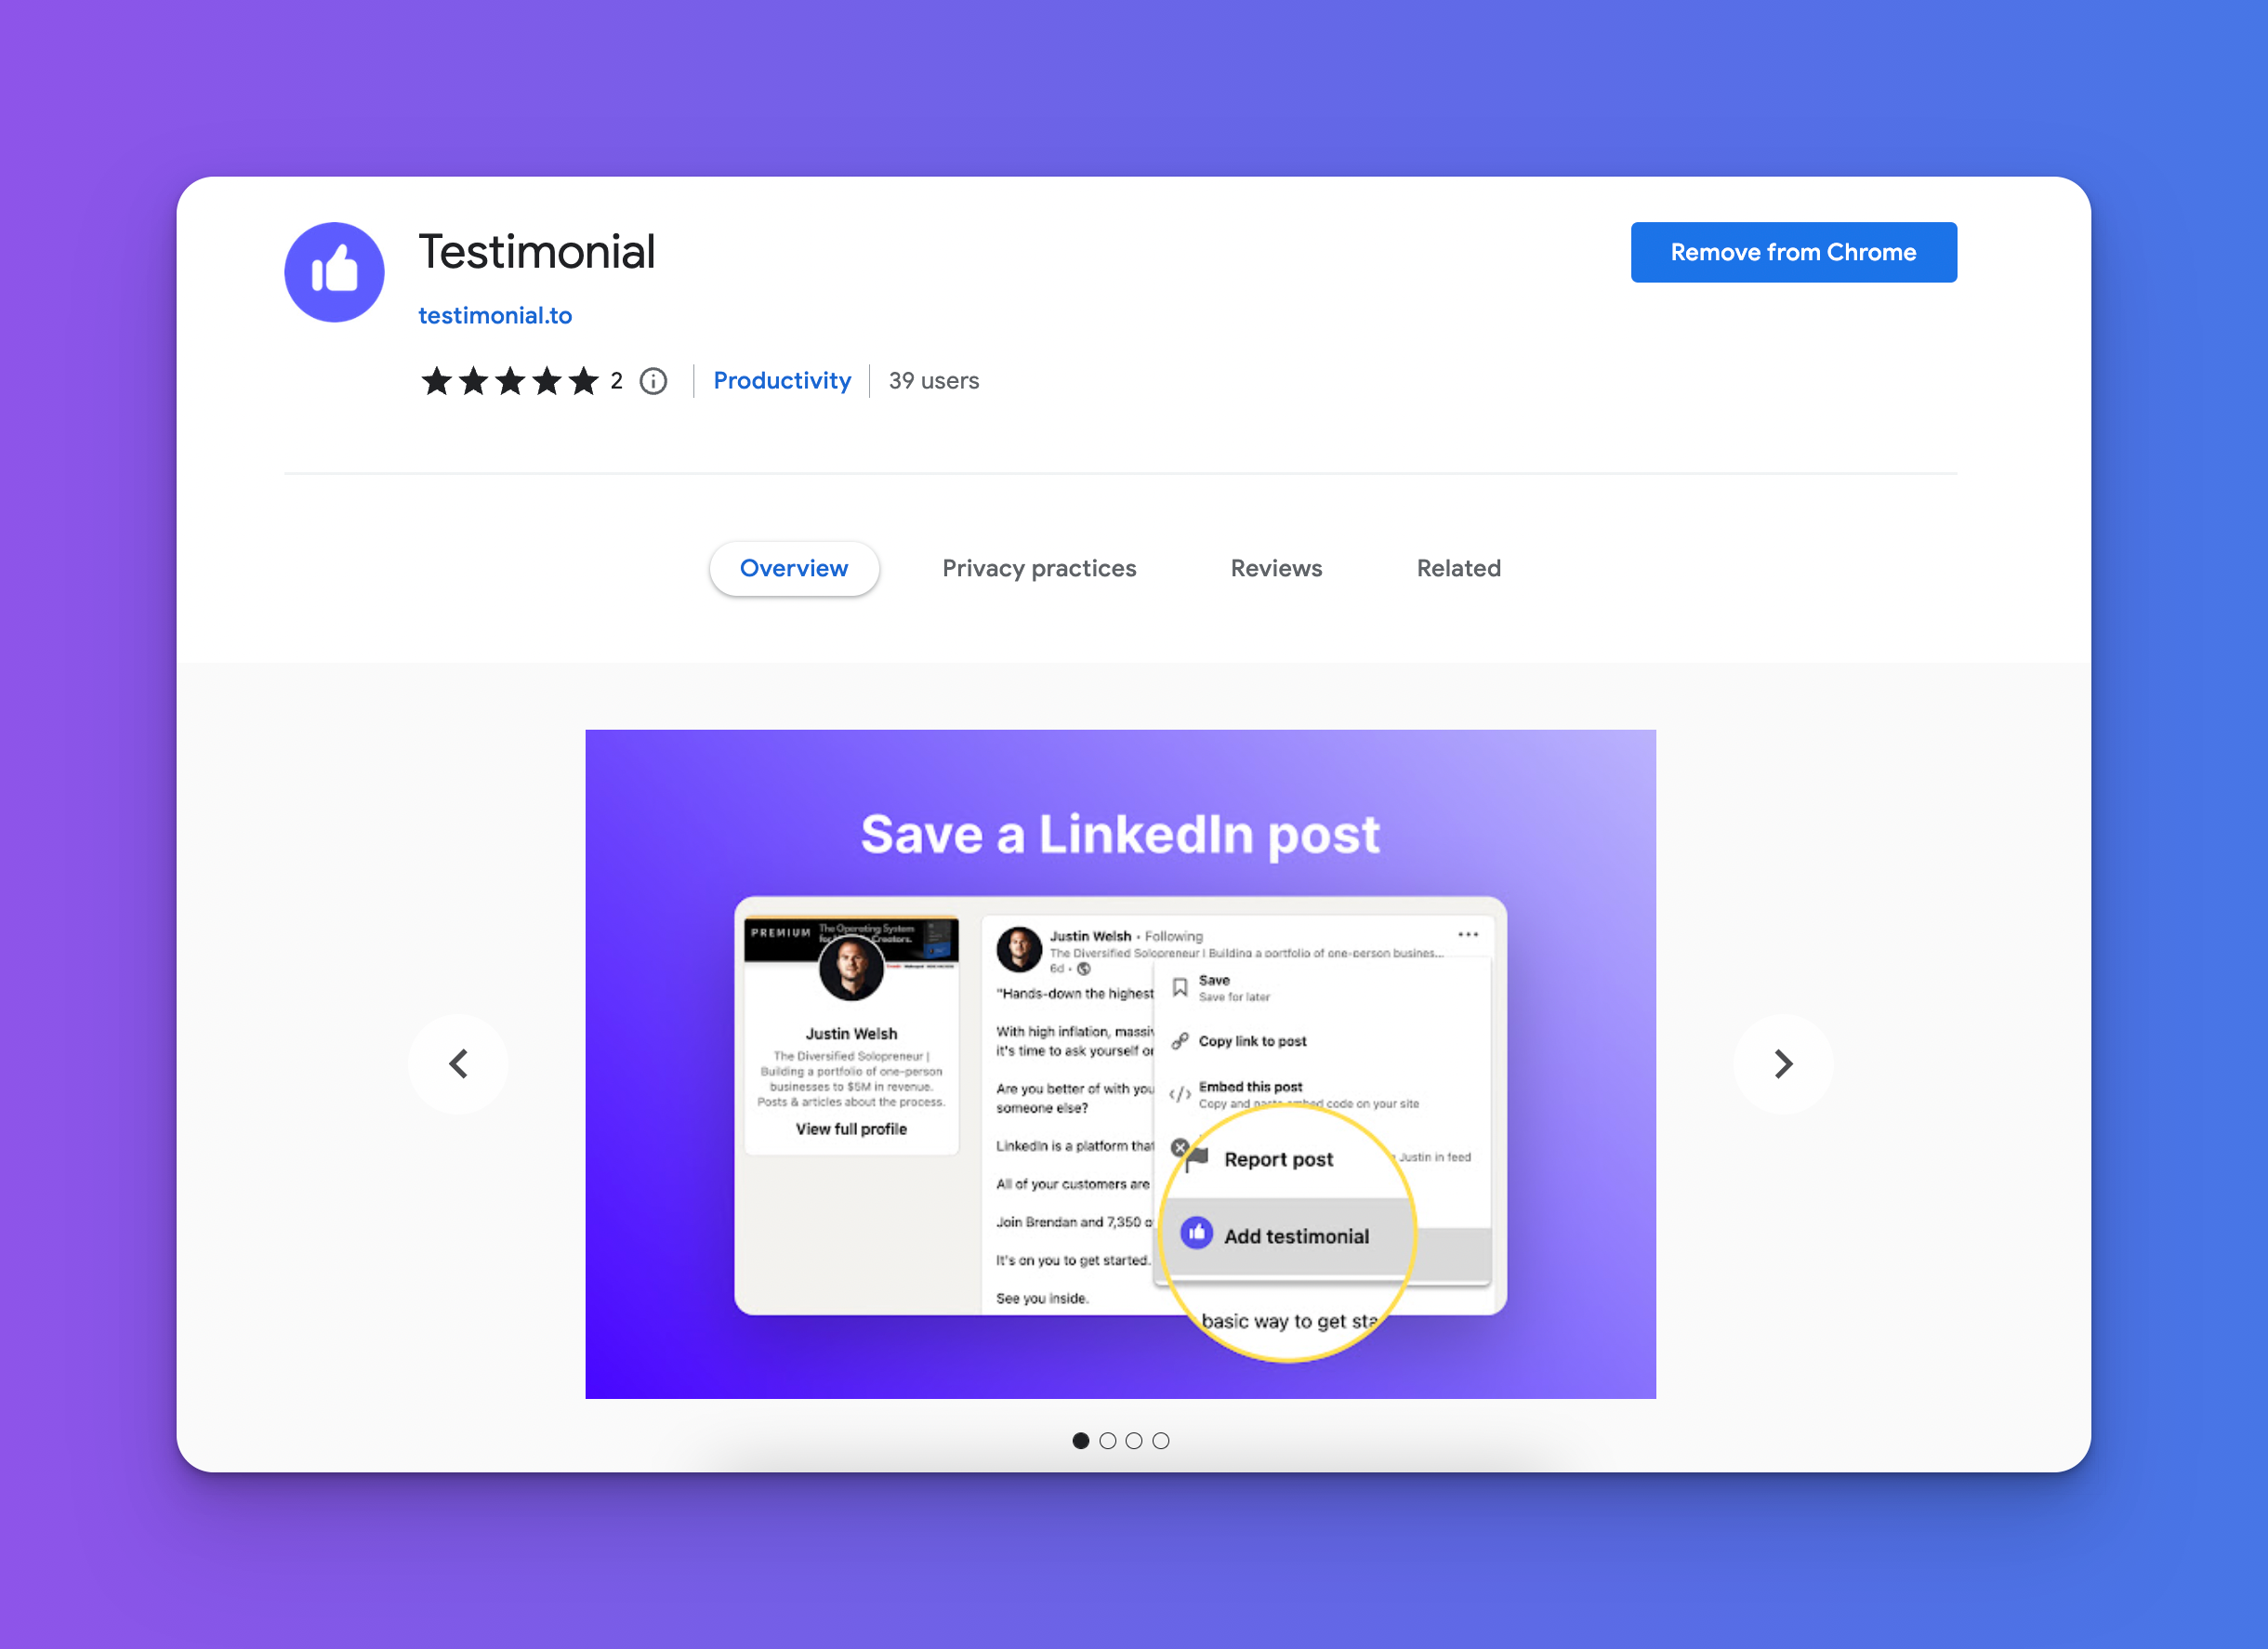
Step 1. Install the Testimonial browser extension. It is available on all chromium browsers such as Chrome, Brave, Vivaldi, Microsoft Edge, etc.
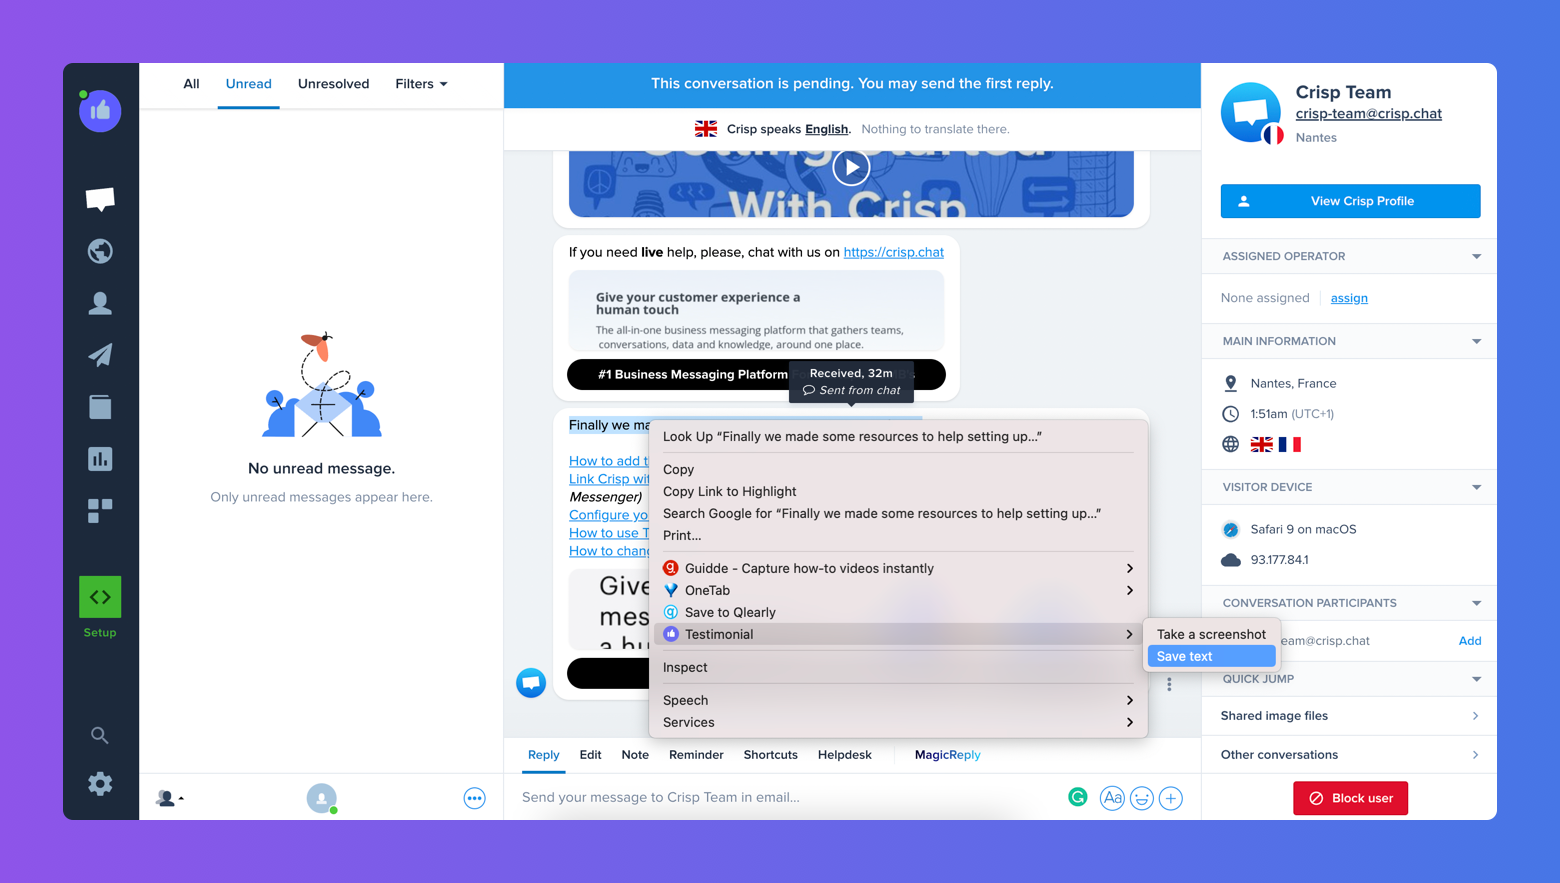
Step 2. Head to the Crisp conversation you want to add to your website or Wall of Love. Do a right-click followed by clicking on ‘Save text’.
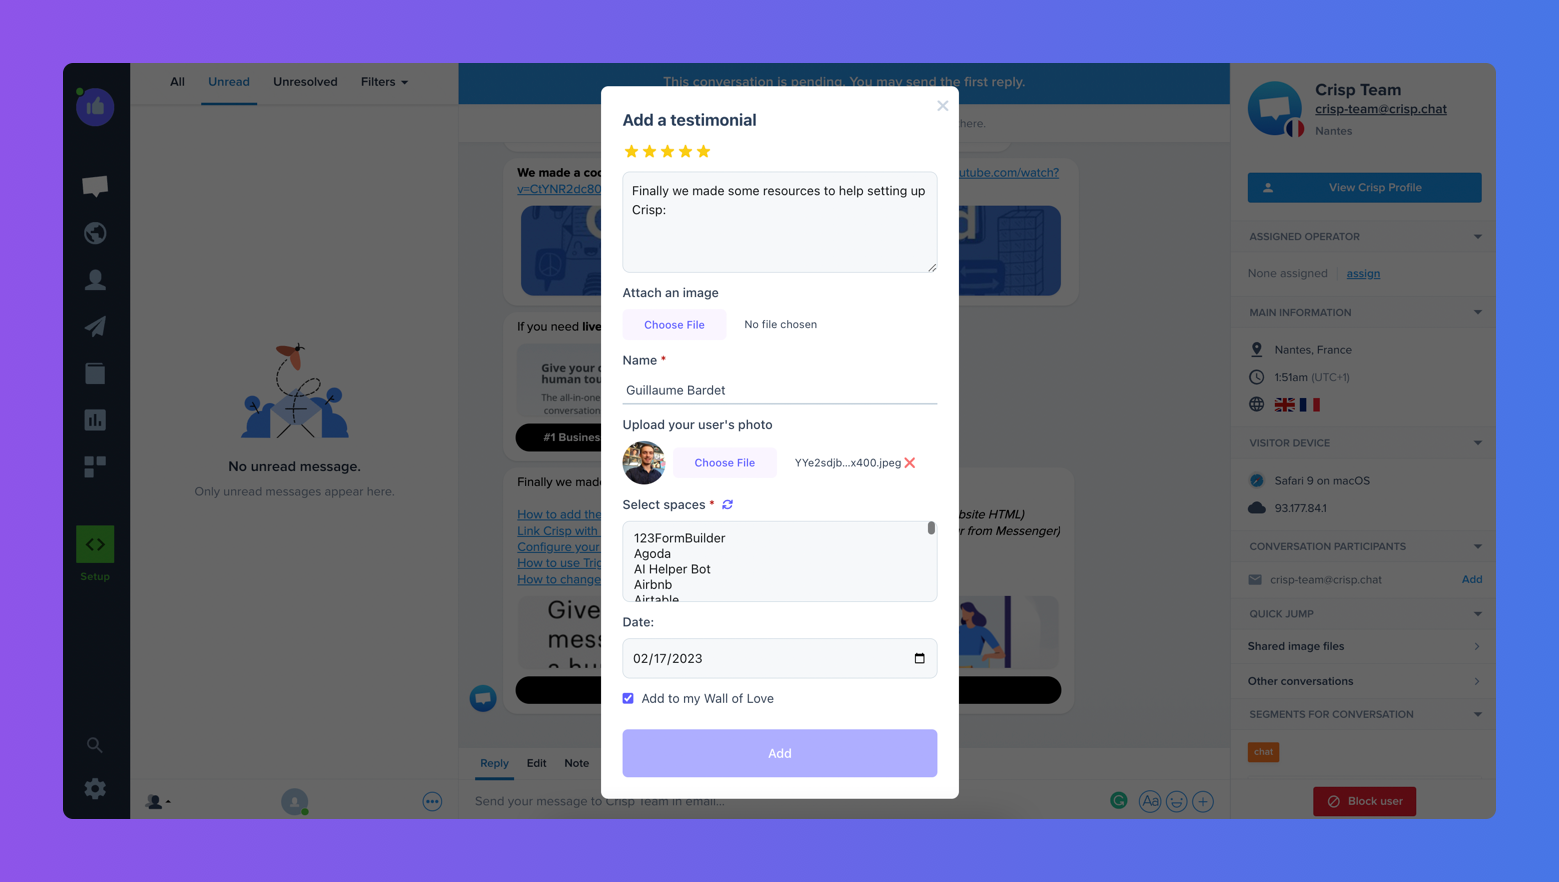
Step 3. Add all the information that you would like to add to your testimonial.
Tip: Under ‘Select Spaces’ make sure to click the space it should be added to. You can also automatically add it to your wall of love by clicking on ‘Add to my Wall of Love’.
Step 4. That’s it! All your live chat tickets will be added to your Testimonial account 💪
Option 3: Bulk Import Live chat conversations to Testimonial.to
Visit your space, click on ‘Options’ followed by ‘Bulk Import’, and follow the steps.

How to Embed Crisp chat tickets on any website
Now that your social proof has been imported to Testimonial, let’s cover how you can display your Crisp messages on your website. In the example below, we’ll be using Webflow.
Note: This will look different depending on your website builder, check out our integrations. We integrate with many website builders such as Webflow, Wix, WordPress, Squarespace, Shopify, and many more.
Step-by-Step Instructions
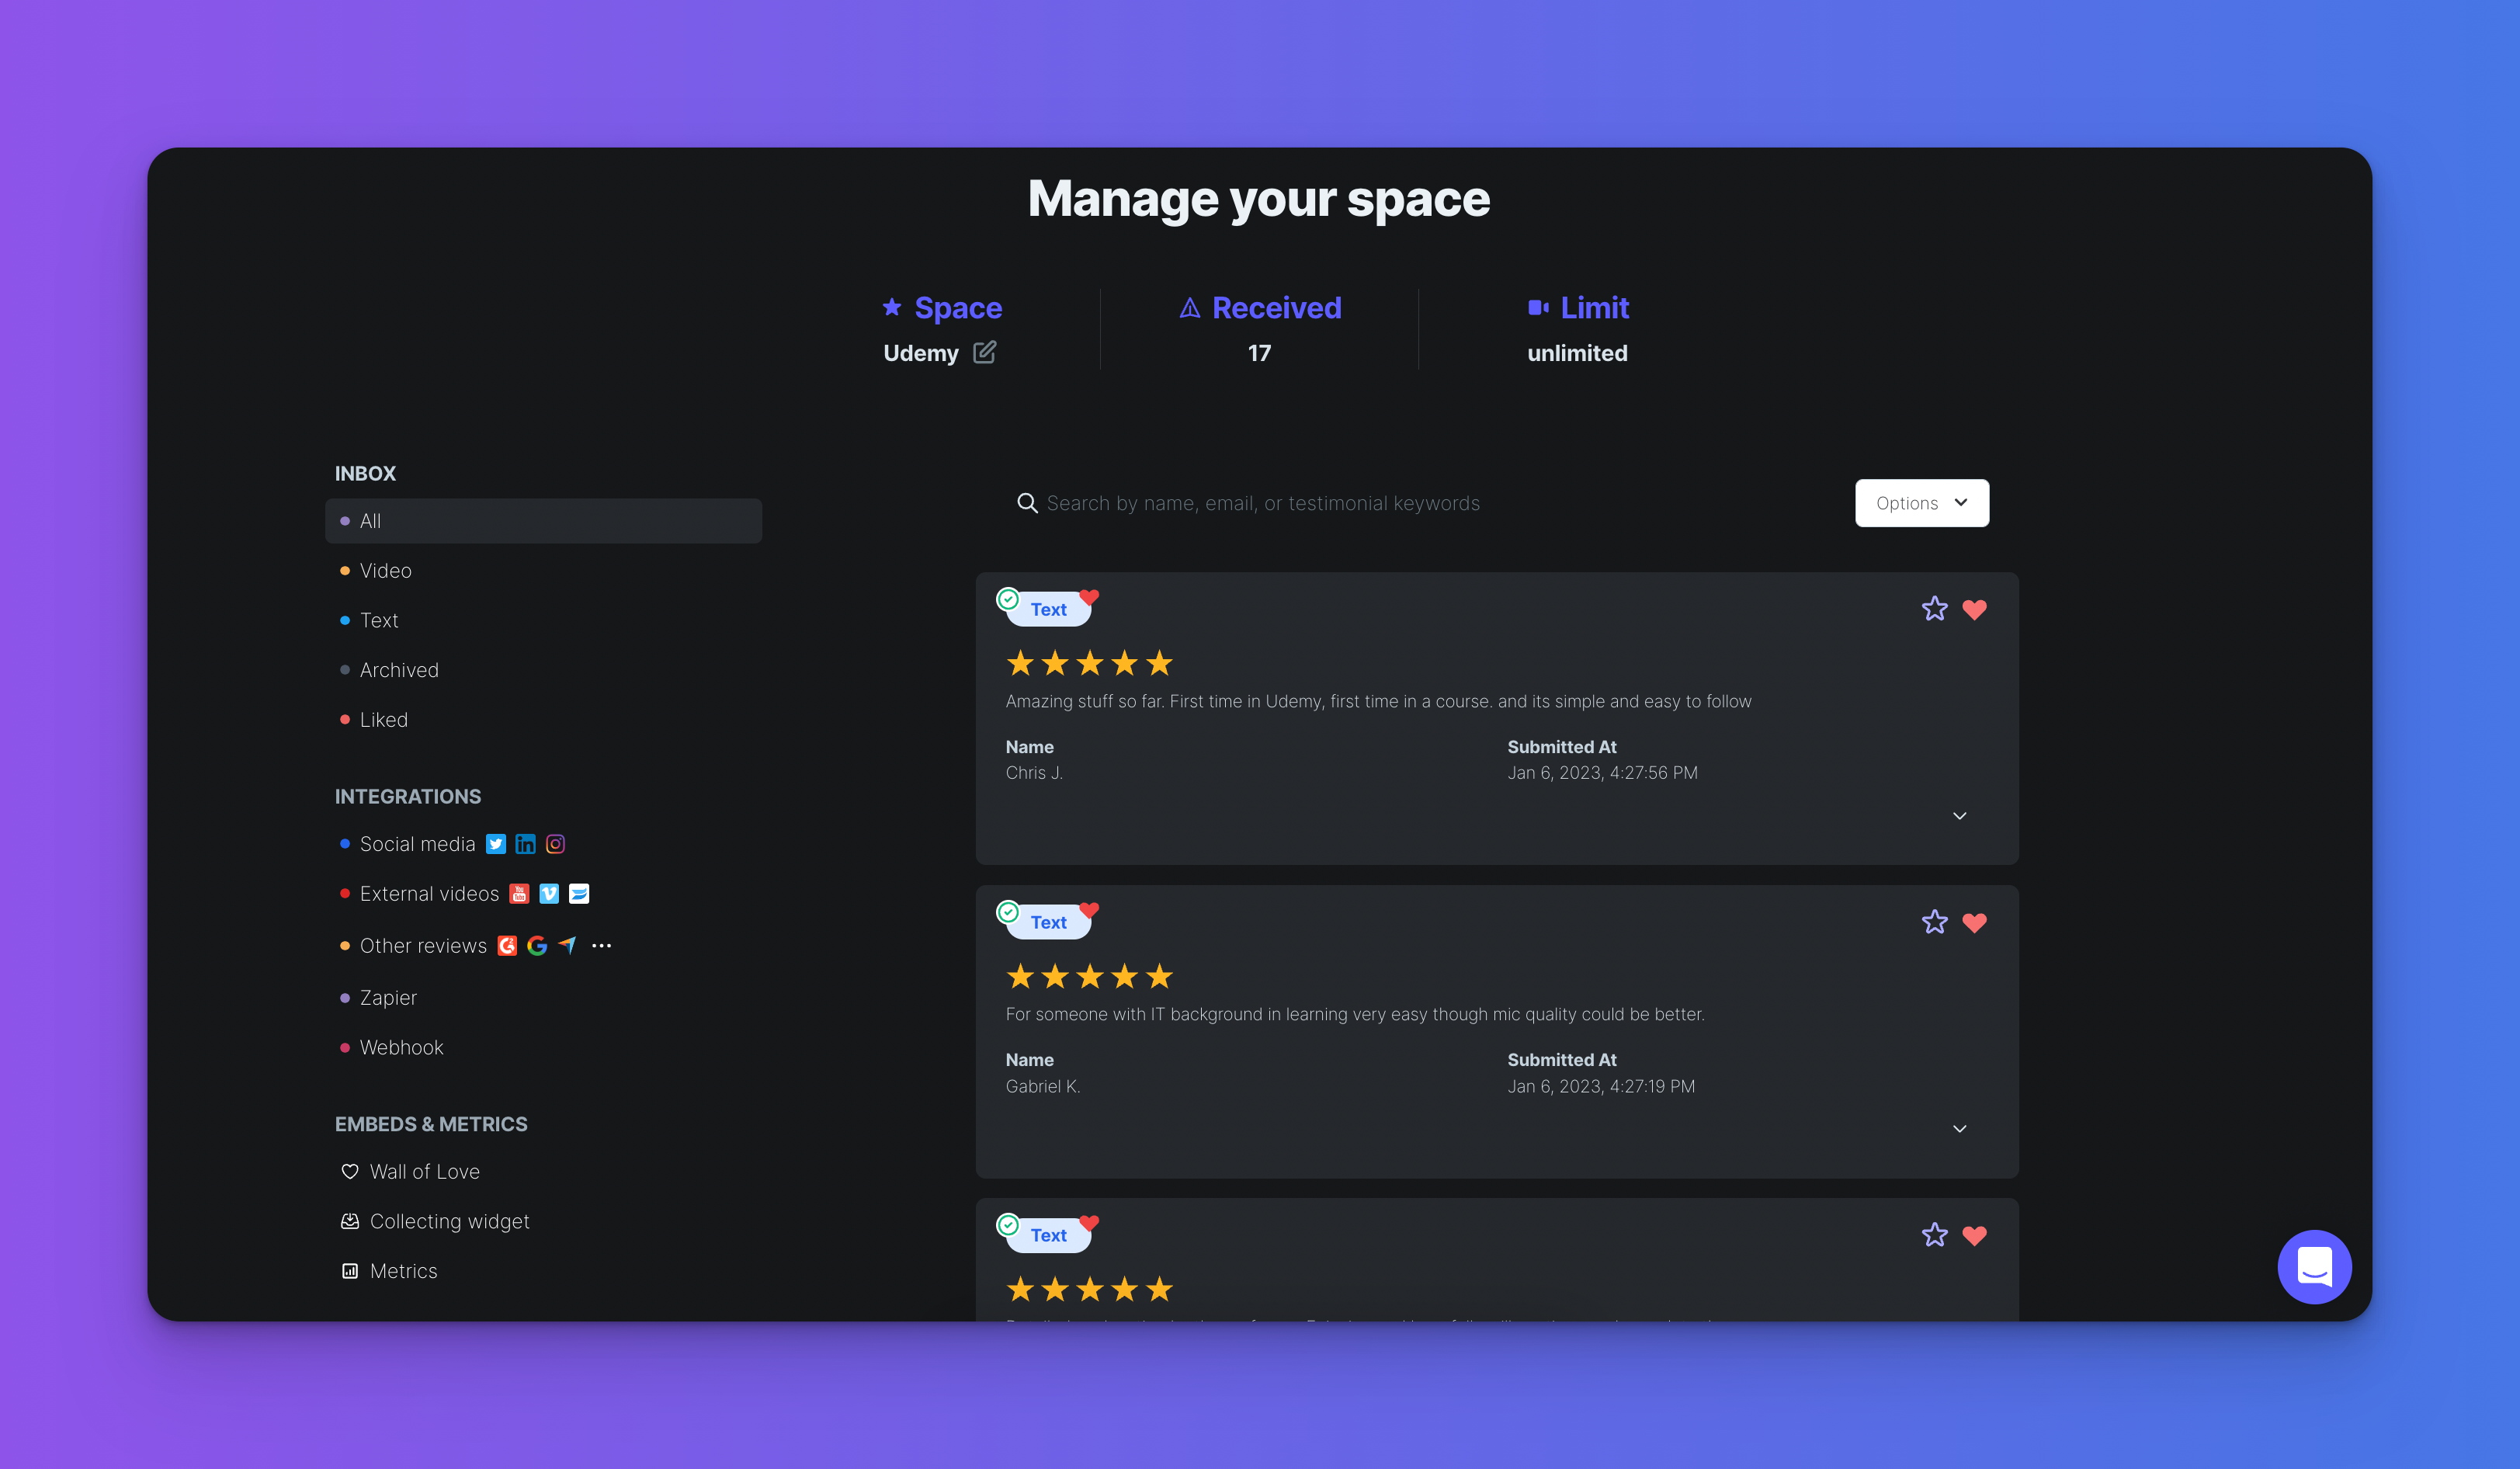
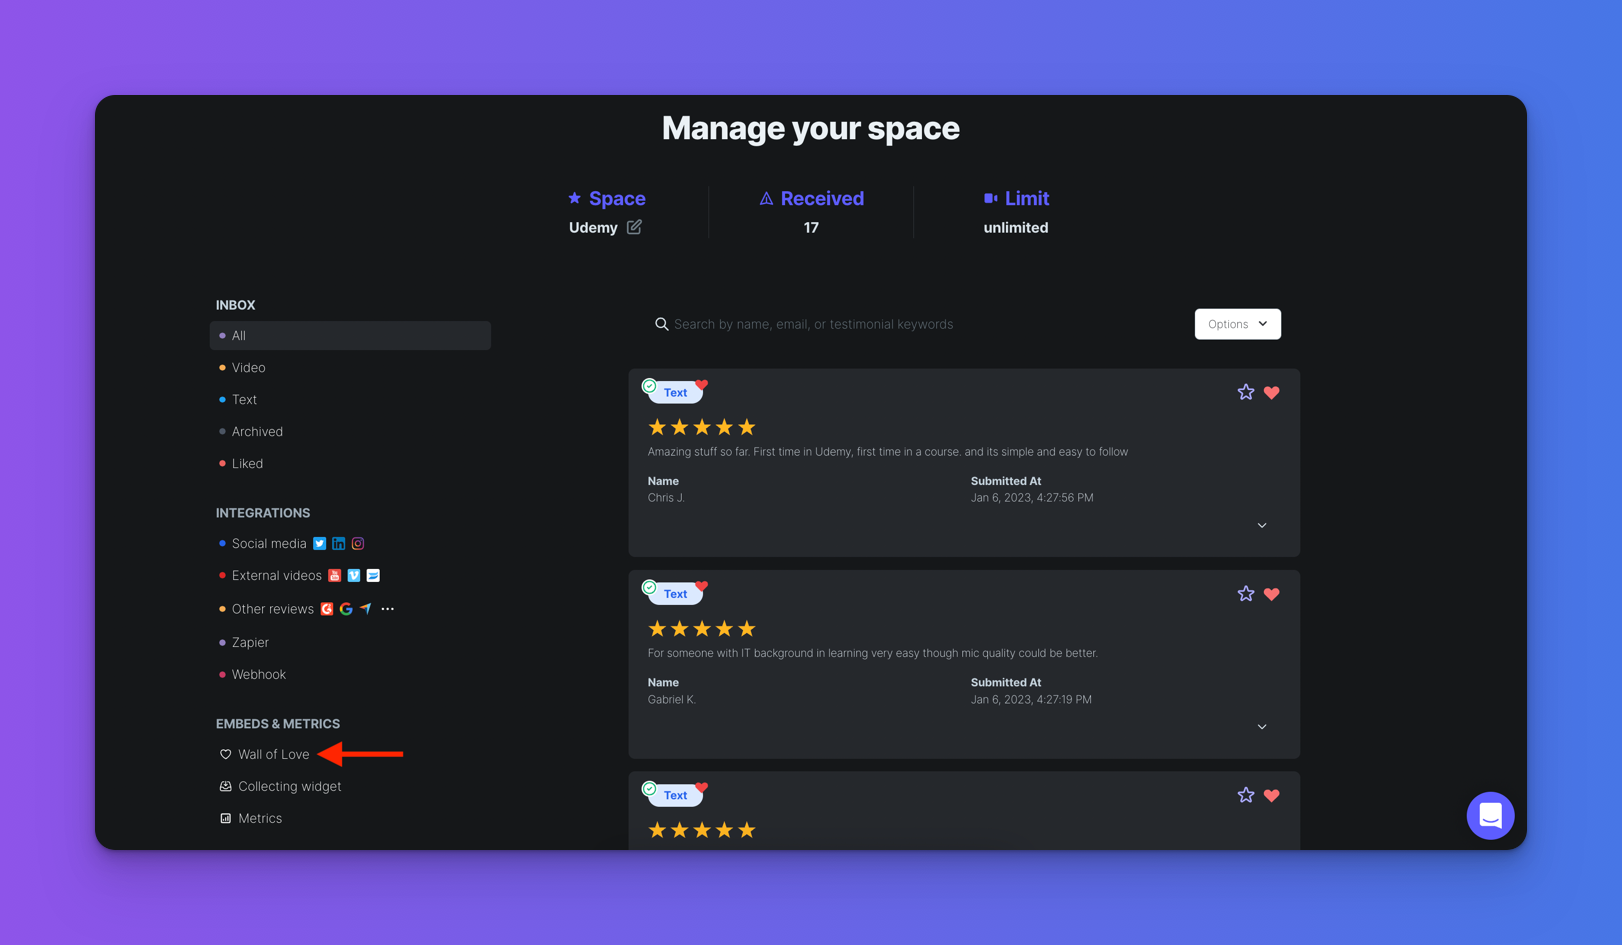
Step 1. Go to your account dashboard and visit the space you want to add to your website. After clicking the space, you will see the "Wall of Love" option on the left sidebar in the Embed section.
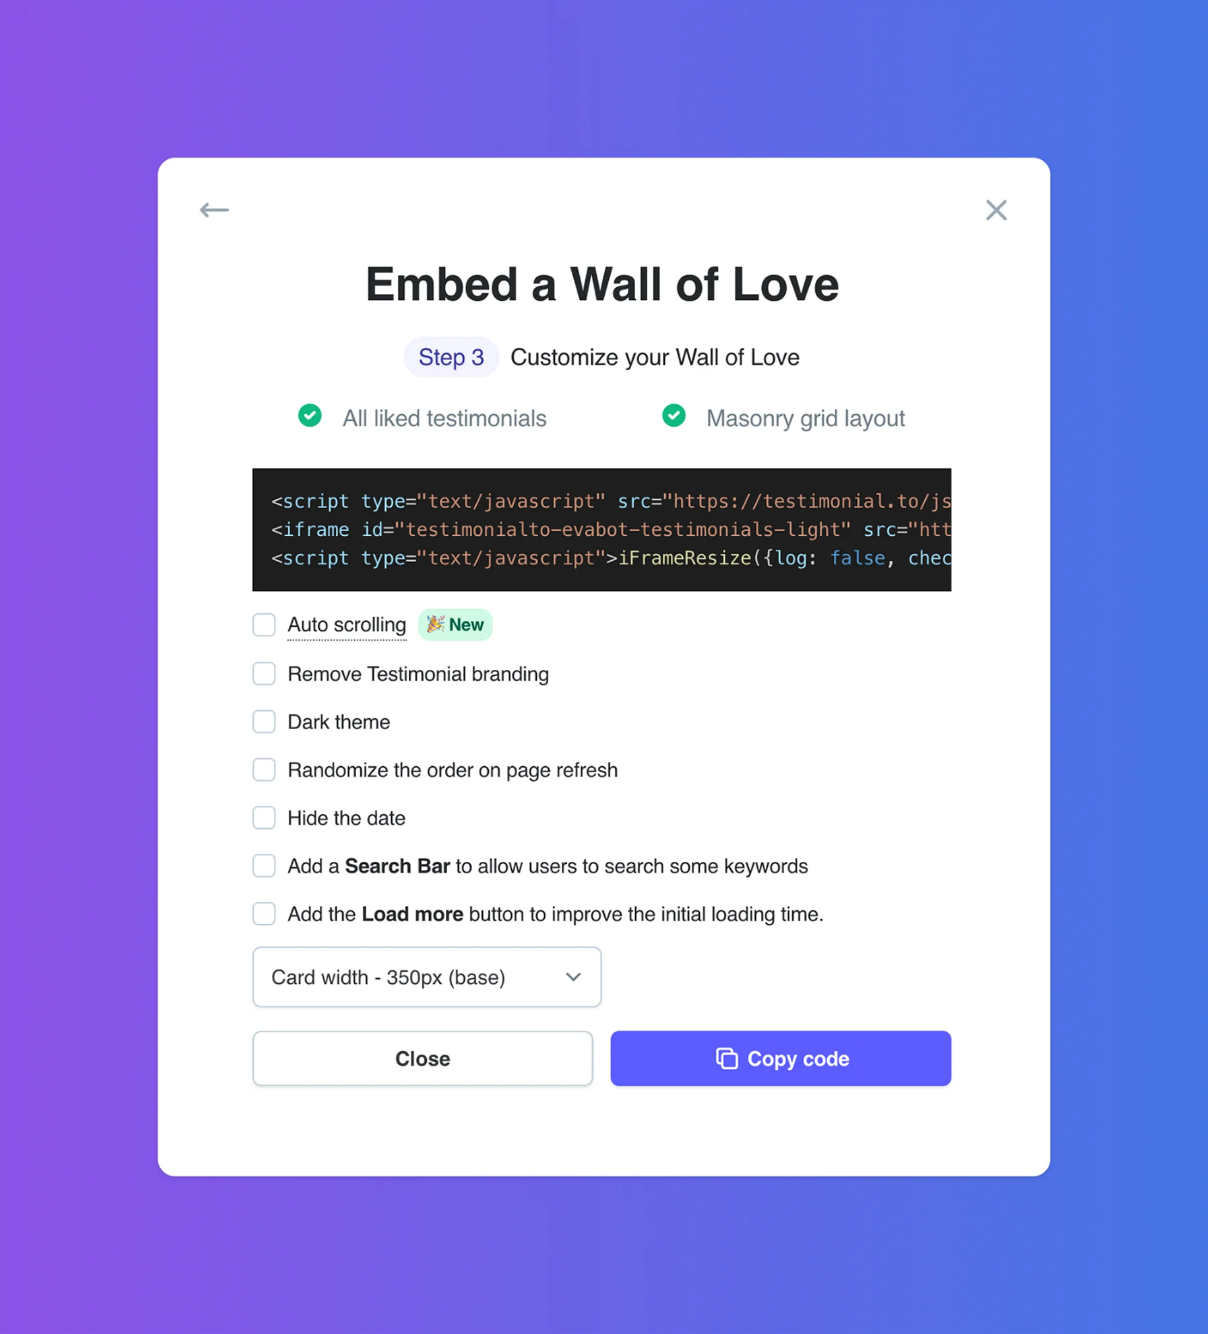
Step 2. Click that, then choose the styles you want to display the wall of love, in the last step, you will find the embed code. Click the "Copy code" button will copy the code to the clipboard automatically.
You can learn more about customizing your Wall of Love by visiting this article.
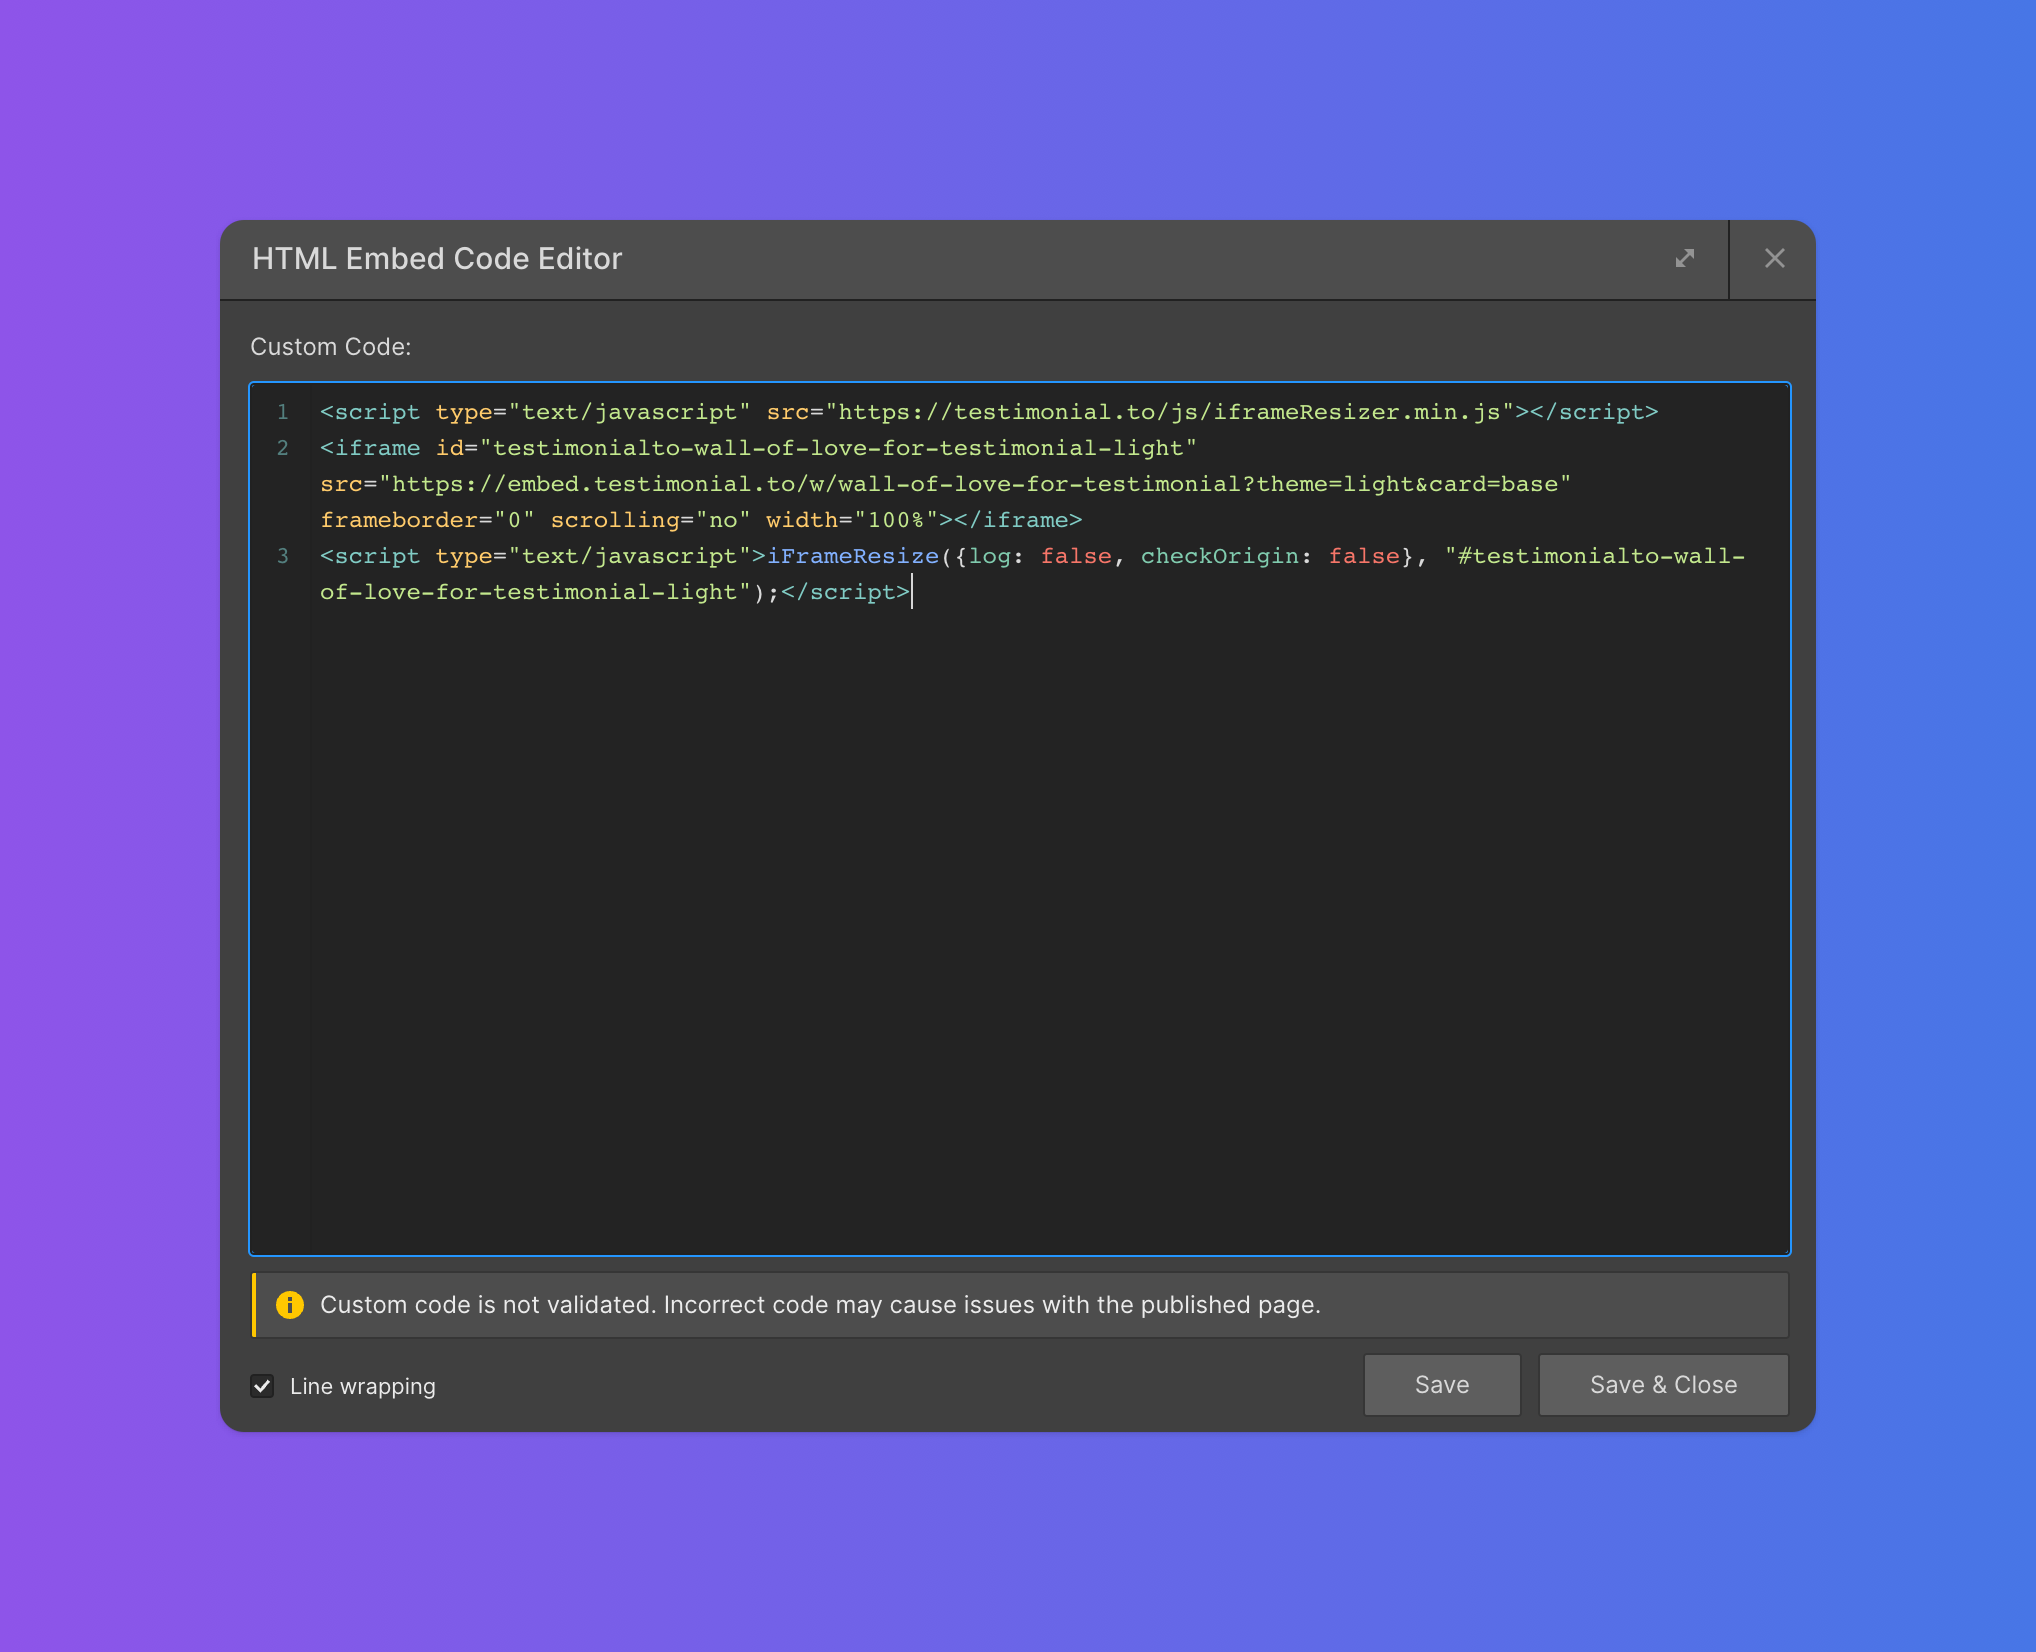
Step 3. Paste the code in the HTML editor from your website builder, then click the Save & Close button.
That’s it! Your Crisp chats and testimonials will now appear on your site ✌️

Tip #1: After importing your testimonials you can customize them and add additional information such as changing their avatar, adding a company name, company logo, and more!

Tip #2: Make your testimonial blend perfectly on your website. You have multiple embed options and design features.
.gif%3Ftable=block&id=e68df650-2251-4f38-85d9-52a8615338ed&spaceId=464a5342-9474-44f9-bfca-588e73348ba9&expirationTimestamp=1779537600000&signature=qfOAGSuymXhlot1aePb_oWFqcgqnKZWSeAJY5yDjLbA?table=block&id=e68df650-2251-4f38-85d9-52a8615338ed&cache=v2)
Tip #3: You can of course automate the process with Zapier. Here’s an example; when closing a Crisp ticket it sends a testimonial request.

That’s all for now!
You’re now ready to turn your live chat tickets into beautiful testimonials. ✌️
